Why is it important to learn how to sign a document electronically?
It eliminates the need for printing, scanning, and mailing physical documents, saving time and resources. Electronic signatures also provide a reliable and tamper-proof authentication method, ensuring the document's integrity.
Additionally, a work email account receives an average of 21 emails on weekends—Saturdays, and Sundays.
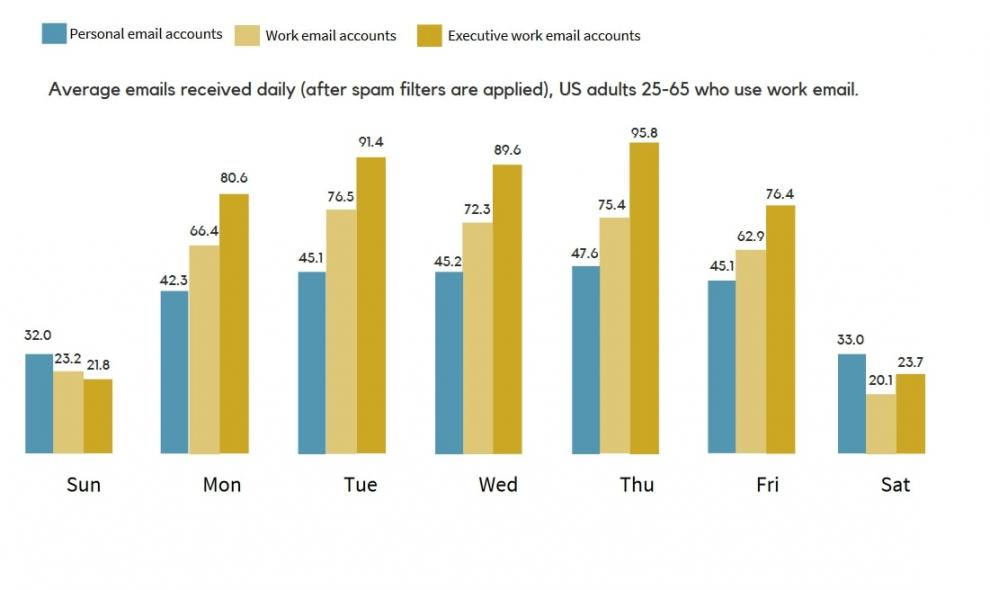
Image via Gated
Most of us are hardly in a position or willing to attend to paperwork on the weekend.
But think about this:
What if the email contains a vital contract that could mean closing a big deal? This is enough reason to learn how to electronically sign a document.
Besides, e-signing documents avoids the inconvenience of spending hours printing long contracts for signing. That’s why it’s essential to learn how to electronically sign a document.
We’ll teach you how to electronically sign a document on your phone and using your laptop. And as a bonus, we’ll show you how to choose the best e-signature software for the task.
But let’s start by straightening out the differences between the two terminologies that are often misused—e-signature and digital signature.
Table of Contents
Is an Electronic Signature the Same as a Digital Signature?
Before we get into the nitty-gritty of our topic, let’s differentiate between electronic and digital signatures.
The two terms are different—although most people use them interchangeably.
An electronic signature is a simple computer-added signature placed on a document. It shows the signer’s intent to enter a particular agreement or contract.
A digital signature is also a computer-added signature, but it’s secured using cryptography. Digital signatures create a virtual fingerprint that identifies users and protects information in digital documents.
Though more secure, a digital signature is also more complicated to develop than an to create an electronic signature.
Certification authorities regulate digital signatures and are ideal when you’re concerned about the security of your online documents.
Digital signatures and electronic signatures are both legally binding.
For this post, our focus will be on the more straightforward but also necessary electronic signatures.
DocuSign is one of the most popular tools for electronically signing a document. But in this article, we’ll mention some of the best DocuSign alternatives as well.
How to Electronically Sign a Document on Your Android Phone
To show you how to electronically sign a document on your Android phone, we’ll use Signaturely.
It has a pretty straightforward user interface, which makes it hassle-free to use on a small screen.
You can sign documents remotely by typing your name and drawing your signature. And if you have an image of your signature on your phone, you can upload it to Signaturely.
Here are the steps you need to follow:
1. Start by signing up for an account. A free account lets you create 3 signature requests per month. You can also sign up for a premium account for unlimited signature requests.
2. Log in to your account. On the left panel, select ‘Sign.’ Choose the ‘Only Me’ option to electronically sign a document.
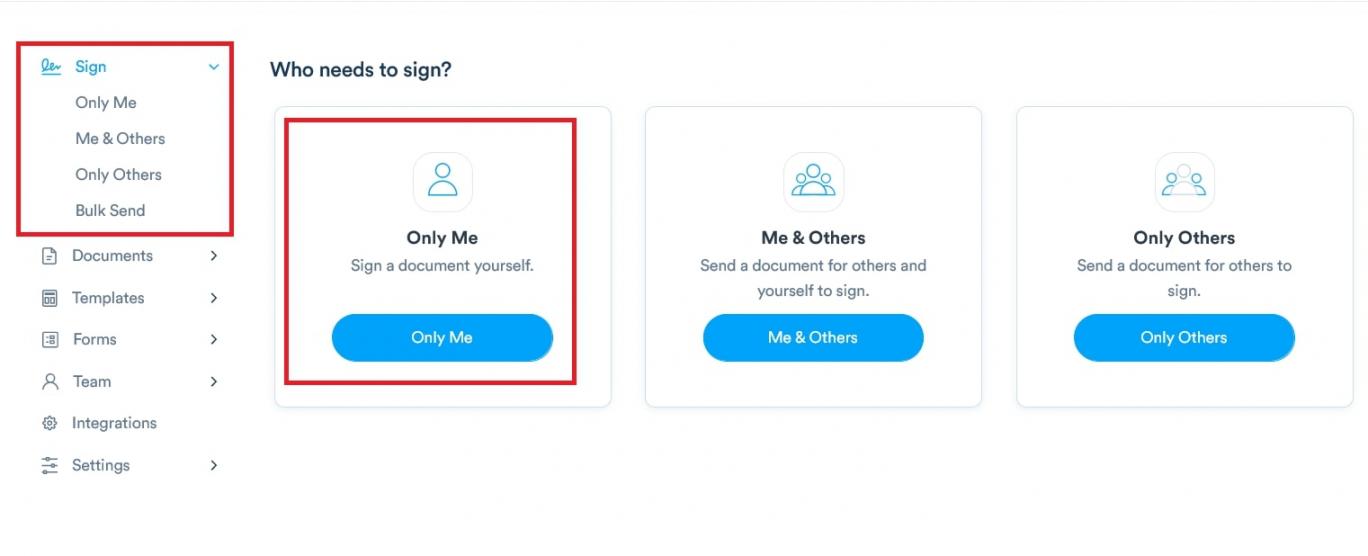
Image via Signaturely
If other people are also signing, you can select the ‘Me & Others’ option.
3. You’ll get the option to upload your document. You can also import it from:
- Google Drive
- One Drive
- Box
- Dropbox
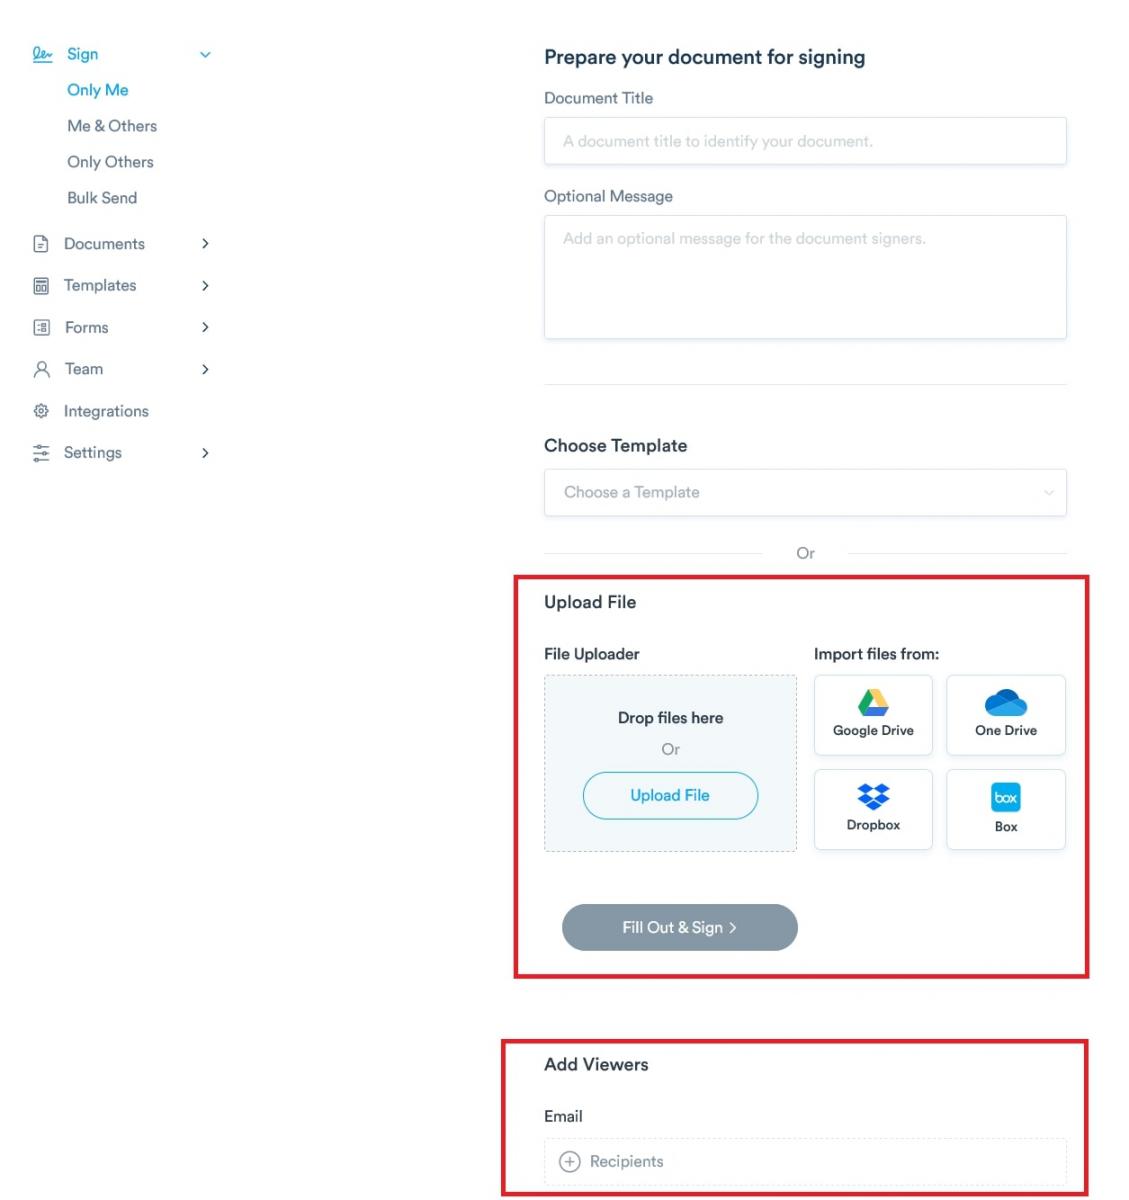
Image via Signaturely
You could also add the email addresses of the people you want to see the document. Once you successfully upload your document, click on ‘Fill Out & Sign’
4. Signaturely will open the document you want to sign electronically.
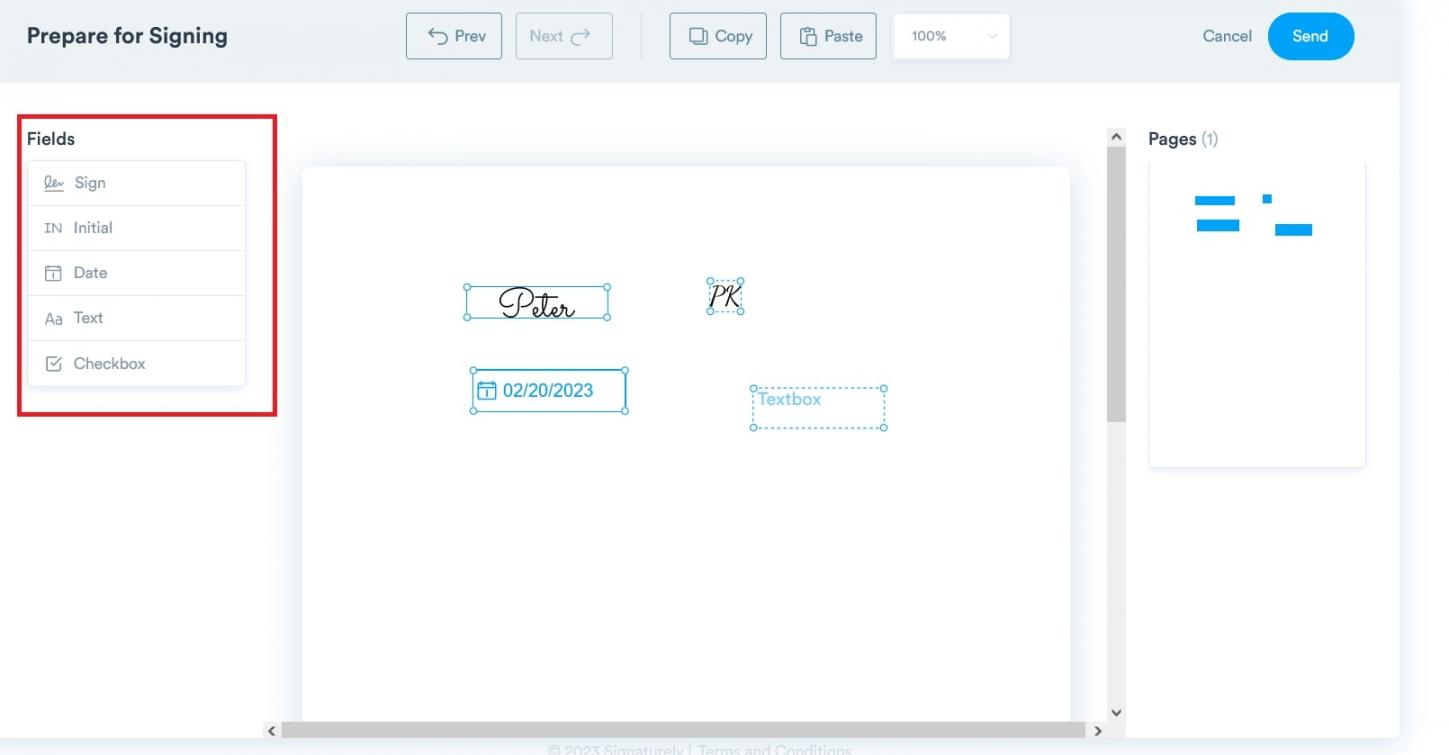
Image via Signaturely
You can electronically sign the document by typing, drawing, or uploading a picture of your signature. To add, you can sign with your full name and initials in a font of your choice.
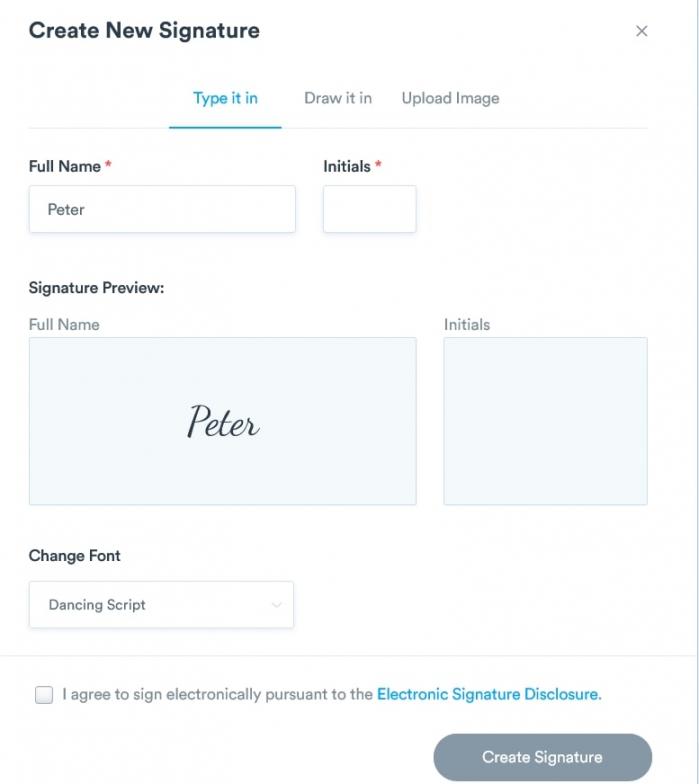
Image via Signaturely
You can also add the date, text to the document, or a checkbox. You can drag and drop the elements around the document to position them as you wish.
5. Click on ‘Send’ to process your document and send it to everyone who needs to sign. A dialogue box will appear where you can download or print the document you’ve signed electronically.
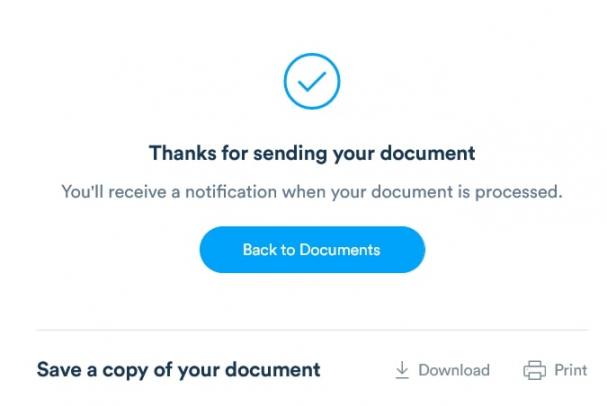
Image via Signaturely
How to Electronically Sign a Document on Windows
If you want to know how to electronically sign a document on a desktop or laptop with Windows, Signeasy is one of the best alternatives to DocuSign that you can use.
Signeasy provides an easy tutorial on electronically signing a document in PDF, Excel, PNG, HTML, Word, JPG, and many other file formats. You can sign a document in over 24 languages.
Here’s how to electronically sign a document in Windows using Signeasy.
1. Create an account. There’s a 7-day free trial where you can test the capabilities of Signeasy before paying for a premium version.
2. Next, in the left panel of the dashboard, select ‘Send for Signature’.
If you only need to electronically sign the document, select the second option, ‘Sign Document.’ If others also need to sign, choose the first option, ‘Send for Signature.’
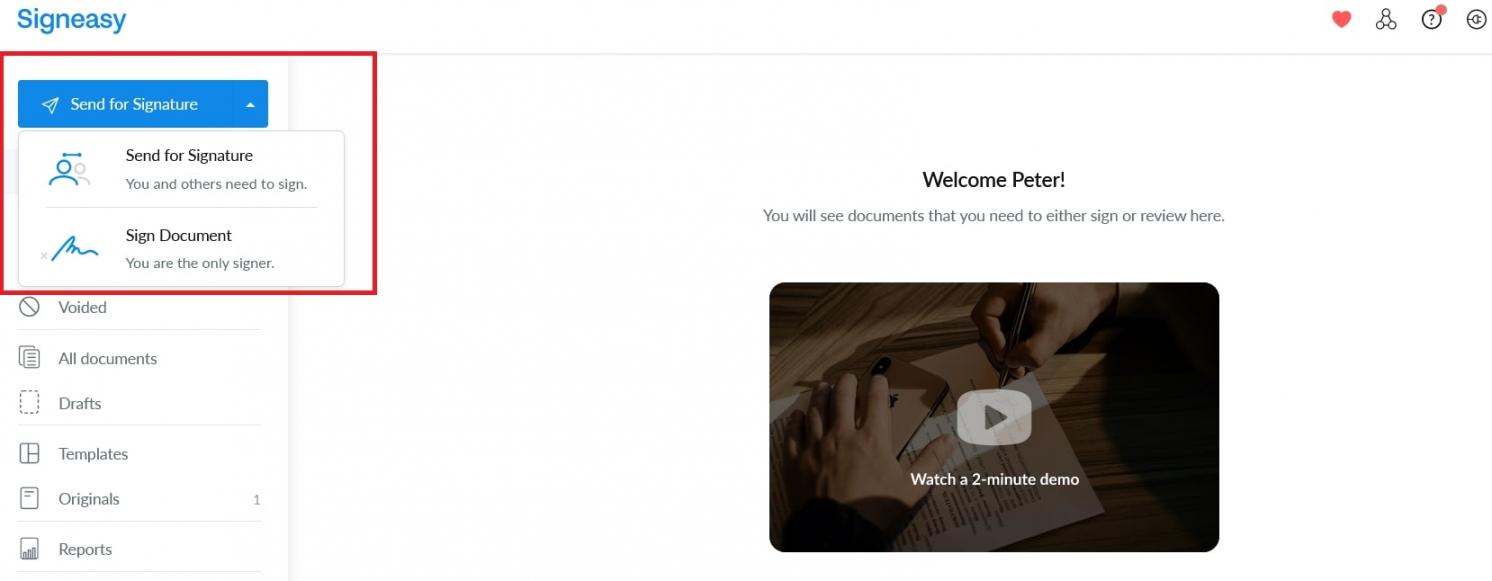
Image via Signeasy
3. You’ll get the option to upload your document. Once you upload it, the document will open in a new window where you can sign it electronically.
From the left panel, select an annotation to know how to electronically sign your document using either a signature or your initials. You can also add the date, text, a checkmark, or an image.
Once you choose an annotation, click inside the document to select where you want to place it in the document.
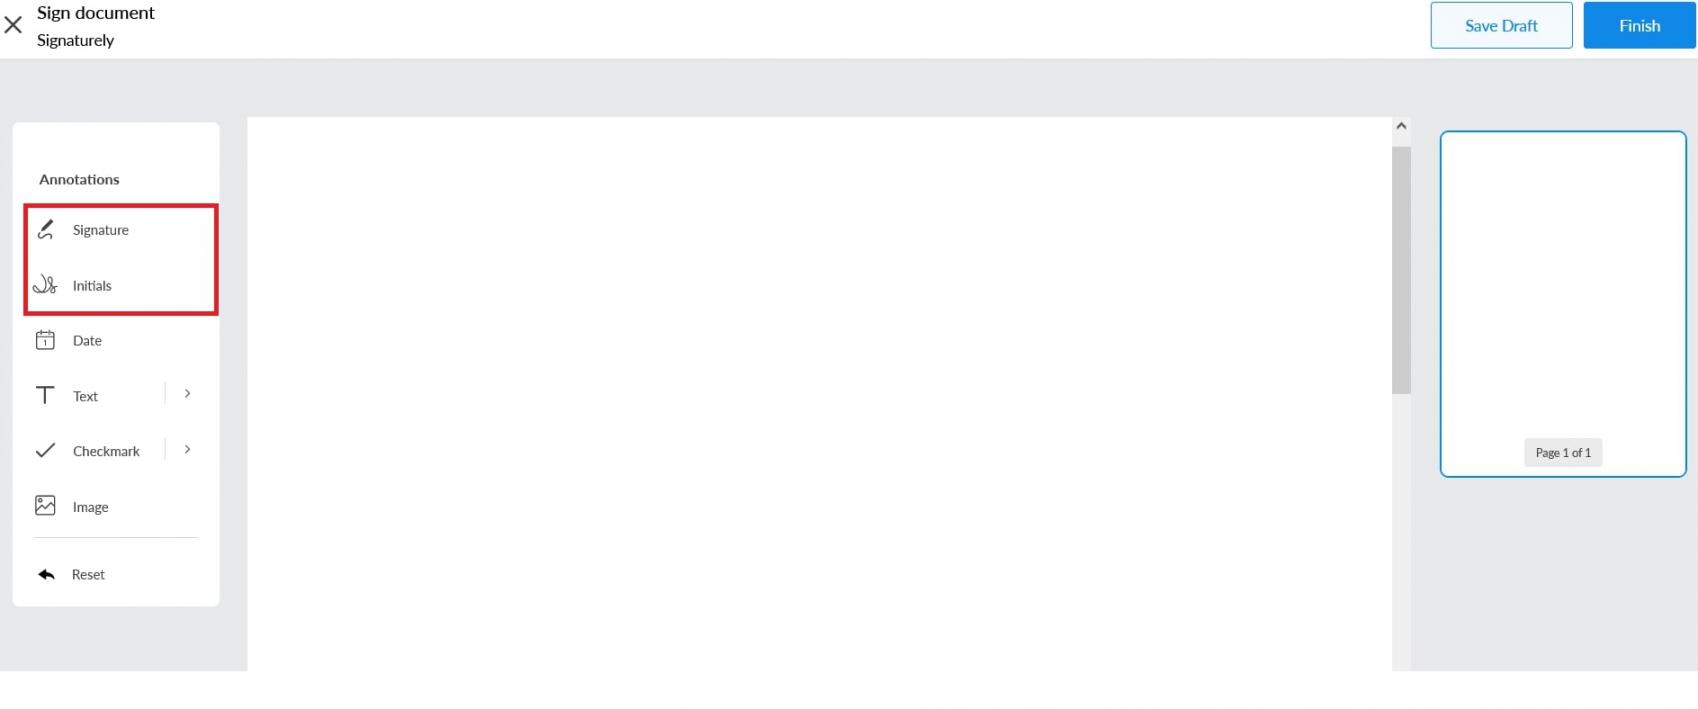
Image via Signeasy
4. Sign the document by either drawing or typing it. You can also upload an image of your signature from your device in PNG format or use one of your saved signatures.
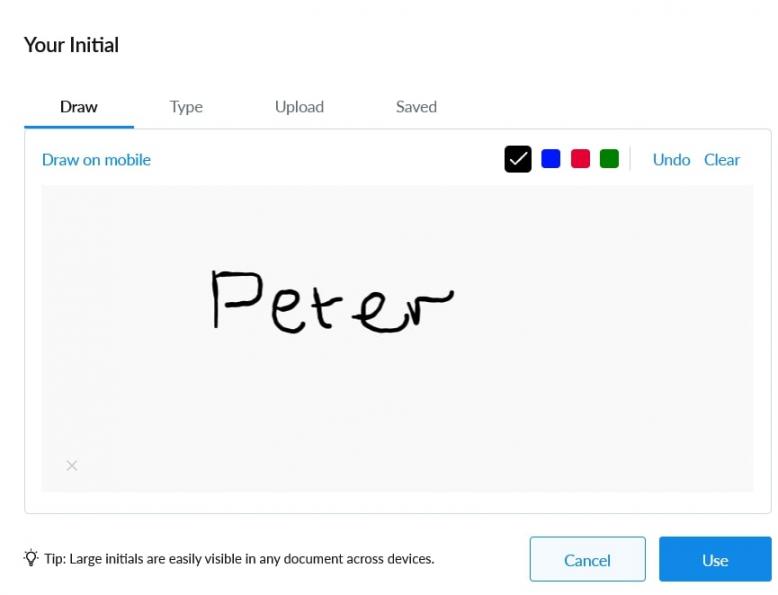
Image via Signeasy
Click on any of the elements to edit or drag and drop them to reposition them on the document.
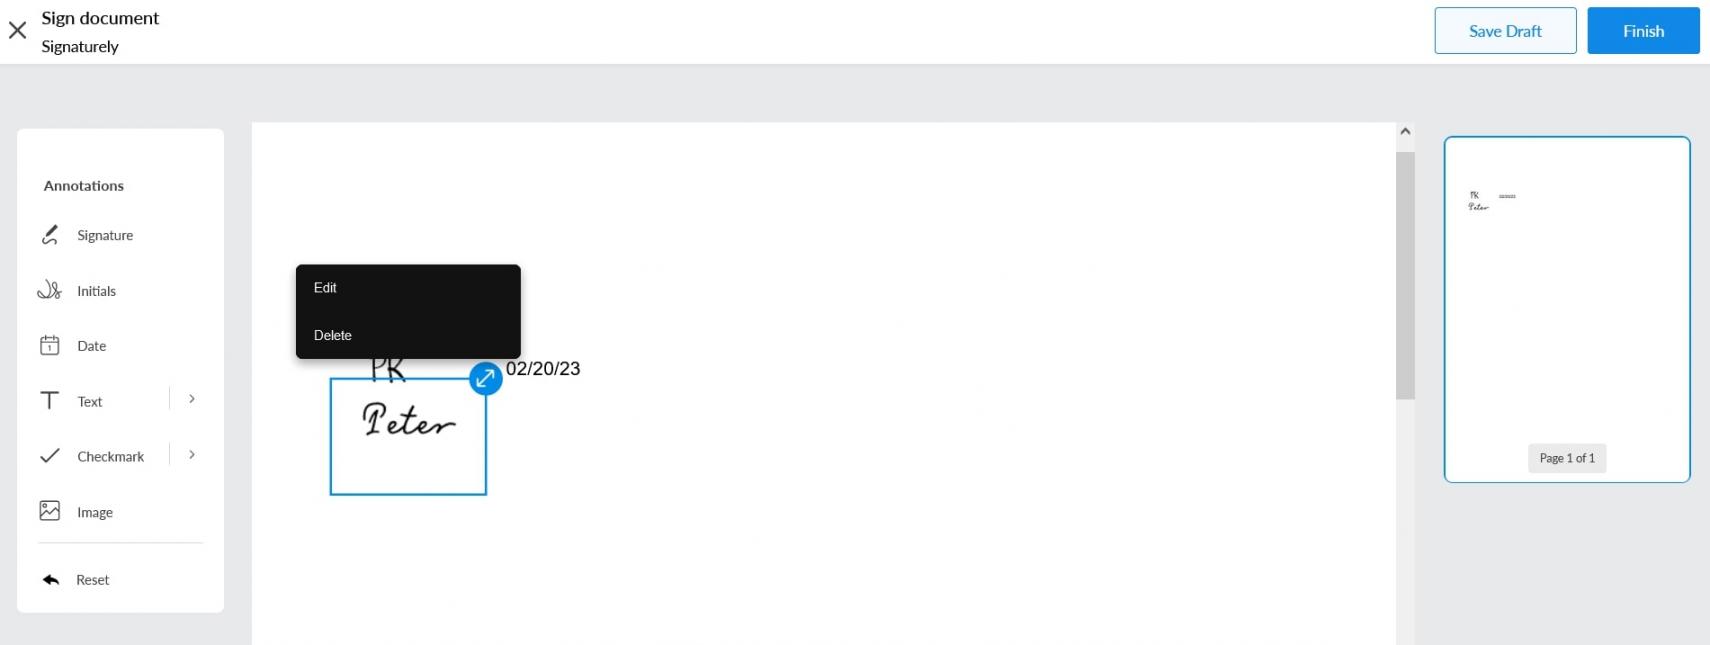
Image via Signeasy
5. Click on ‘Finish’ to process your document. You can then download, print, or share it via email.
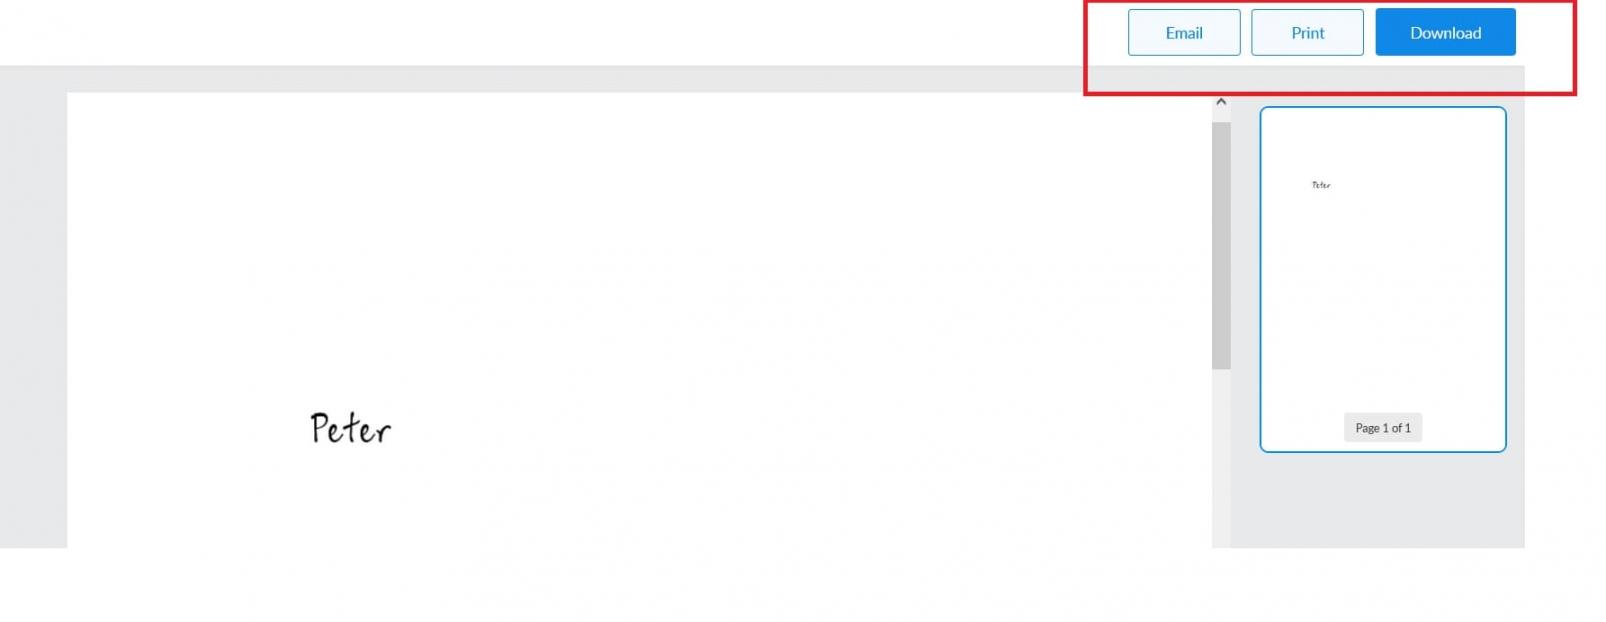
Image via Signeasy
How to Electronically Sign a Document on Mac
Another great e-sign tool that you can use is Xodo Sign (formerly eversign). It’s ideal for MacOS users and is highly secure and easy to use.
Start by signing up for Xodo Sign. Log in to your account and start the process to electronically sign a document.
1. In the left panel, select ‘Documents’. Then choose ‘New Document.’
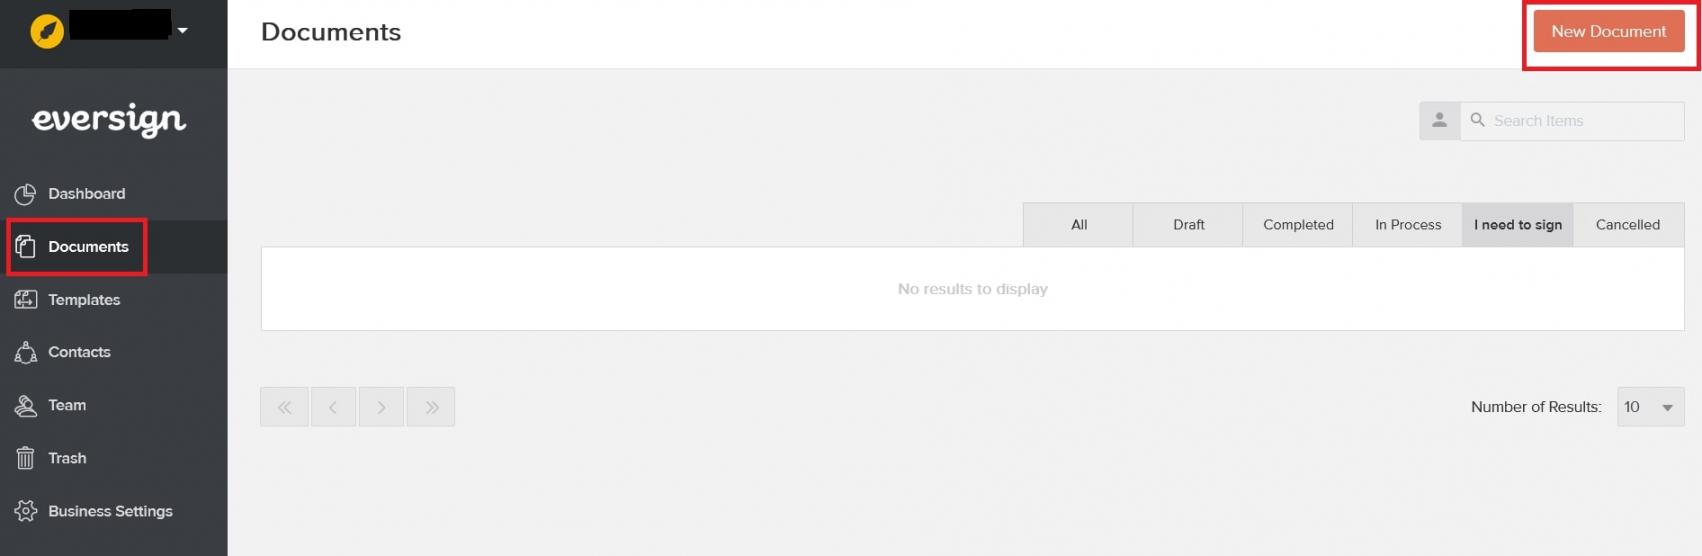
Image via eversign (now Xodo Sign)
2. Choose whether only you’ll sign the document or others will sign it as well.
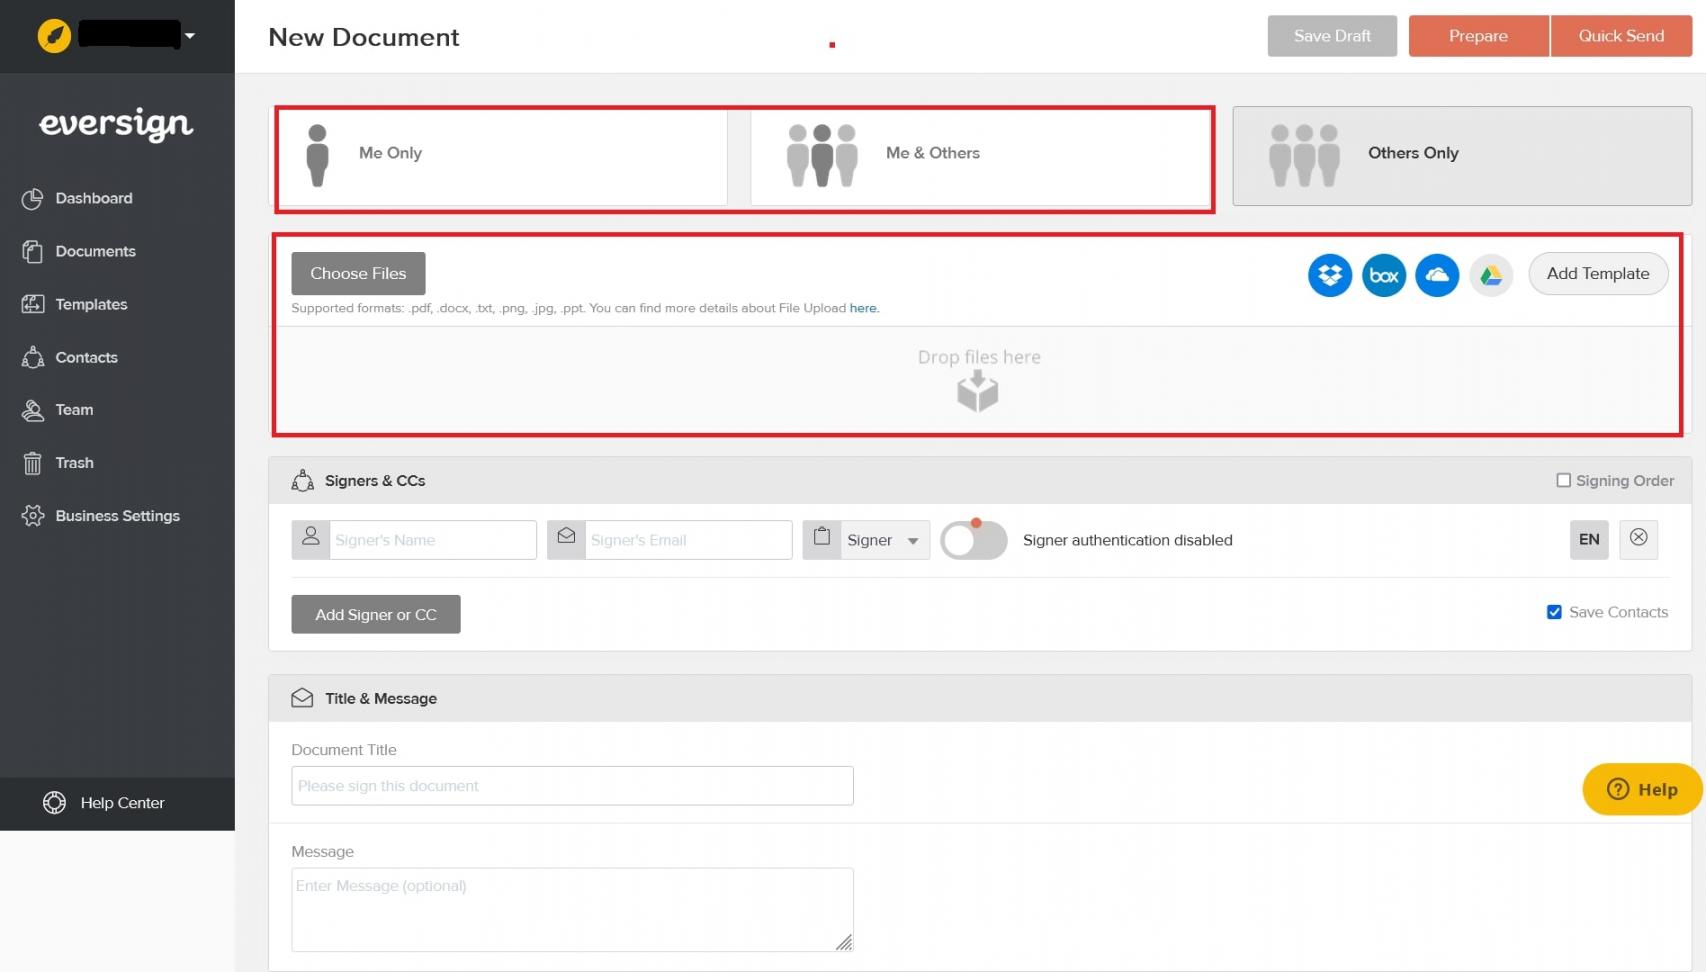
Image via eversign (now Xodo Sign)
In the ‘Choose Files’ section, upload the document you want to sign electronically.
You can upload Word or PDF documents. You can also upload files in .txt, PNG, JPG, or PPT formats. It can also be uploaded directly from Dropbox, OneDrive, Box, or Google Drive.
3. Once it successfully uploads, click on ‘Prepare.’
On the right panel are several fields you can add to your document. Drag and drop the ‘Signature’ and ‘Initials’ fields to your document.
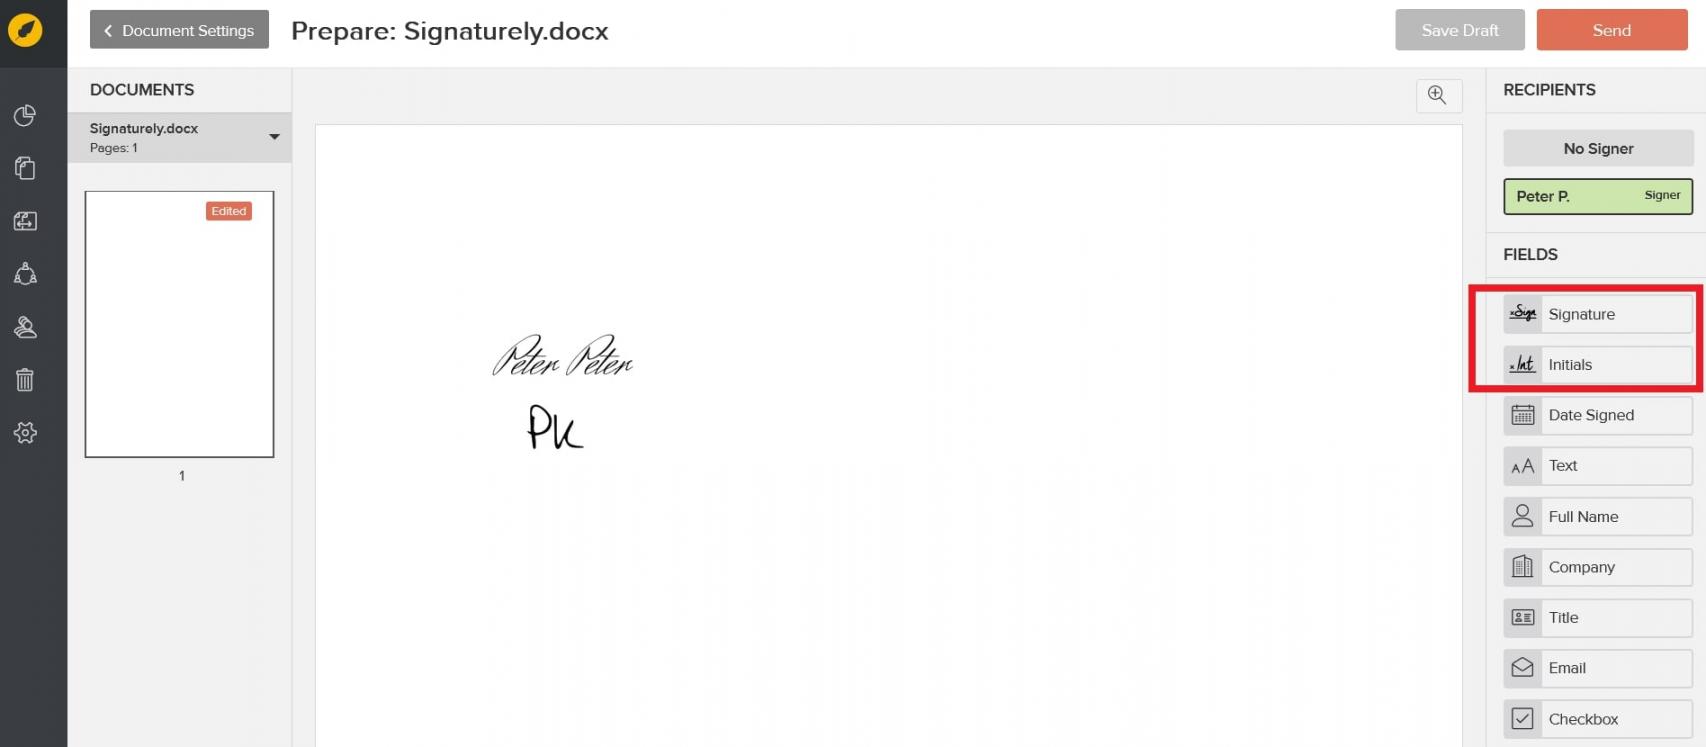
Image via eversign (now Xodo Sign)
You’ll get the option to type, draw, or upload an image of your signature.
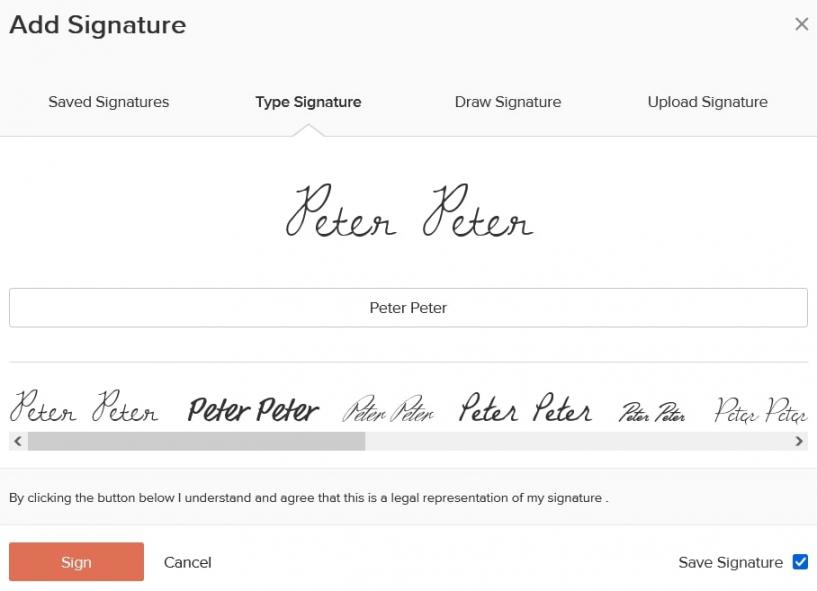
Image via eversign (now Xodo Sign)
You can add the other fields as needed.
Click on ‘Save Signature’ to make it available for when you need to electronically sign a document again in the future.
Click on ‘Send’ to send the signed document to your email. Or if you selected the ‘Me & Others’ option, the rest of the signers will receive the document for signing.
You can also download the signed document directly from Xodo Sign as a PDF file.
How to Electronically Sign a Document on ChromeOS
The e-sign tool signNow is an excellent option for Chromebook users who want to electronically sign a document.
Use these steps to electronically sign a document using signNow.
1. Open your Chromebook's signNow electronic signature tool and create an account.
2. Upload your document by clicking on the ‘Upload My First Document’ button.
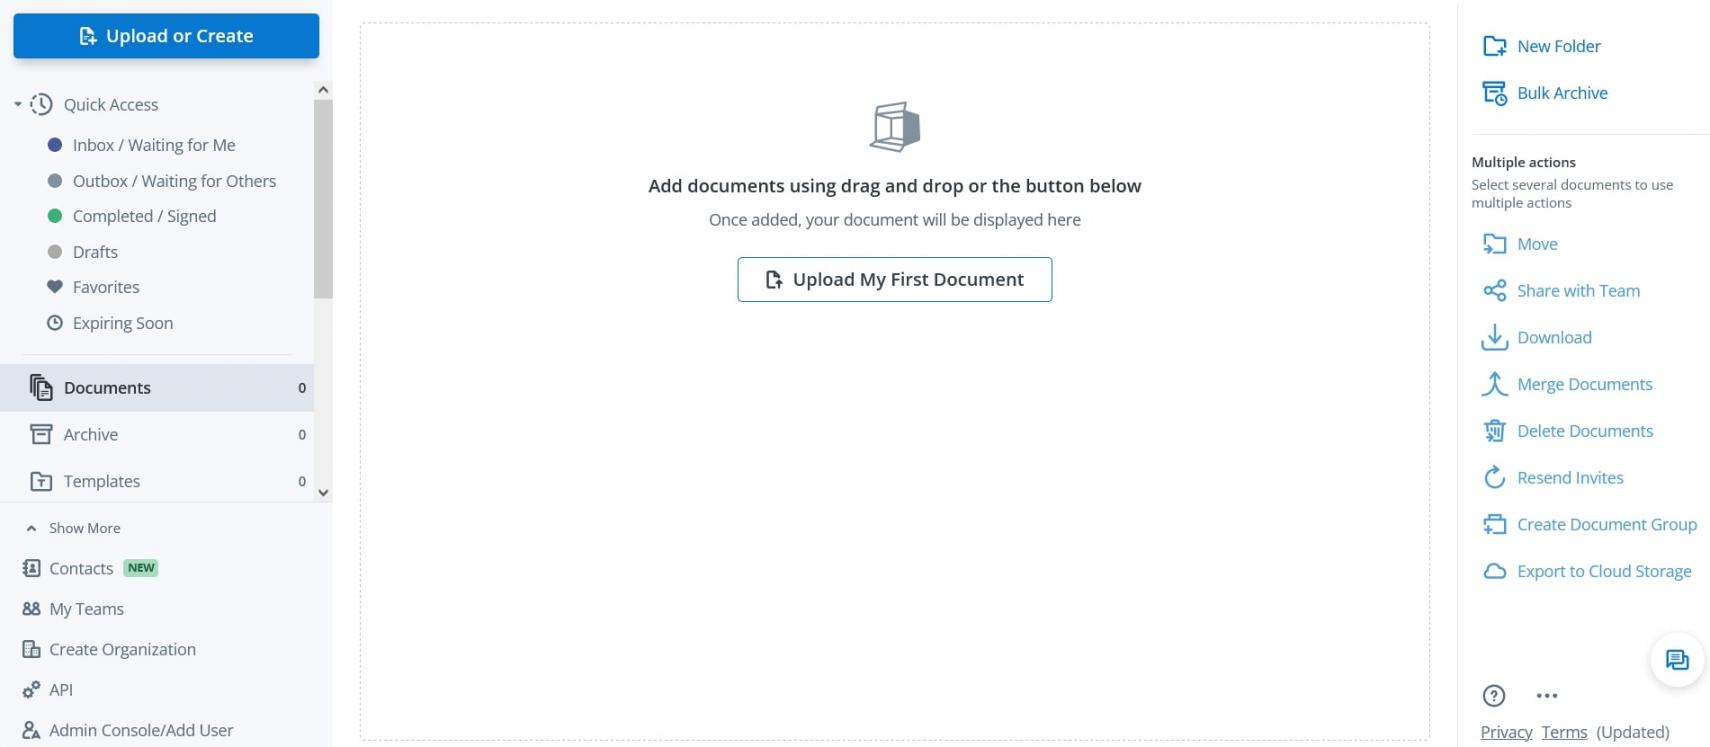
Image via signNow
3. Once the document you want to sign electronically uploads, select the ‘Me’ option on the left panel. It lets you sign your document. Select ‘ Recipient ‘ if you want another person to sign the document.’
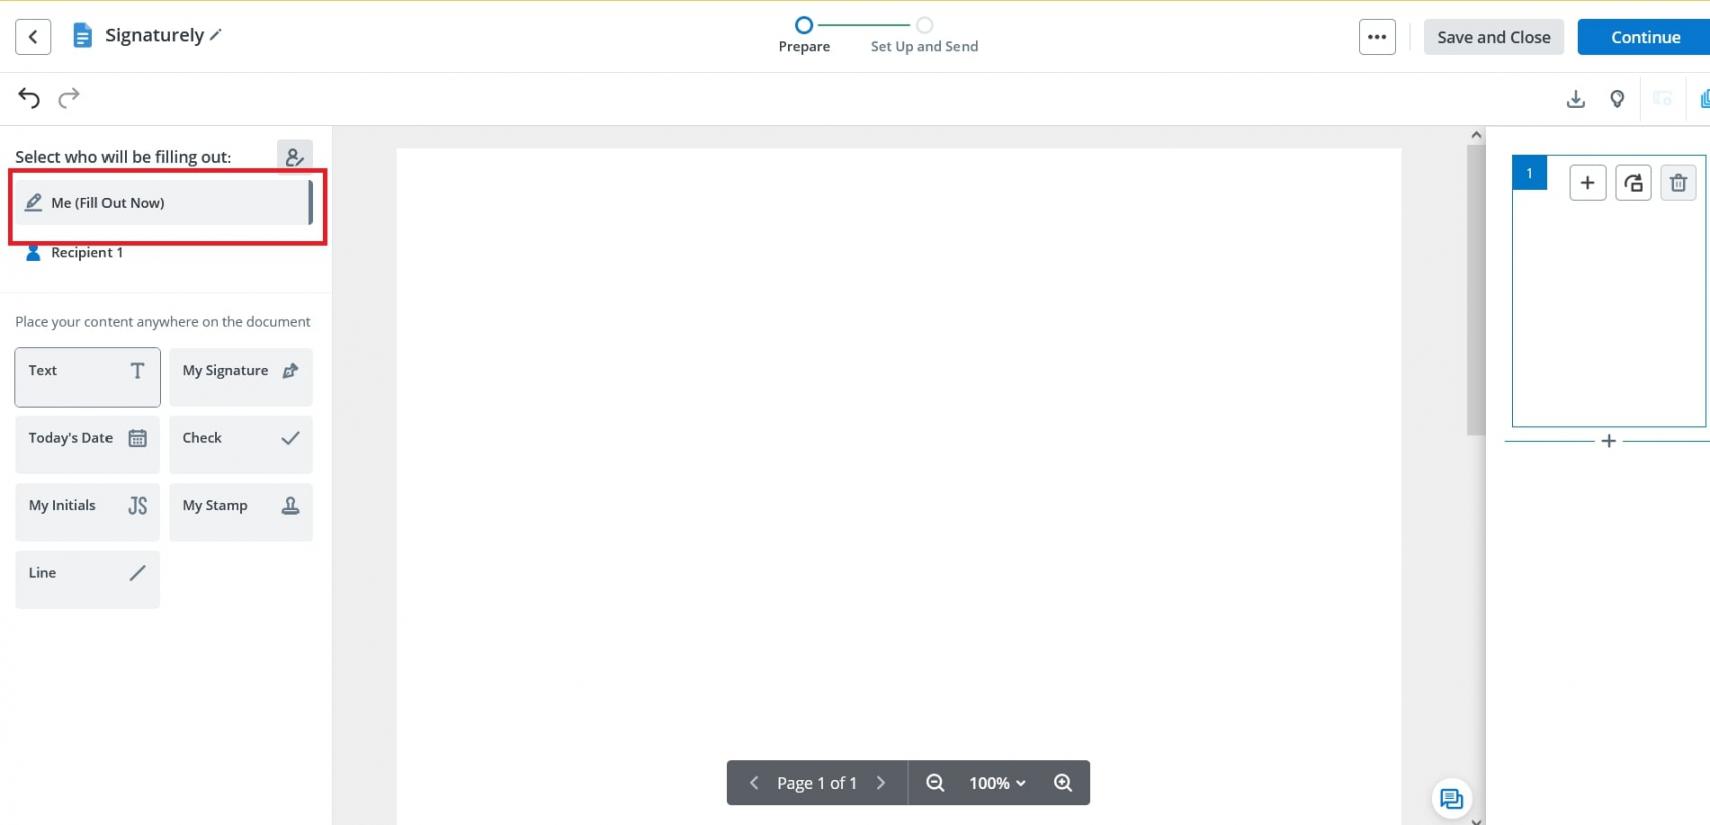
Image via signNow
4. Select ‘My Signature’ to electronically sign your document. You can either type or draw it. Or, if it’s in the form of an image on your Chromebook, upload it.
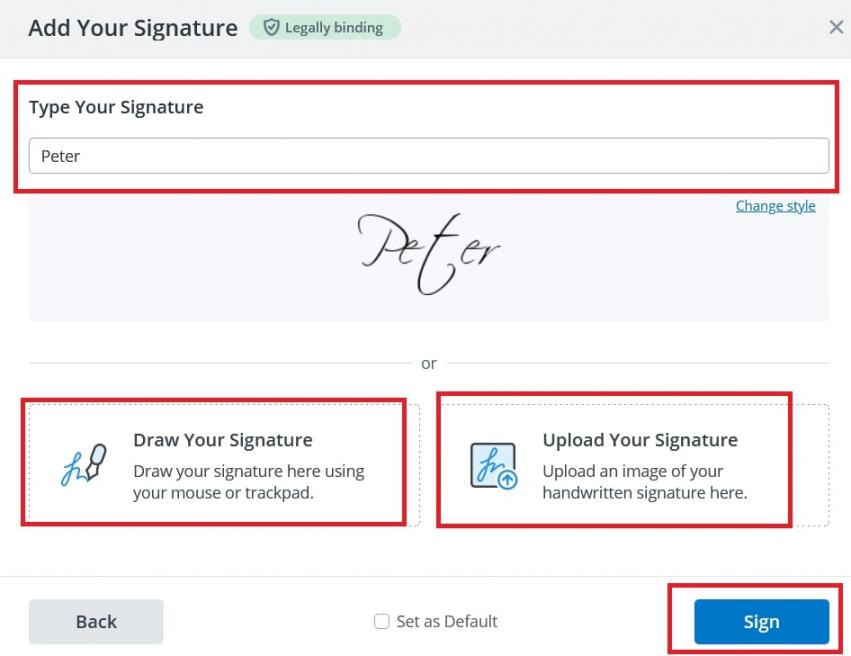
Image via signNow
Along with your signature, you can also add a date, your initials, add a signature line, or a checkmark. You can also upload an image of your stamp in PNG, JPG, or GIF file format.
5. Once you’re done, click on ‘Save & Close.’
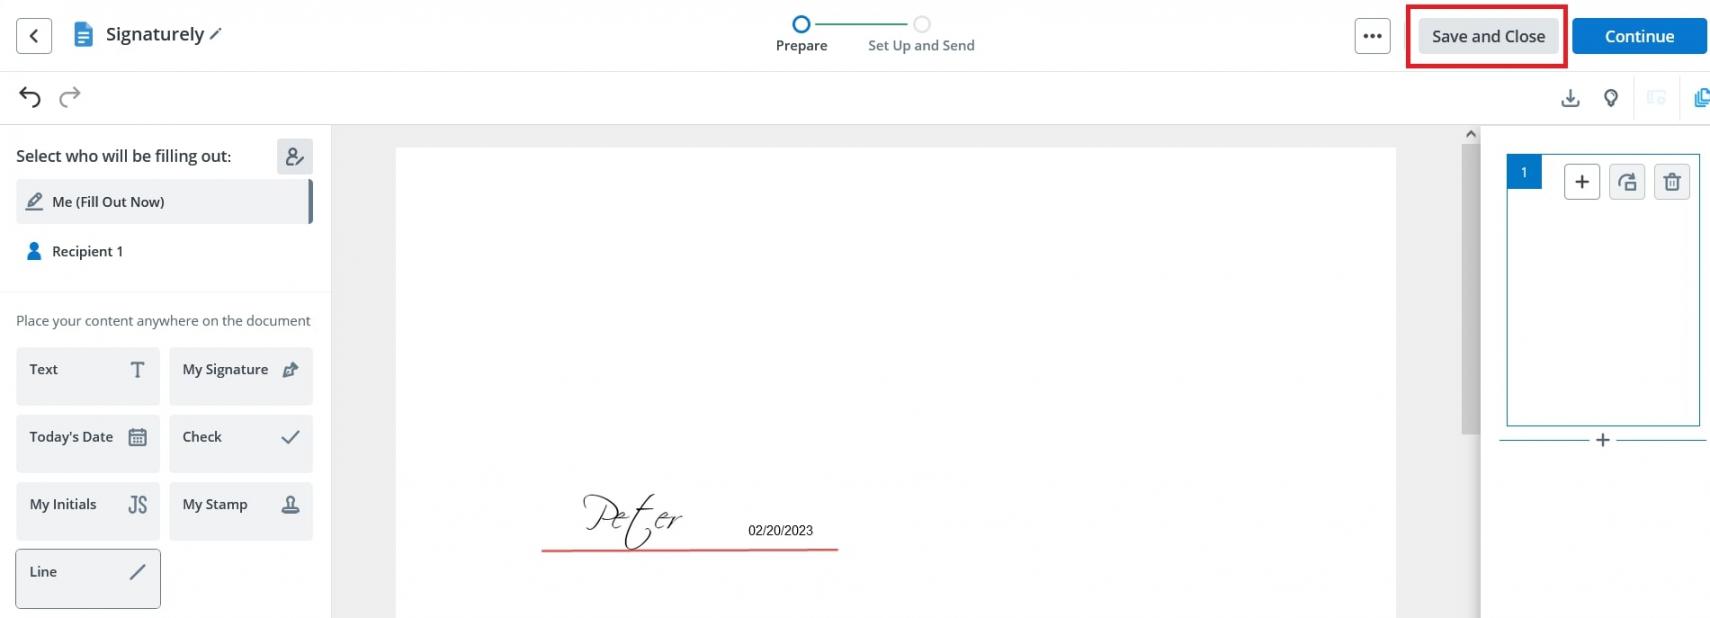
Image via signNow
How to Choose the Right Platform to Electronically Sign a Document
There’re plenty of e-signature platforms in the market.
What features should you look for when picking the right tool to electronically sign your documents?
Following are some important features to consider.
1. Check its Mobile-Friendliness
This is a no-brainer. The platform should let you electronically sign documents on the go— anywhere, anytime.
If a client asks for a contract, the best e-signature platform will let you electronically sign the document from your mobile device instead of making the client wait, which could mean losing them to a competitor.
Ensure that the signing process optimizes for all types of mobile devices.
2. Consider Speed and Efficiency
An e-signature software solution should make it easier and more convenient to electronically sign a document. If it’s not, then it’s not worth it.
Check how long things like uploading a document, processing the signed document, or uploading a handwritten signature takes.
Pay attention to the user interface and user experience. If it takes hours to navigate the app, you may want to consider a different option.
3. Integration with Existing Business Applications
Most e-signature platforms support integration with other apps and software. But checking if it integrates with your existing tech stack is important.
Besides pre-built connectors, check if powerful application programming interfaces (APIs) can integrate with any apps or tools you use.
The best e-signature platform easily integrates the existing document workflows and overall business processes.
4. Check if It’s Secure
Most e-signature platforms are SaaS companies. So, the safety of your documents is an essential selection criterion for choosing a vendor.
Cloud security and data protection should be weaved into every part of the business processes, including:
- Physical security: The location where the company’s systems reside should be secure.
- Platform security: There should be robust cloud infrastructure and security certifications to protect stored data.
- Process security: Employees, vendors, and other stakeholders should adhere to strict security and data privacy practices.
It’s also essential for the vendor to provide authentication features. Two-factor authentication, at least or the signature can be legally binding if you want to sign PDF online with complete security. Two-factor authentication, at least. This prevents your documents from falling into the wrong hands.
5. Consider the Cost of the Platform
Cost-effectiveness is another important factor when picking a platform to electronically sign your documents.
Check the features you’re paying for. You don’t want to pay for features you may never need.
You can use the free-trial option that most platforms offer to assess if the value you’re getting is worth the cost.
FAQ
Q1. How can you create an electronic signature for free?
A. You can electronically sign a document for free using an electronic signature app that offers a free plan, such as:
- Signaturely
- Xodo Dign (formerly eversign)
- PandaDoc
- HelloSign
- Indy
- DocHub
Q2. How do I create an electronic signature on a document?
A. You can do that by creating an account with an electronic signature app of your choice.
Open the app, upload your document, and sign it by typing or drawing it. Or you can upload an image of your signature.
Q3. How to electronically sign a document in Word?
A. To electronically sign a document in Word, use a tool like Signaturely. Here’s the process you need to follow:
- Create an account and upload or import your Word document
- On the left panel, click on ‘Sign’ and then on ‘Only Me’
- Select ‘Fill Out & Sign’
- Create an e-signature by typing, drawing, or uploading an image of your signature
- Tap ‘Send’ to process your document. Choose to download or print the signed document in the dialogue box that appears
Q4. How can I electronically sign a document in PDF?
A. Open your PDF in Adobe Acrobat Reader and follow these steps:
- In the menu bar, go to Tools and click on “Fill & Sign”
- Select ‘Sign Yourself’
- Click where you want to sign in the PDF document. A blue text box will appear
- Type your name or initials
- Click on ‘Next’. You will receive the option to save the file as a read-only copy that can’t be modified. Or you can send the document to others for e-signing
Q5. Are electronic signatures secure?
A. Absolutely! However, before signing digital documents, use an electronic signature app that prioritizes data security, like Xodo Sign.
Key Takeaway
You now know how to electronically sign a document and how to choose the right platform for the task.
Signing digital documents is no longer stressful; you must return to your office to complete it.
Did you get any other e-signing tips that have worked for you? Share in the comments below.