Knowing how to start a website is essential for anybody who aims to build an online presence and attract organic traffic. Whether you want to run an online store or a platform to showcase your talent, you need an official website.
Multiple things come into play when building a fully functional website. You will need a domain name, a web hosting plan, and access to a platform like WordPress or Wix. You can build a website without these tools. However, doing so can be tricky for beginners.
Platforms like WordPress and Wix make it easy for people who don’t have coding knowledge. These platforms also offer you a customizable domain name, free content management service (CMS), and web hosting with your subscription plan.
Excited to learn more about how to start your own website?
Then, read this guide till the end. You’ll be surprised to learn how easy it is to start your own website from scratch in 2025.
Let’s get started.
Disclaimer: This content contains some affiliate links for which we will earn a commission (at no additional cost to you). This is to ensure that we can keep creating free content for you.
Table of Contents
How to Start Your Own Website (Using WordPress)
Did you know that 43.4% of websites are built using WordPress? Along with being a standard website builder, the platform offers numerous themes and plugins to help you enhance the look and feel of your website.
Since the platform enjoys such widespread popularity, we assume that you would like to explore its website-building capabilities. So, here are tips you can follow on how to start your own website:
1. Pick a Domain Name
Picking a domain name is a key step when learning how to start your own website. Your domain name is like your address on the web. It’s the name that people use to find your website on web browsers and search engines. For instance, this website’s domain name is attrock.com.
Your domain name needs to be unique, for which you need to register it. Registering a domain name can cost anywhere between $15 to $50 yearly.
Your domain name is a critical part of your website. A great domain name is more than just a name. It will resonate with your brand, boost your search performance, and appeal to your website visitors. This is why picking the right one is a major step in how to start your own website.
You should devote time to picking a domain name for your business since it can be tedious and time-consuming to change it later. Moreover, changing your domain name repeatedly can take a toll on your search engine rankings and organic website traffic.
When picking up a domain name for your website, you should:
Choose a Reliable Domain Extension
There are plenty of domain extensions available today for website owners – traditional ones like .com, .org, and .net to niched ones like .blog and .lib.
When figuring out how to start your own website, it’s wise to stick with established domain extensions as they look credible and trustworthy. Most smart keyboards have a “.com” key which makes typing the URL easier. Moreover, many users automatically type “.com” in the address bar when they don’t know a website’s complete URL.
For instance, if your website’s name is “greg.pizza,” people might type “greg.pizza.com” since they might not be familiar with the “.pizza” domain extension. They will encounter a 404 error and might abandon the search altogether.
Include Keywords in Your Domain Name
Keyword-rich domain names help Google crawlers find and index your website correctly. But, don’t bet on finding such domain names easily. Be creative and combine keywords with other unique words. This is not just essential when learning how to start your own website, but it also allows you to come up with domain names that are available as well as contextual.
Keep It Short and Sweet
When learning how to start your own website, avoid going overboard with long, keyword-stuffed domain names. Keep the name under 15 characters since shorter domain names are easier to remember. Moreover, there's a greater chance of typos with long names, which can lead to traffic loss.
Keep It Easy to Type and Pronounce
As you go about mastering how to start your own website, ensuer that your domain name is easy to spell, type, and pronounce. If you plan to create a branded email ID based on your domain name, it makes even more sense to keep your domain name simple.
Avoid using hyphens. There are chances that the domain name you want is already taken. You might want to add a hyphen to make your domain name unique. But, searchers are prone to landing on your competitor’s site if they omit the hyphen while typing your domain name.
Another important tip when learning how to start your own website is to avoid double letters. Domain names like “pressetup.com” are prone to typos if people misspell them. So, avoid using unnecessary double letters and tricky spellings in your quest to come up with unique names.
Keep Your Name Scalable
It’s important to keep your domain name contextual as you navigate how to start your own website. But more importantly, ensure that there is enough room to expand your business to related verticals with the same name.
For instance, a domain name like “orchidflorist.com” will pose a problem when you decide to sell flowers other than orchids at a later stage.
You should opt for flexible domain names as you navigate how to start your own website. This way, you won’t have to migrate to a new website when you decide to scale your business.
Check Your Selected Domain Names for Trademark Issues
In 2024, there were over 360 million domain name registrations. Therefore, chances are high that the names you want to use to start your own website might already exist. If you don’t want to invite legal troubles or confuse visitors, check your selected names for trademark issues.
You can conduct a Trademarks Search on the USPTO website or perform a basic Google search for your selected domain name to check if it’s available to register.
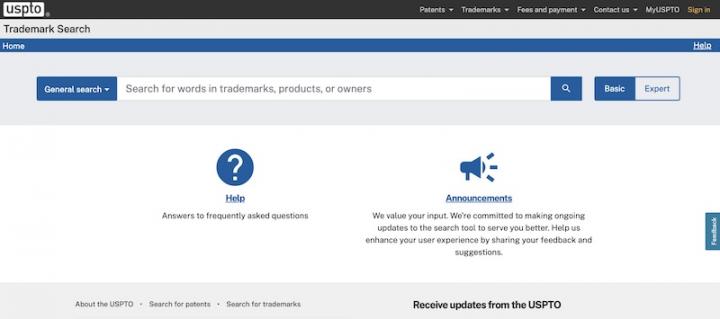
Image via USPTO
Use Domain Name Generators
To save time and effort when navigating how to start your own website, you can use domain name generator tools like Nameboy and WPBeginner’s Business Name Generator. Within minutes, these tools can suggest hundreds of unique domain names that are contextual, unique, and keyword-optimized.
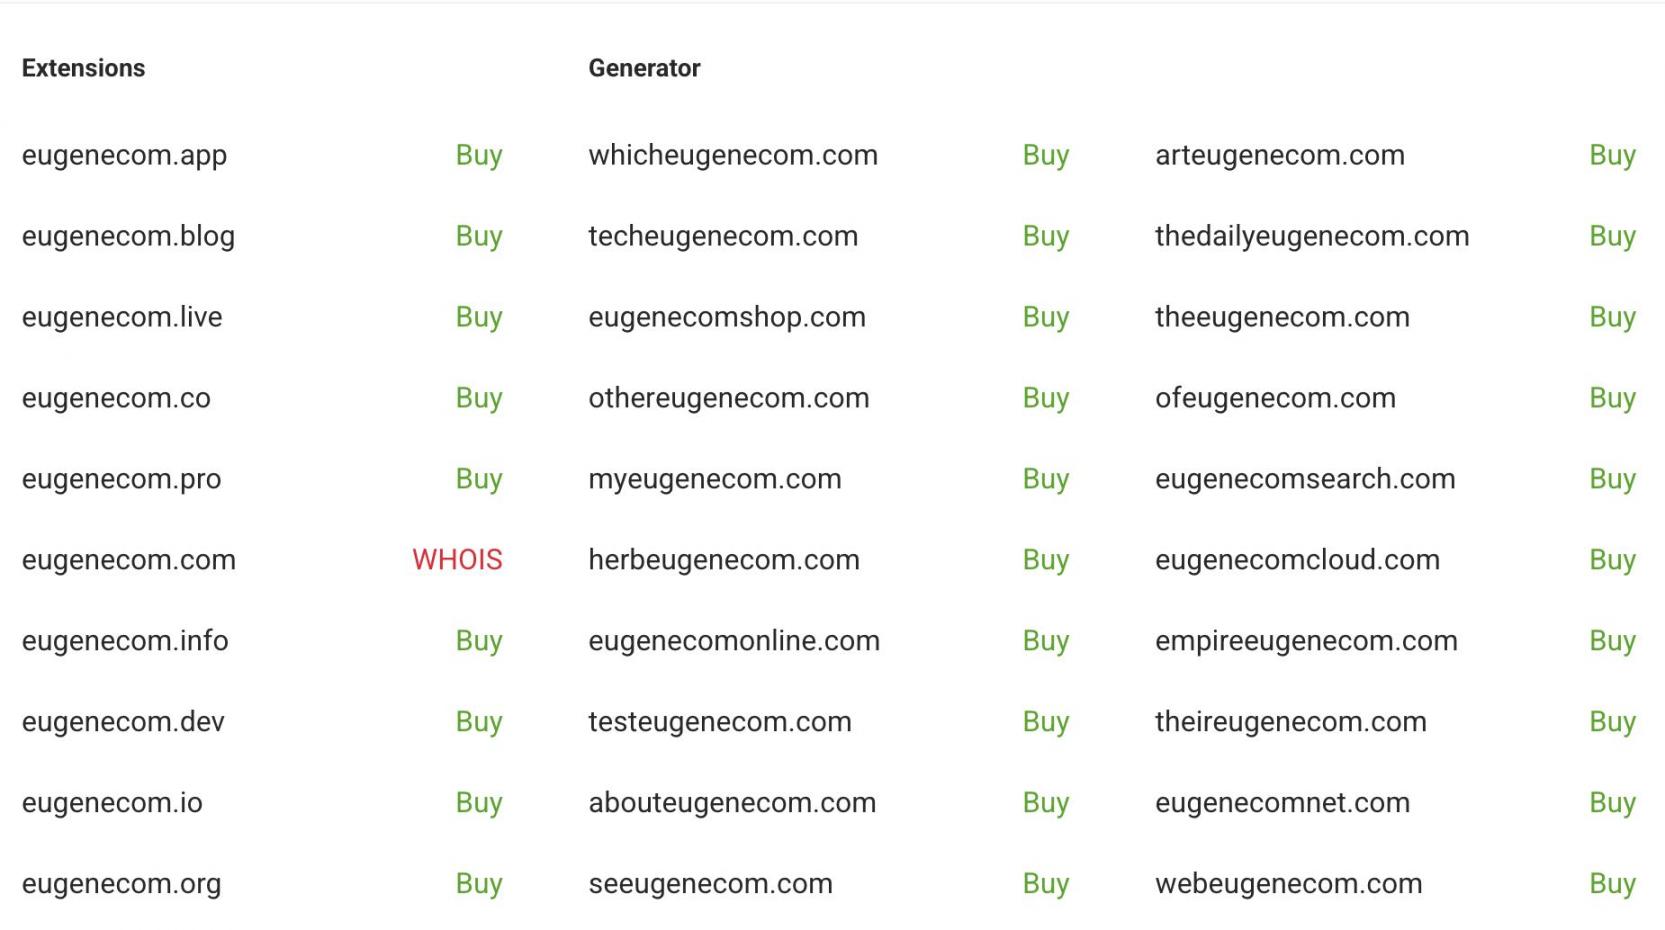
Image via Nameboy
Once you finalize a domain name for your new website, act quickly and get the name registered via domain registrars like Domain.com or GoDaddy. Registering a domain name can cost between $8 to $24, and you will need to renew it every year.
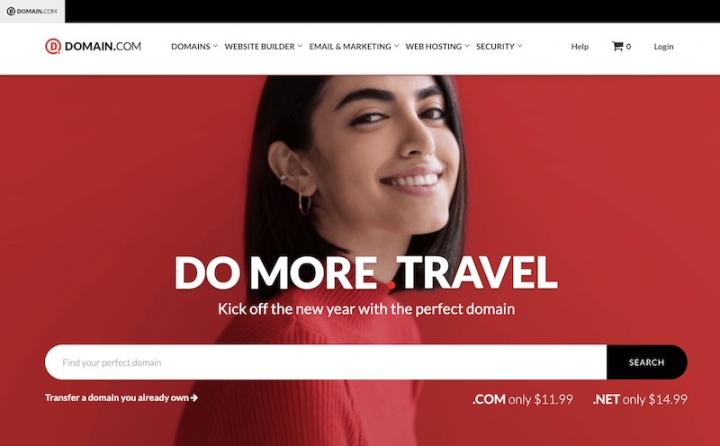
Image via Domain.com
Want a pro tip on how to start your own website?
The majority of web hosting companies offer free domain name registration services when you buy their hosting plans. Take advantage of this offer and register your domain name for free for the first year through your web hosting company.
2. Buy a Web Hosting Plan
You will need a reliable web hosting service provider to store data and host your website. Many website builders include hosting in their packages to simplify the website-building process. But if you’re opting for standalone web hosting, don’t get swayed by gimmicky features you’ll never use. Instead, look for critical features like uptime guarantees and SSL certificates.
Confused on how to start your own website and how to know a good web hosting service?
Great web hosting is all about 3 Ss: Support, Security, and Service.
When in doubt, follow the guidelines below to choose the right web host as you navigate out how to start your own website:
Determine Your Website Needs
Every website has unique needs, and you should figure out your needs right before you start your own website.
Does your business website need an integrated online payment system? Or, is it going to be a simple blog with media-rich content?
Your website hosting provider should possess the right site structure, and tools to fulfill your specific needs.
Consider How Much Technical Support You’ll Need
If you’re a small business owner considering how to start your own website, you should look for 24×7 support through live chat. In any case, phone, ticket, and email support are a must. Turnaround time on requests should not exceed 24 hours.
If you don’t buy managed services, your vendor might answer basic configuration issues but won’t be able to hand-hold you through the process.
Whereas, with managed services, you will be assigned a system manager who will keep an eye on security lapses, patch your software, and manage backups promptly.
Estimate Your Expected Web Traffic
Your web host will charge you based on the bandwidth and server space you consume. So, be honest about how many visitors you expect to get on your new site as you lay the groundwork for how to start your own website.
If you’re planning to serve a few pages to a few local visitors, buying a shared hosting plan will be sufficient. But if you’re expecting thousands of visitors, ensure that you opt for cloud or dedicated hosting.
Understand Server Types
One thing you need to know when learning how to start your own website is that the cheapest hosting plan you can get is the shared type. Your website’s speed and performance will depend on how much load is exerted on your shared server by other hosted websites. Moreover, you are restricted in terms of how you can upload files. There is no shell access and limited database access.
If you're exploring how to start your own website with more control, consider a VPS (Virtual Private Server). This is the type where your website runs as a virtual machine on a server. Baseline services are better than shared servers, but you should be a pro at server management if you opt for this server type.
Dedicated servers are a better option if you don’t want your site speed to get impacted by shared resources. A physical server box is rented out to you, but it sits in a remote location. You need to be familiar with server maintenance to handle dedicated servers.
Cloud hosting is another great option to consider when learning how to start your own website, especially if scalability matters. Go for cloud servers that are maintained by providers like Google Cloud and Amazon Web Services (AWS). As your traffic surges, you can expand your server storage and bandwidth and pay for the additional consumption.
Don’t Be Fooled by Unlimited Offers
Be wary of unlimited offers as you navigate how to start your own website. If a service provider is offering hosting at unbelievably low prices, go through their terms of service carefully. Contact their support executives to confirm that you’ll get unmetered bandwidth and uptime at that price.
Pick a Portable Content Management System (CMS) to Prevent Lock-Ins
A crucial tip to keep in mind when learning how to start your own website is to ensure that your business site isn’t tied to one host. If the company is acquired or its management or technology changes, you can lose your hosted data, media, and content. Even if you work with WordPress, don’t forget to update and back up your site regularly.
Focus on Essential Features
Things like SSL certificates, a user-friendly control panel, and proactive customer support are non-negotiable when it comes to selecting a web hosting provider. Also, look into server locations, compliance, and platform specialization when navigating how to start your own website.
What should you do once you’ve selected a web host for your website?
We’ll tell you what to do.
Say, you’ve selected Bluehost as your hosting provider. Then, you need to follow the steps below:
Step 1: Visit the Bluehost website and click on “Get Started Now.”
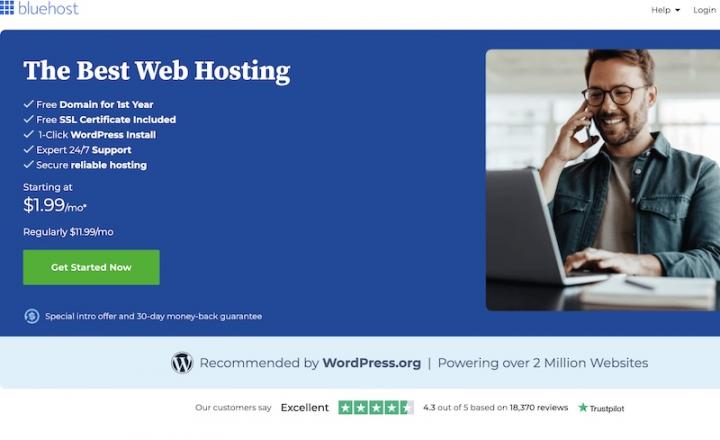
Image via Bluehost
Step 2: Select a web hosting plan after considering the number of domains, bandwidth, and storage you need.
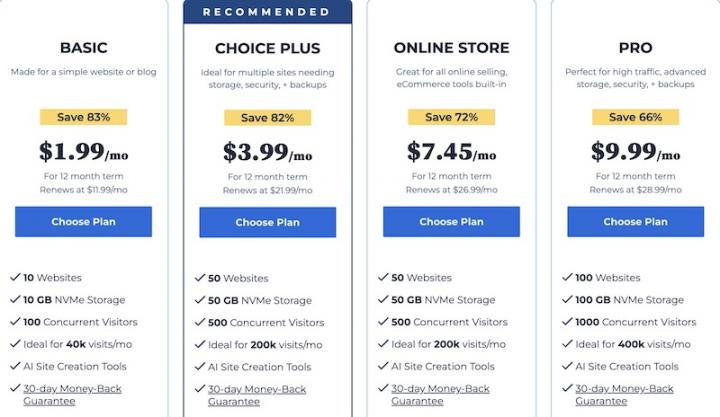
Image via Bluehost
Step 3: Select and register a domain name. If you need country-specific domain extensions like “.au,” you can purchase them from sites like Domains.com and GoDaddy.com.
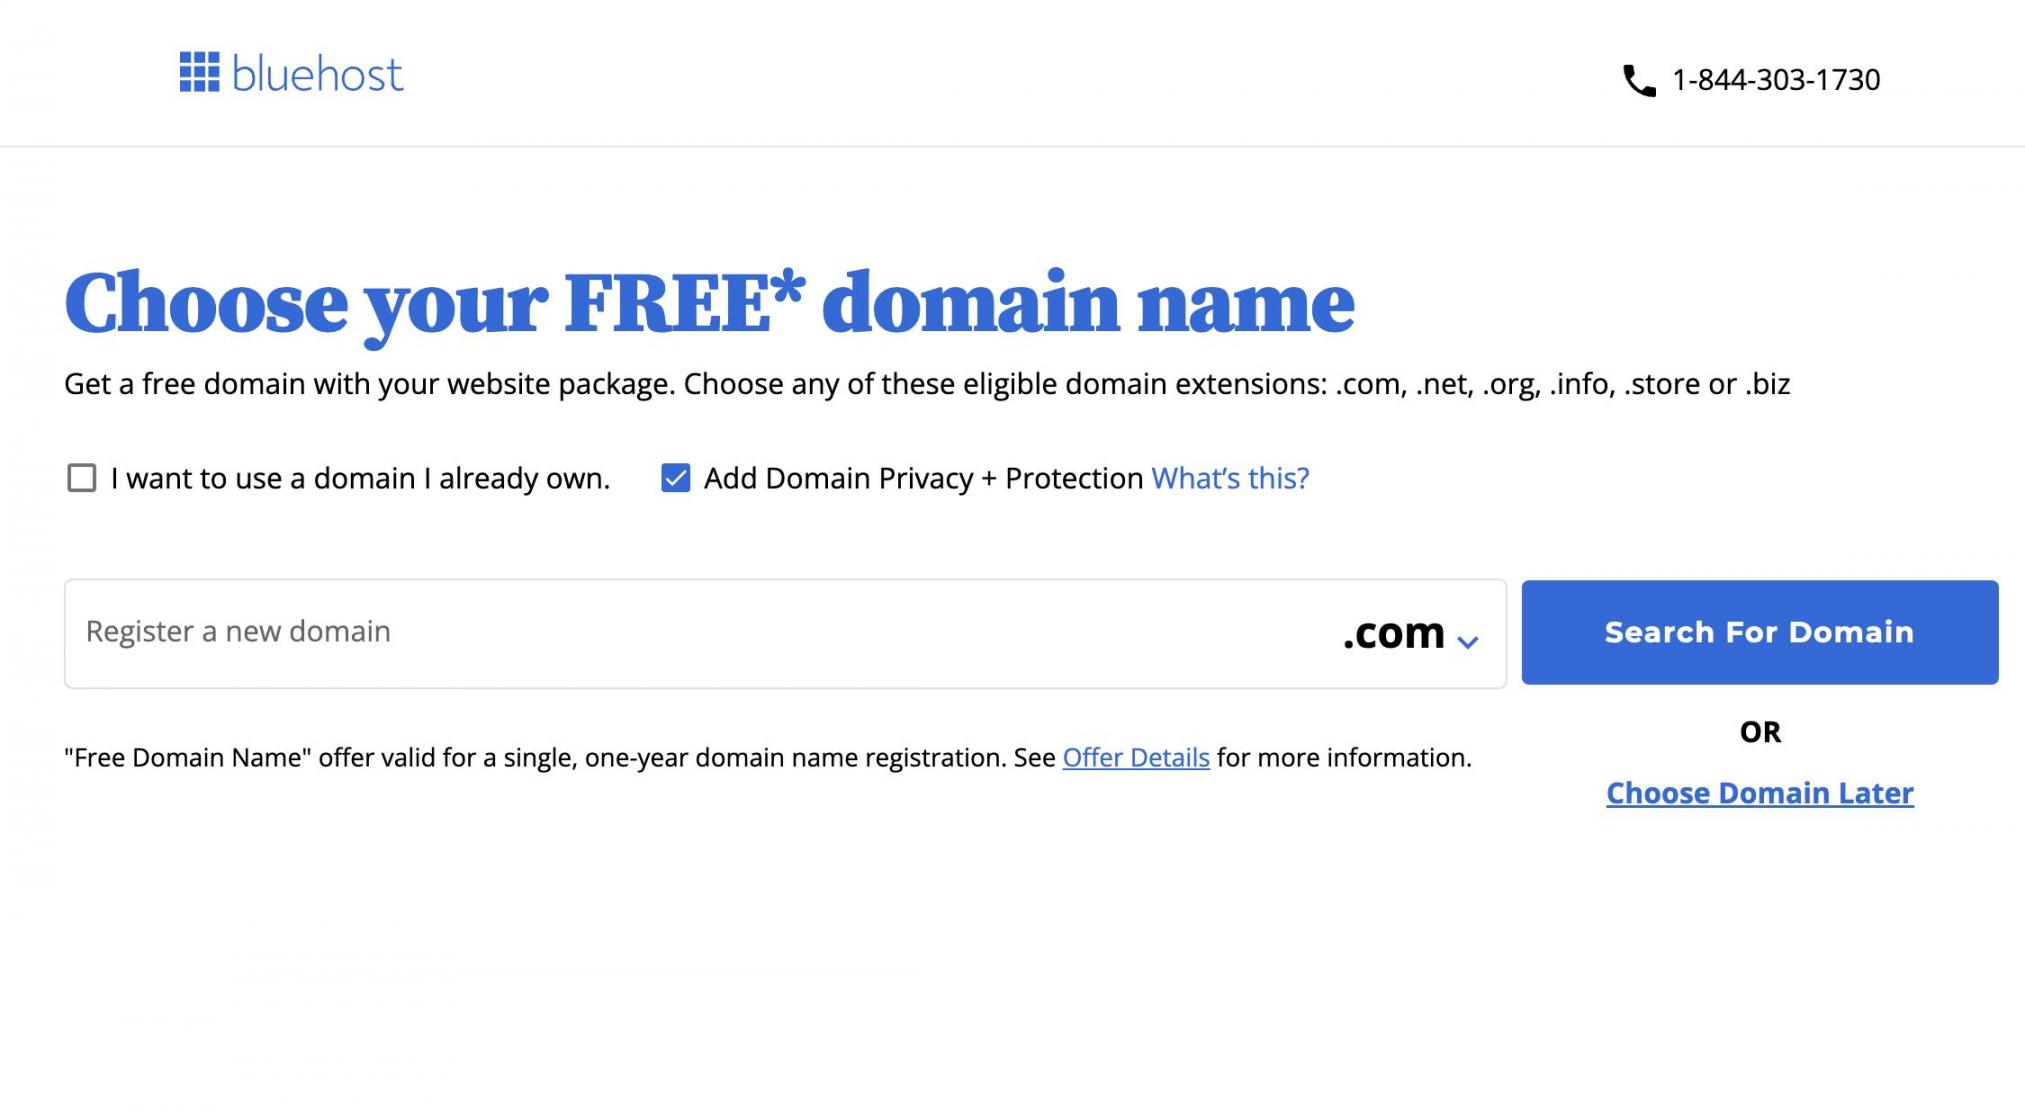
Image via Bluehost
If you’ve already bought a domain name from some other vendor, Bluehost allows you to use it as well. You will be required to change your domain name servers to Bluehost servers, which include:
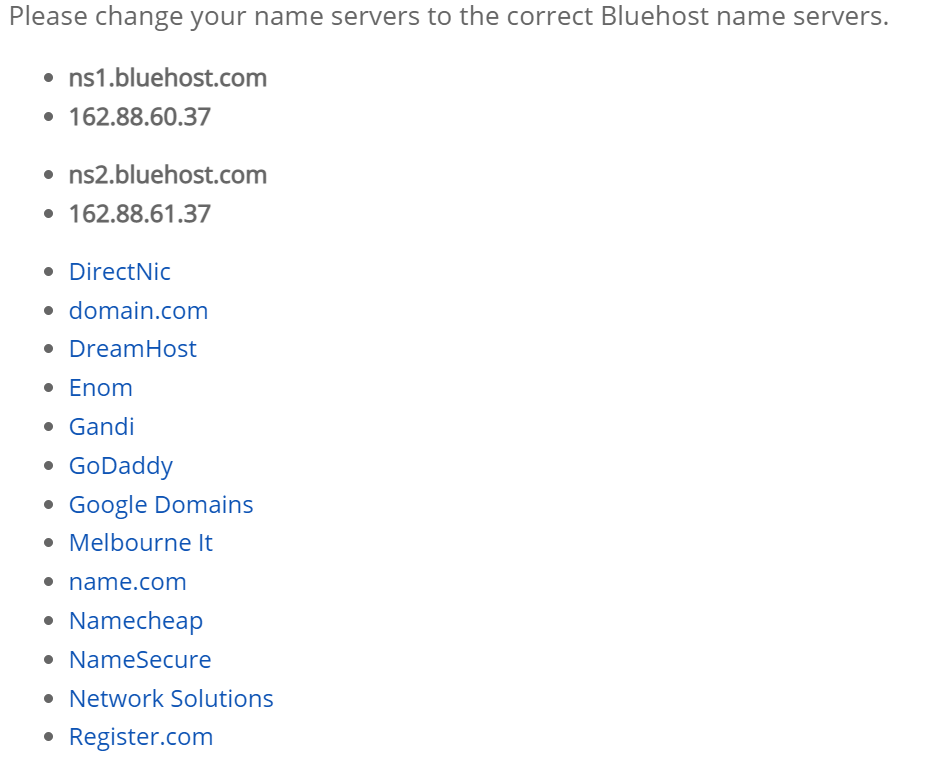
Image via Bluehost
Step 4: Once the registration process is complete, you will be taken to WordPress to start building your website.
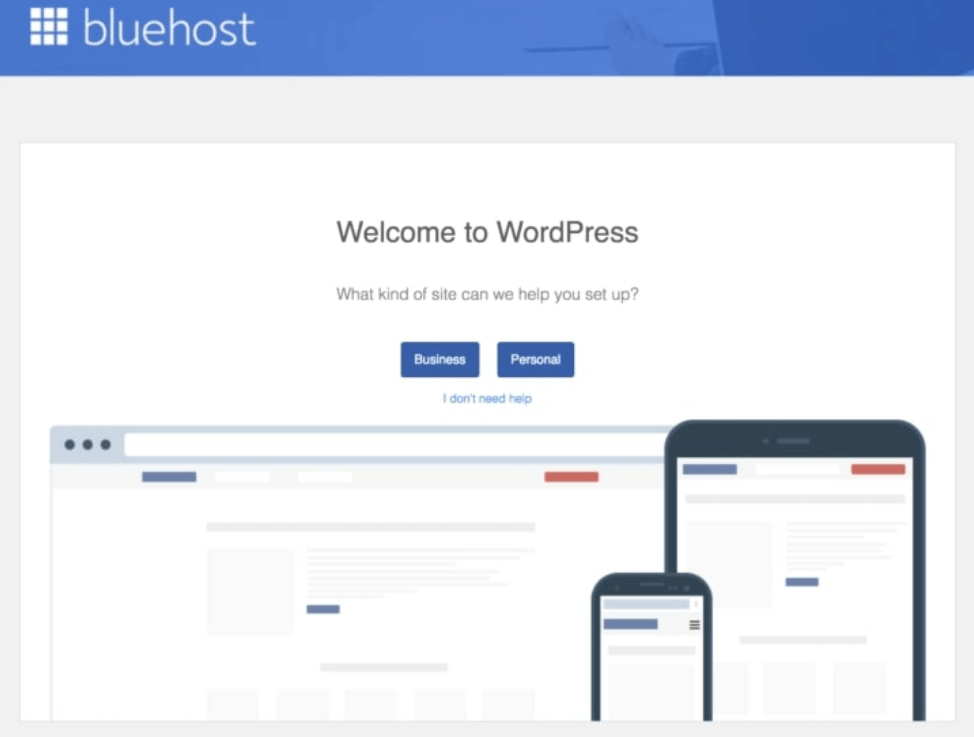
Image via Bluehost
3. Set Up a Website Using WordPress (WP)
With your domain name and web hosting plan in place, you’re ready to start your own website using a website builder.
WordPress is a great option since it’s easy to use, reliable, and comes with tons of free themes and plugins to give your website a professional look and feel.
Like Bluehost, most hosting service providers offer native integration with WordPress. You can find one-click installs in their control panel that help you start your own website in minutes. If not, you can always install WordPress manually by following the steps below:
- Download the WordPress package from https://wordpress.org/download/. Unzip the package.
- If you have shell access and can use console-based tools, download WordPress to your web server using the command: wget https://wordpress.org/latest.tar.gz
Then, unzip the package using the command: tar-xzvf latest.tar.gz
WordPress will be downloaded in a folder named “wordpress.”
- Next, you need to create a WordPress database and username. Most hosting providers already set up databases for their users or have automated systems to create databases. Go through your cPanel to confirm this.
In case your hosting provider doesn’t offer database support, you might have to create a database manually using phpMyAdmin. Here’s how you can do this:
- Click on the “Database” dropdown on the left and type a name for your new database in the “Create database” field. It’s advisable to opt for names beginning with your username and an underscore.
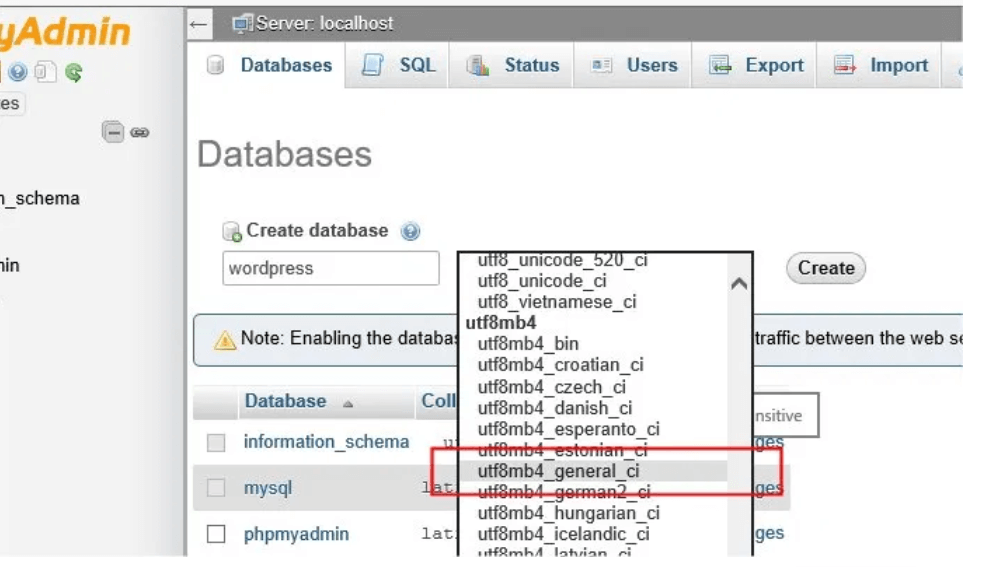

Image via phpMyAdmin
- Go back to the homepage by clicking the “phpMyAdmin” icon on the left. On the homepage, select the “Users” tab and click on “Add User” at the bottom of the page.
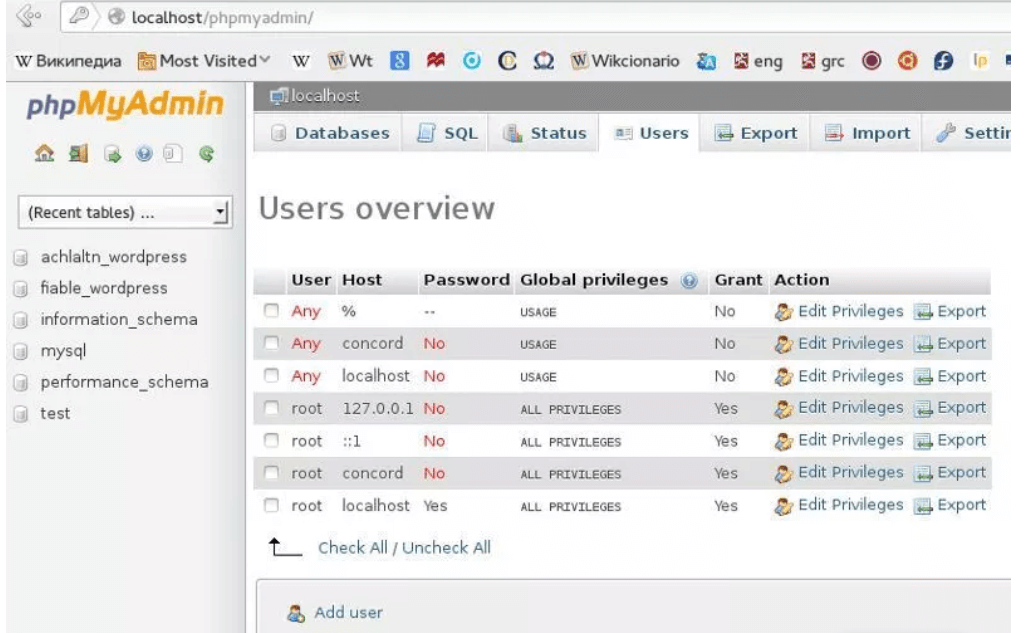

Image via phpMyAdmin
- Enter a username in the “Username” field. Ensure that “Use text field” is selected in the adjacent dropdown. Enter a secure password in the “Password” field and re-enter it in the “Re-type” field.
- Don’t change the default values in the “Global privileges” section. Click on “Go.”
- Go back to the “Users” page and click on the “Edit privileges” icon next to the newly-created user in the list of users displayed there.
- In the “Database-specific privileges” section, find the new database you just created, and click on “Go.”
- The page will reflect all of the new privileges for that database. Then, select “Check all” so that all the privileges are selected, and then, click on “Go.”
- On the next page, note the name displayed after “Server:” at the top of the page.


Image via phpMyAdmin
- WordPress will create a wp-config.php file when it runs the installation script. Go to the location where you extracted the WP folder and rename the file “wp-config-sample.php” to “wp-config.php.”
- Enter your name, username, password, and server name in the “DB_NAME,” “DB_USER,” “DB_PASSWORD,” and “DB_HOST” fields.
- Type some secret key values in the “Authentication Unique Keys and Salts” section.
- Save the wp-config.php file.
- Now, you have to decide where you would like to upload your WP site to your root directory or to a sub-directory.
Here are the steps you need to follow for each location:
- In the root directory: To upload your files to your web server, use shell access or an FTP client. Upload all of the content of the “wordpress” directory, but not the directory itself, to your website’s root directory.
- In a subdirectory: Rename the “wordpress” directory to a name you want and then, move the directory to your desired location using FTP or shell access.
- Next, you need to run the installation script. If the WP files are in your root directory (say example.com), visit this URL in a web browser: http://example.com/wp-admin/install.php.
If your files are in a subdirectory (say “blog” in “example.com”), visit this URL: http://example.com/blog/wp-admin/install.php.
- WP will create and edit the “wp-config.php” file if it can’t find it. After that, you will be directed to the following interface for site installation:
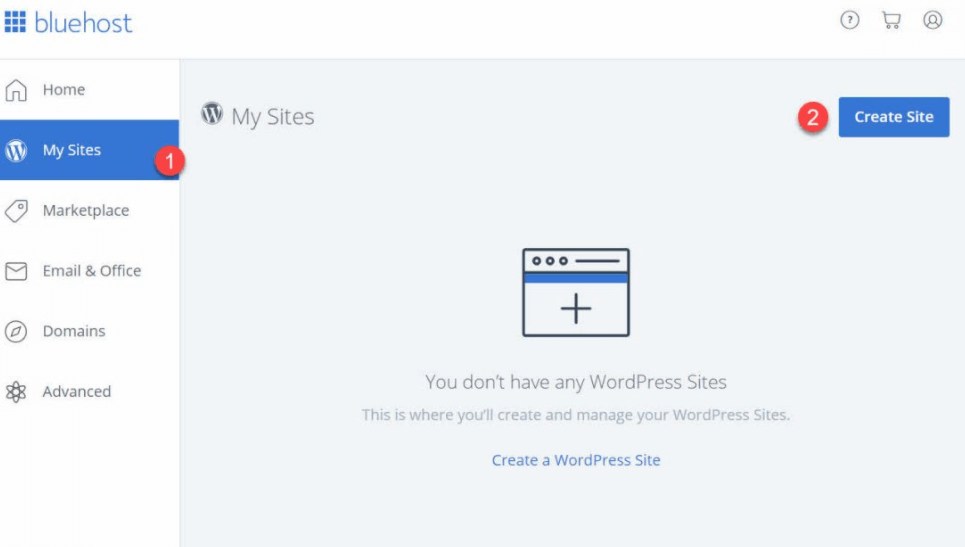

Image via Bluehost
A login prompt will display if you’ve installed WordPress correctly.
What if you want to install WordPress using Bluehost?
Here are the configuration steps you will need to follow:
- Log in to your Bluehost account.
- Click on “My Sites” in the left navigation pane and then, click on “Create Site” on the right.
- WordPress installation will happen on auto-pilot mode. You will be asked to provide some basic information about your website.
- Once the installation is complete, Bluehost will display your login credentials. Save them in a safe location.
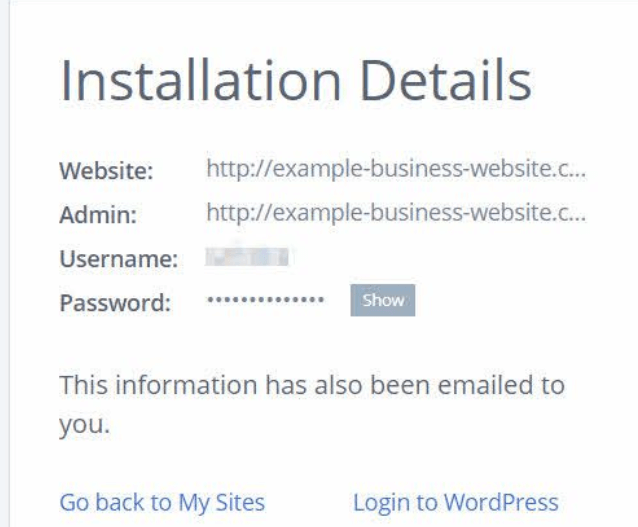

Image via Bluehost
- Test your website by typing its domain name in a web browser. If you’ve performed all of the above steps correctly, you should see a basic website like the screenshot below:
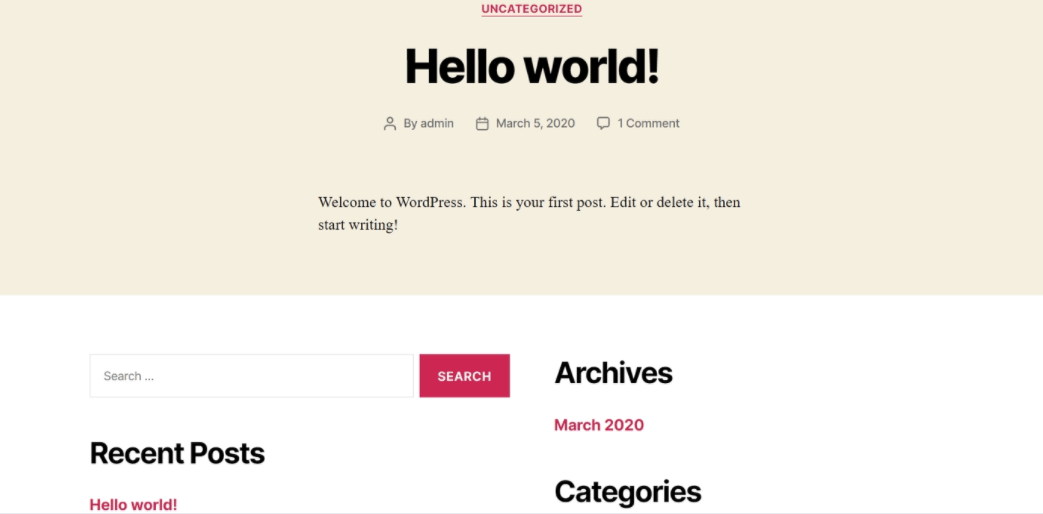

Image via Bluehost
- Next, check if Bluehost has provided you with an SSL certificate by clicking on “My Sites” in the navigation pane. After that, click on “Manage Site” and access the “Security” tab. Under the “Security Certificate” section, you will find your “Free SSL Certificate” status.
You should see a lock icon next to your domain name to indicate that your website is secure. You might have to work for some time while WordPress configures your SSL certificate and shows the lock icon. Meanwhile, you can work on improving your website’s look and feel as you navigate how to start your own website.
4. Design Your Website
Right now, your new website looks very bare and unattractive. But don’t worry, you can revamp its appearance using WordPress themes. Think of themes as “skins” for your website. They control the physical appearance of your site and the way different on-screen elements interact with each other.
Currently, WordPress offers three default themes: Twenty Twenty-Five, Twenty Twenty-Four, and Twenty Twenty-Three. But there are numerous free themes for beginners to learn how to start your own website. You can purchase more themes from their collection of 2,900 paid themes.
When figuring out how to start your own website using themes, access the “Theme Directory” in WordPress after logging into your administrator account. You can also click on the “Themes” tab on your WordPress dashboard.
As a beginner figuring out how to start your own website, you can use advanced filters to specify subjects, layouts, and features to sort theme options.
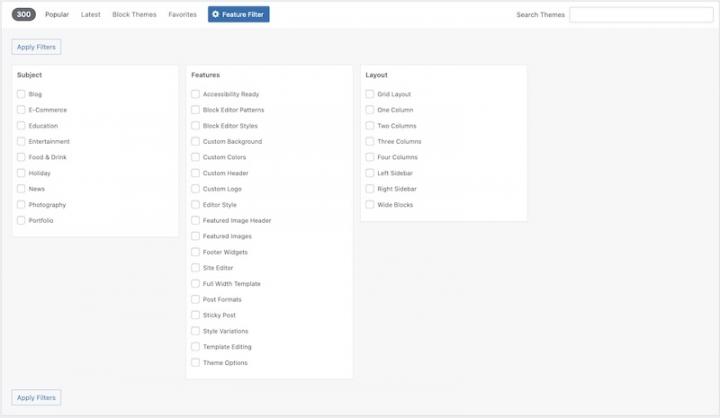
Image via WordPress
Based on your filters, WordPress will suggest certain themes to you. You can preview each theme by accessing the theme’s “Info Page.”
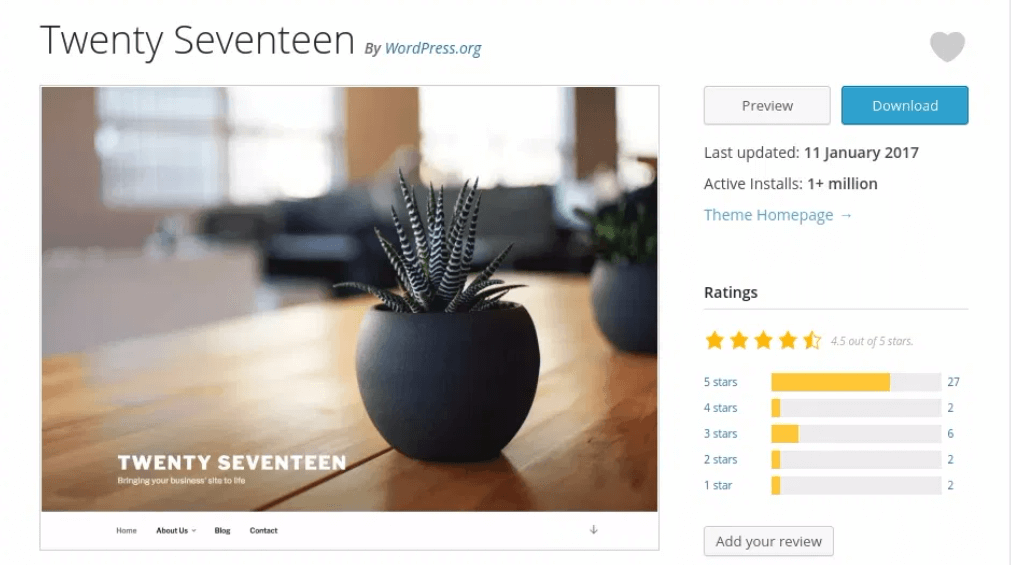
If you’re satisfied with the themes WordPress has suggested, click on the “Download” button on the theme Info page. Each theme comes with installation instructions.
Suppose your theme doesn’t render correctly, even though you’ve followed the installation instructions when navigating how to start your own website. In that case, you can contact the theme’s author or the WordPress support center.
All the themes you install will show up when you click on the “Appearance” menu in the dashboard.

Image via WordPress
You can activate one theme at a time, which means this theme’s behavior and style will be applied to your website. To activate a theme, click on the “Activate” button that appears when you hover over a theme’s thumbnail. When a theme is activated, you will receive a notification about it.

Image via WordPress
For this guide, we’re going to use the “Neve” theme. It’s a versatile theme, which comes with 20+ free designs in niches like business, restaurant, food, fitness, etc.

Image via WordPress
Say we select the “Original” design in this theme.
Click on “Import.” The design and all of its plugins and demo content will get downloaded and you can see the progress through a pop-up.
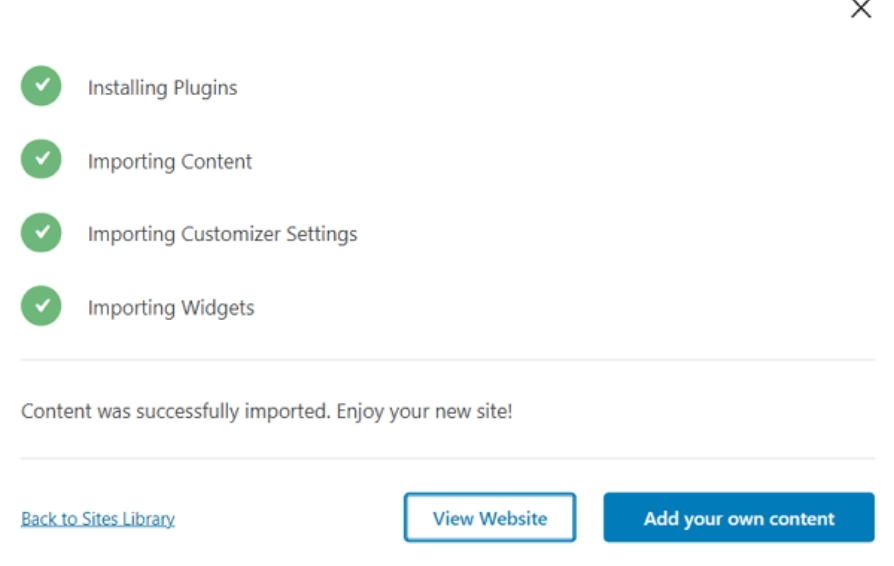
Image via WordPress
Once all of the design elements get installed, go to the “Appearance” menu and explore the customization options that the theme offers.
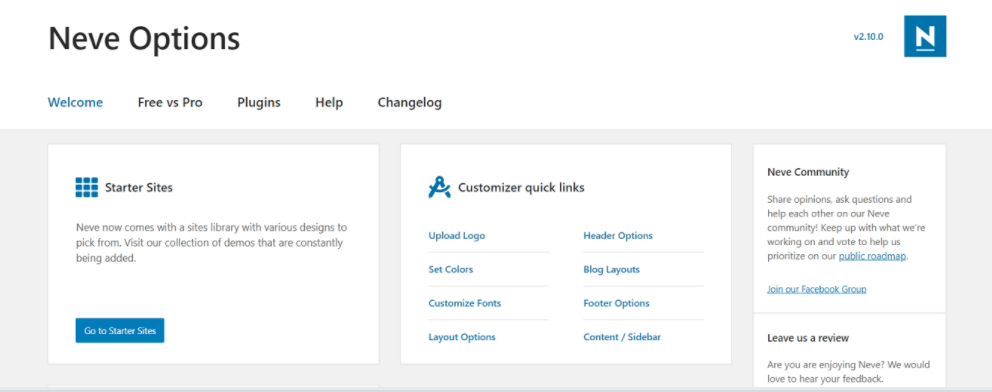
Image via WordPress
Now that you understand how to start your own website, let’s explore website design customization.
- Upload logo: Upload your small business logo from your system to WordPress.When you’re happy with the way your logo appears in the preview on the right, click on the “Publish” button and exit the Customizer interface.
- Choose site colors: You might want your theme colors and fonts to resonate with your brand identity. It’s easy to change these elements through the Customizer interface.
You can select the colors you want to change (text color, link color, background color, etc.) and create a new color palette for your website.
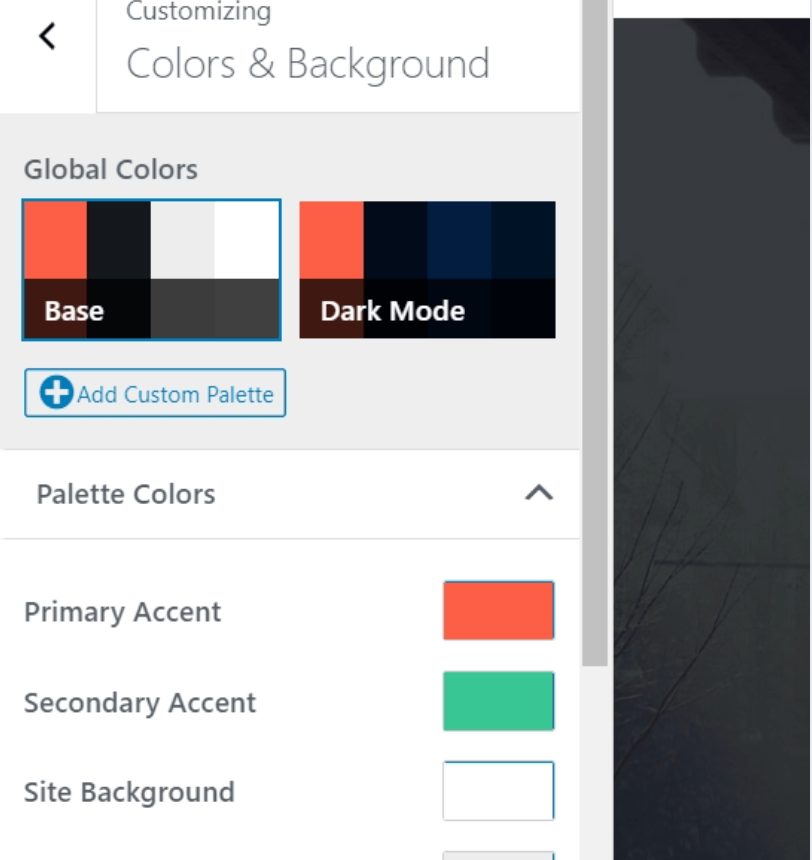
Image via WordPress
- Customize fonts: Click on “Typography” to check and edit the font for your H1, H2, H3, and normal content. You can choose a new font from the “Font Family” dropdown.
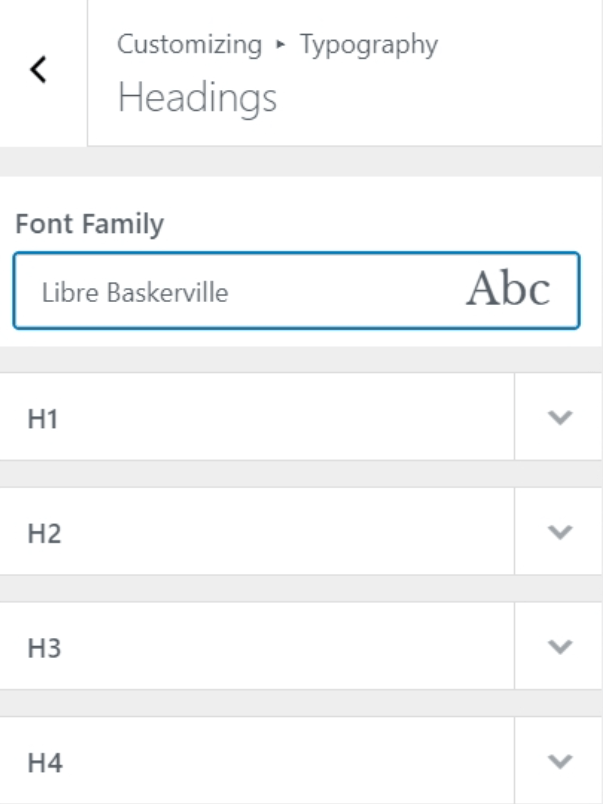

Image via WordPress
Click on “Publish” when you’re done and exit the Customizer.
- Add a sidebar: You can click on the “Layout” option to add a sidebar to your site. Most themes give you three sidebar options – “No sidebar,” “Sidebar to the right,” and “Sidebar to the left.” Select the desired option and click on “Publish” to make the changes.
- Add widgets: Widgets are small content blocks that appear in the sidebars of websites.
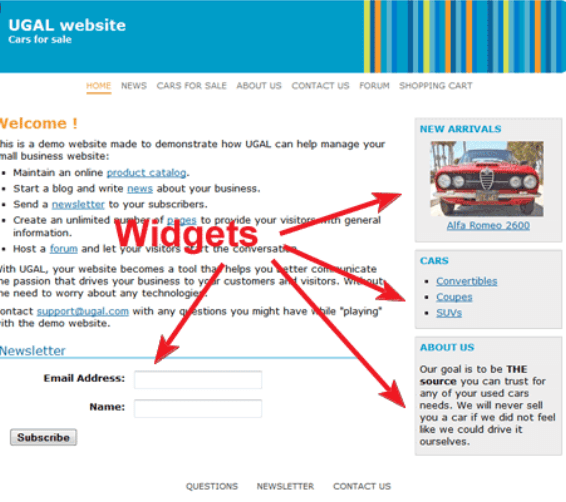

Image via UGAL Website
To add widgets to your website, go to “Appearance” on the main Dashboard and click on “Widgets.” The widget configuration page will appear:
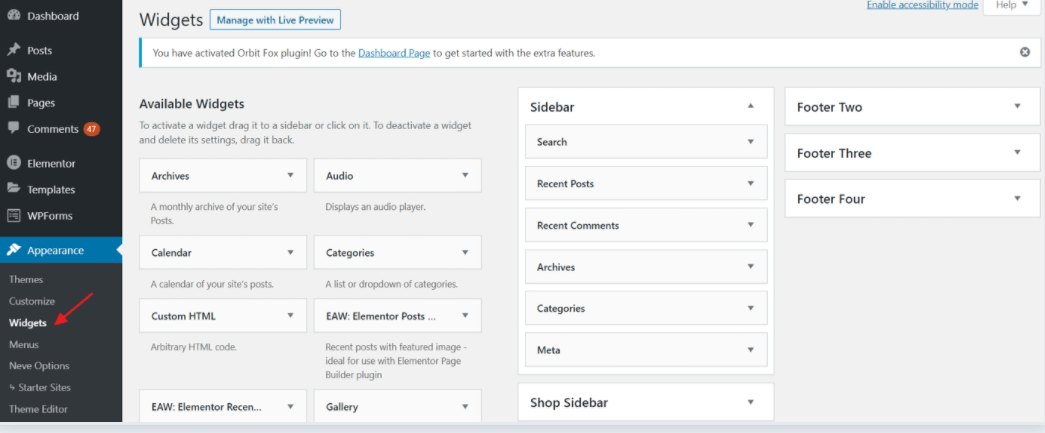
Image via WordPress
On the left, you can see the available widgets. On the right, you can see the on-page areas where you can display these widgets.
You can easily drag and drop widgets such as calendars, categories menu, and more in the sidebar and footer of your business website.
With all of these elements added, your website should become presentable and functional. As you advance through the process of how to start your own website, we recommend that you explore the other customization options to make your website more engaging and attractive.
5. Add Content to Your Website
As a small business owner learning how to start your own website, it’s essential to understand the importance of two key content types — pages and blog posts. You can also use the “Block Editor” to add content to your WordPress site.
Here are the steps you need to follow to add a page or a post to your website:
- To add content, you should have Administrator, Editor, or Contributor access. Log in to your account and go to “My Sites” on the Dashboard. Then, select “Site” and you’ll see the different types of content you can add.
- Select the desired option – “Pages” or “Posts”
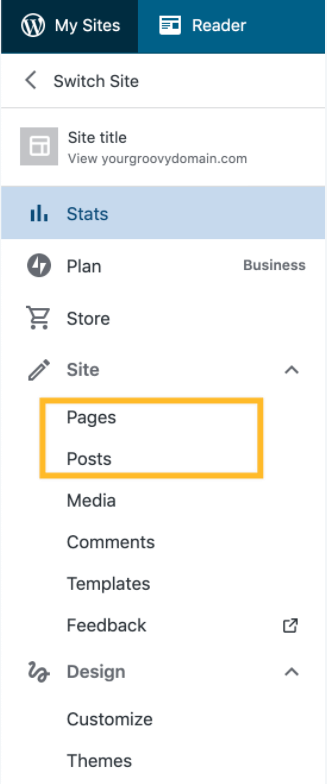

Image via WordPress
- When you click on “Pages,” the following interface will display on the right. Click on the “Add New Page” button.
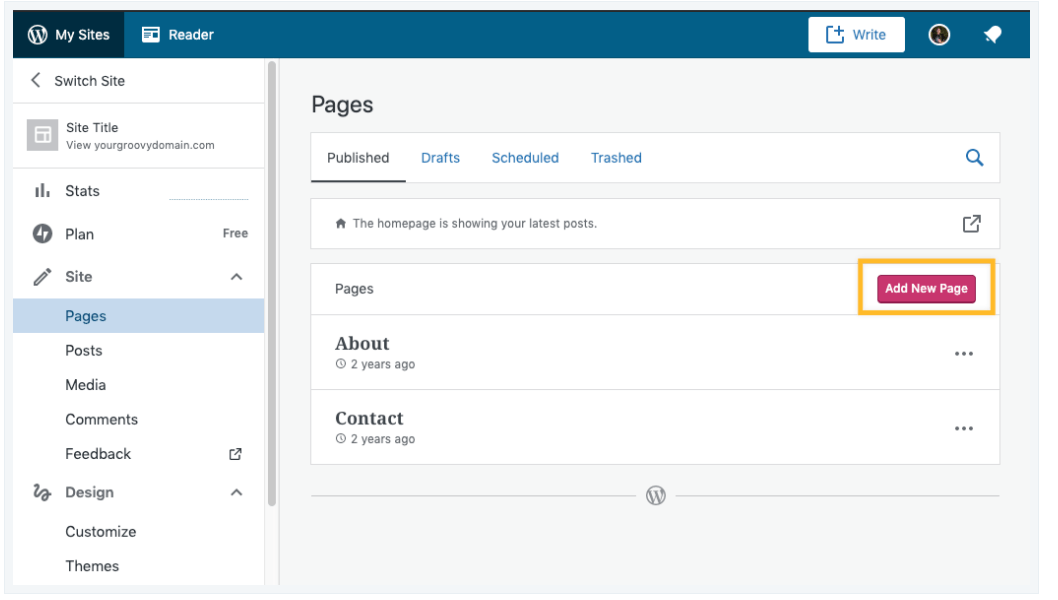

Image via WordPress
- The Block Editor opens up. On the right are the document settings. If you don’t see the pane, click on the gear icon adjacent to the “Publish” button. In the Settings section, you can add a featured image, tags, and categories to a post, plus see its publishing status.
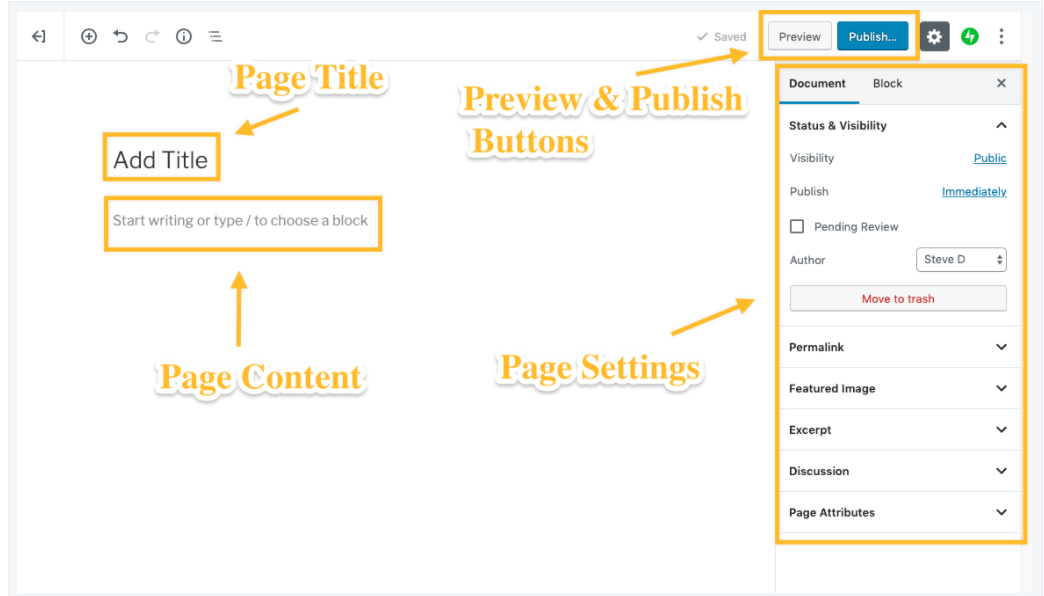

Image via WordPress
- Your content will be added as blocks on your page. You can add a new block by clicking the “+” icon on the top-left corner of the Block Editor.
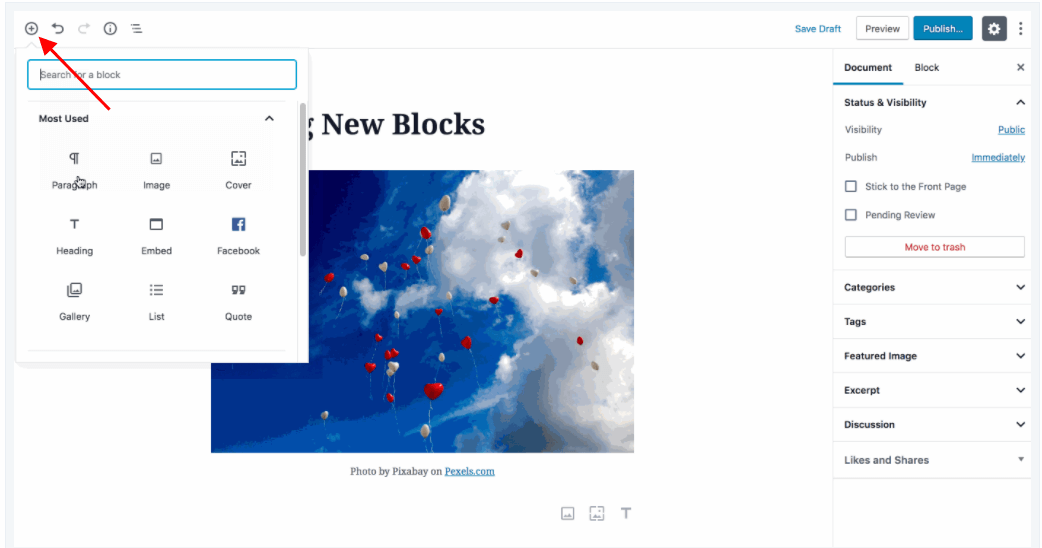

Image via WordPress
- You can add different types of content blocks – paragraphs, tables, galleries, columns, and more. Here is a basic definition of the commonly-used blocks:
- Paragraph block: This is the default content block, which can be used to add text to posts and pages.
- Image block: This block can be used to add images to posts and pages.
- Cover block: This block can be used to add text on top of images.
- Column block: You can use this block to align multiple blocks.
- Heading block: This block can be used to add headings to posts and pages.
- Once you add a block, you can change its orientation by dragging and dropping it to the desired location. On the left side, you can see additional block settings like “Font Settings” and “Color Settings.” You can see how the final block will look after clicking the “Preview” button on the top.
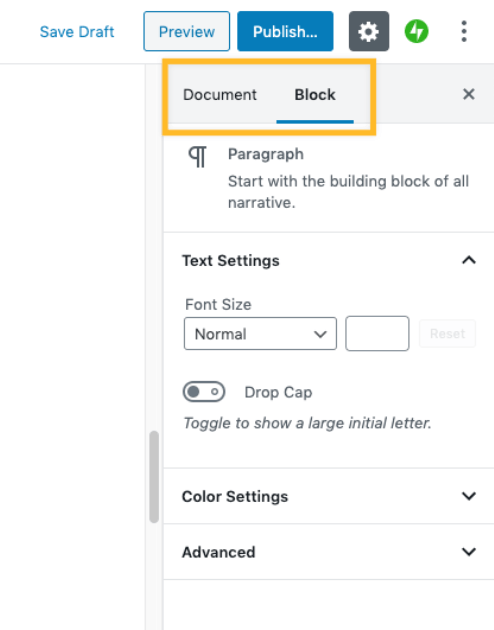

Image via WordPress
To access document settings, you can switch to the “Document” tab at the top.
- To remove a block, click the ellipses (three vertical dots) at the top of the block and select “Remove Block.”
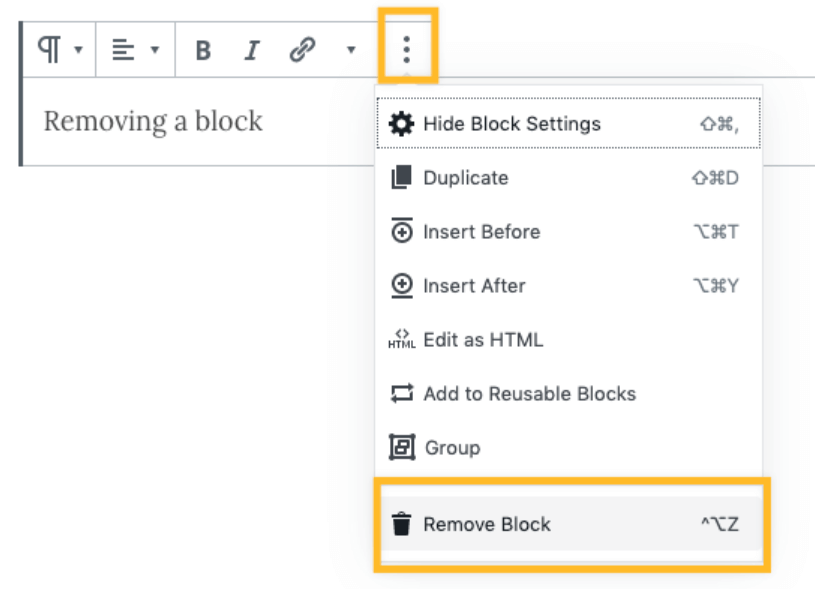

Image via WordPress
- Once you’ve added all of the blocks, click on “Publish” at the top of the Block Editor.
- To create your homepage, click on “Homepage Settings” in the Customizer.
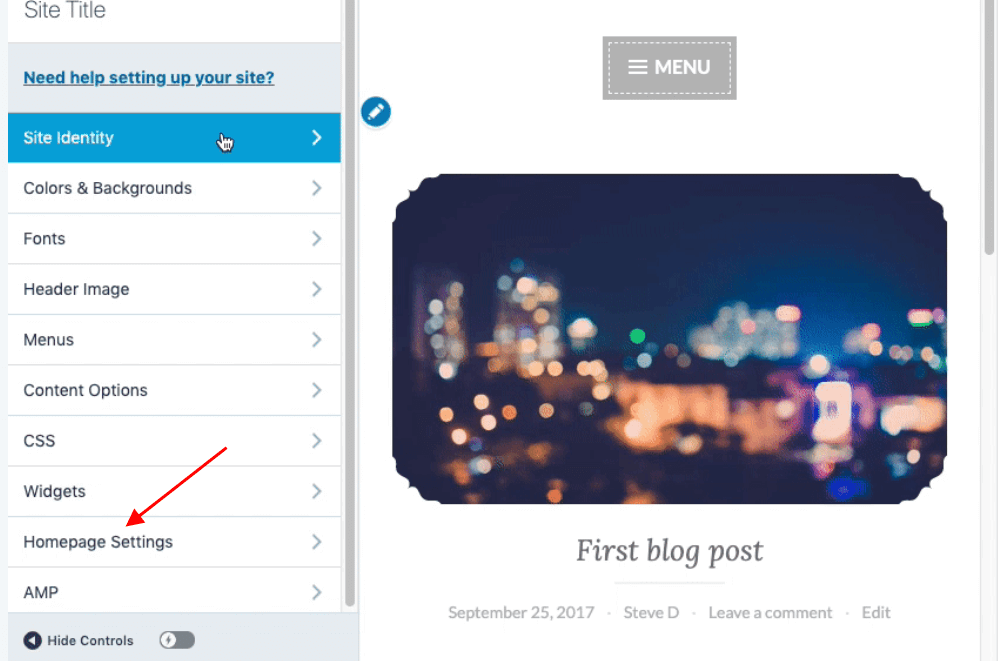

Image via WordPress
You can choose to keep your homepage as a custom page by choosing the “A static page” option. Or, you can choose the “Your latest posts” option to show all of your posts on the homepage itself.
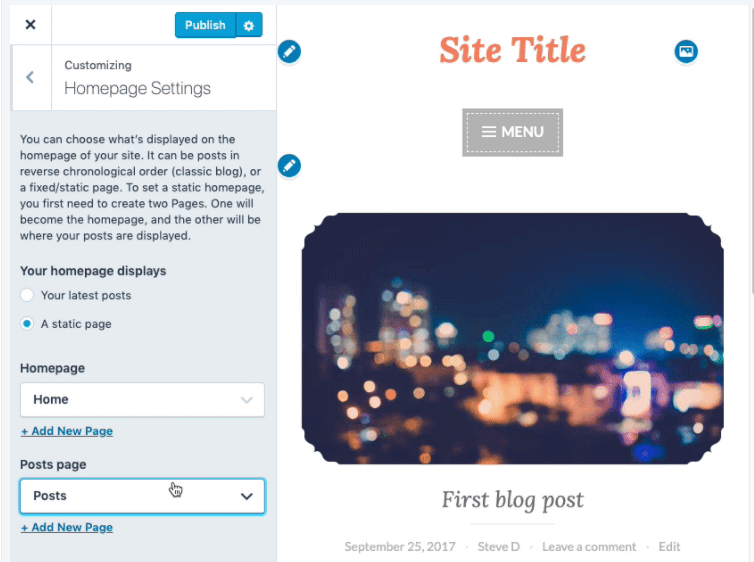
Image via WordPress
- Next, you need to add a menu so that visitors can navigate to the pages you just created. To do that, go to Menus > Primary > Add Item in the Customizer.


Image via WordPress
Type a name for your menu in the “Menu Name” field and search for the menu items you want to display. Click on “Add Items” to add menu items and click on the “Reorder” link to change the order of menu items.
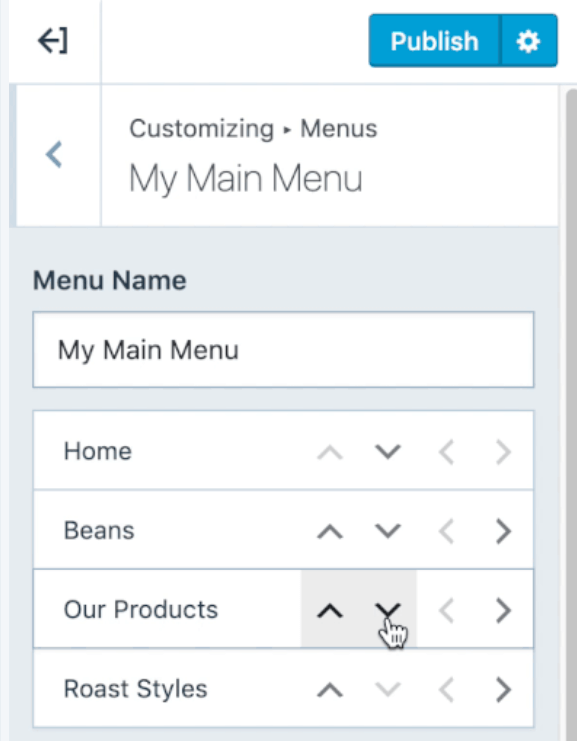
Image via WordPress
Click on the “Publish” button to save the changes.
6. Write and Schedule Your First Post
Now that you have learned how to start your own website with a great homepage and some content pages for your website, you should plan and write your first blog post. Writing blog posts can help you target important keywords and rank your website on the results pages of top search engines.
How to start your own website’s first blog post.
Select “Posts” > “Add a New Post” from the WordPress dashboard.
The post editor will open. Type your post title and set category, tags, featured image, etc.
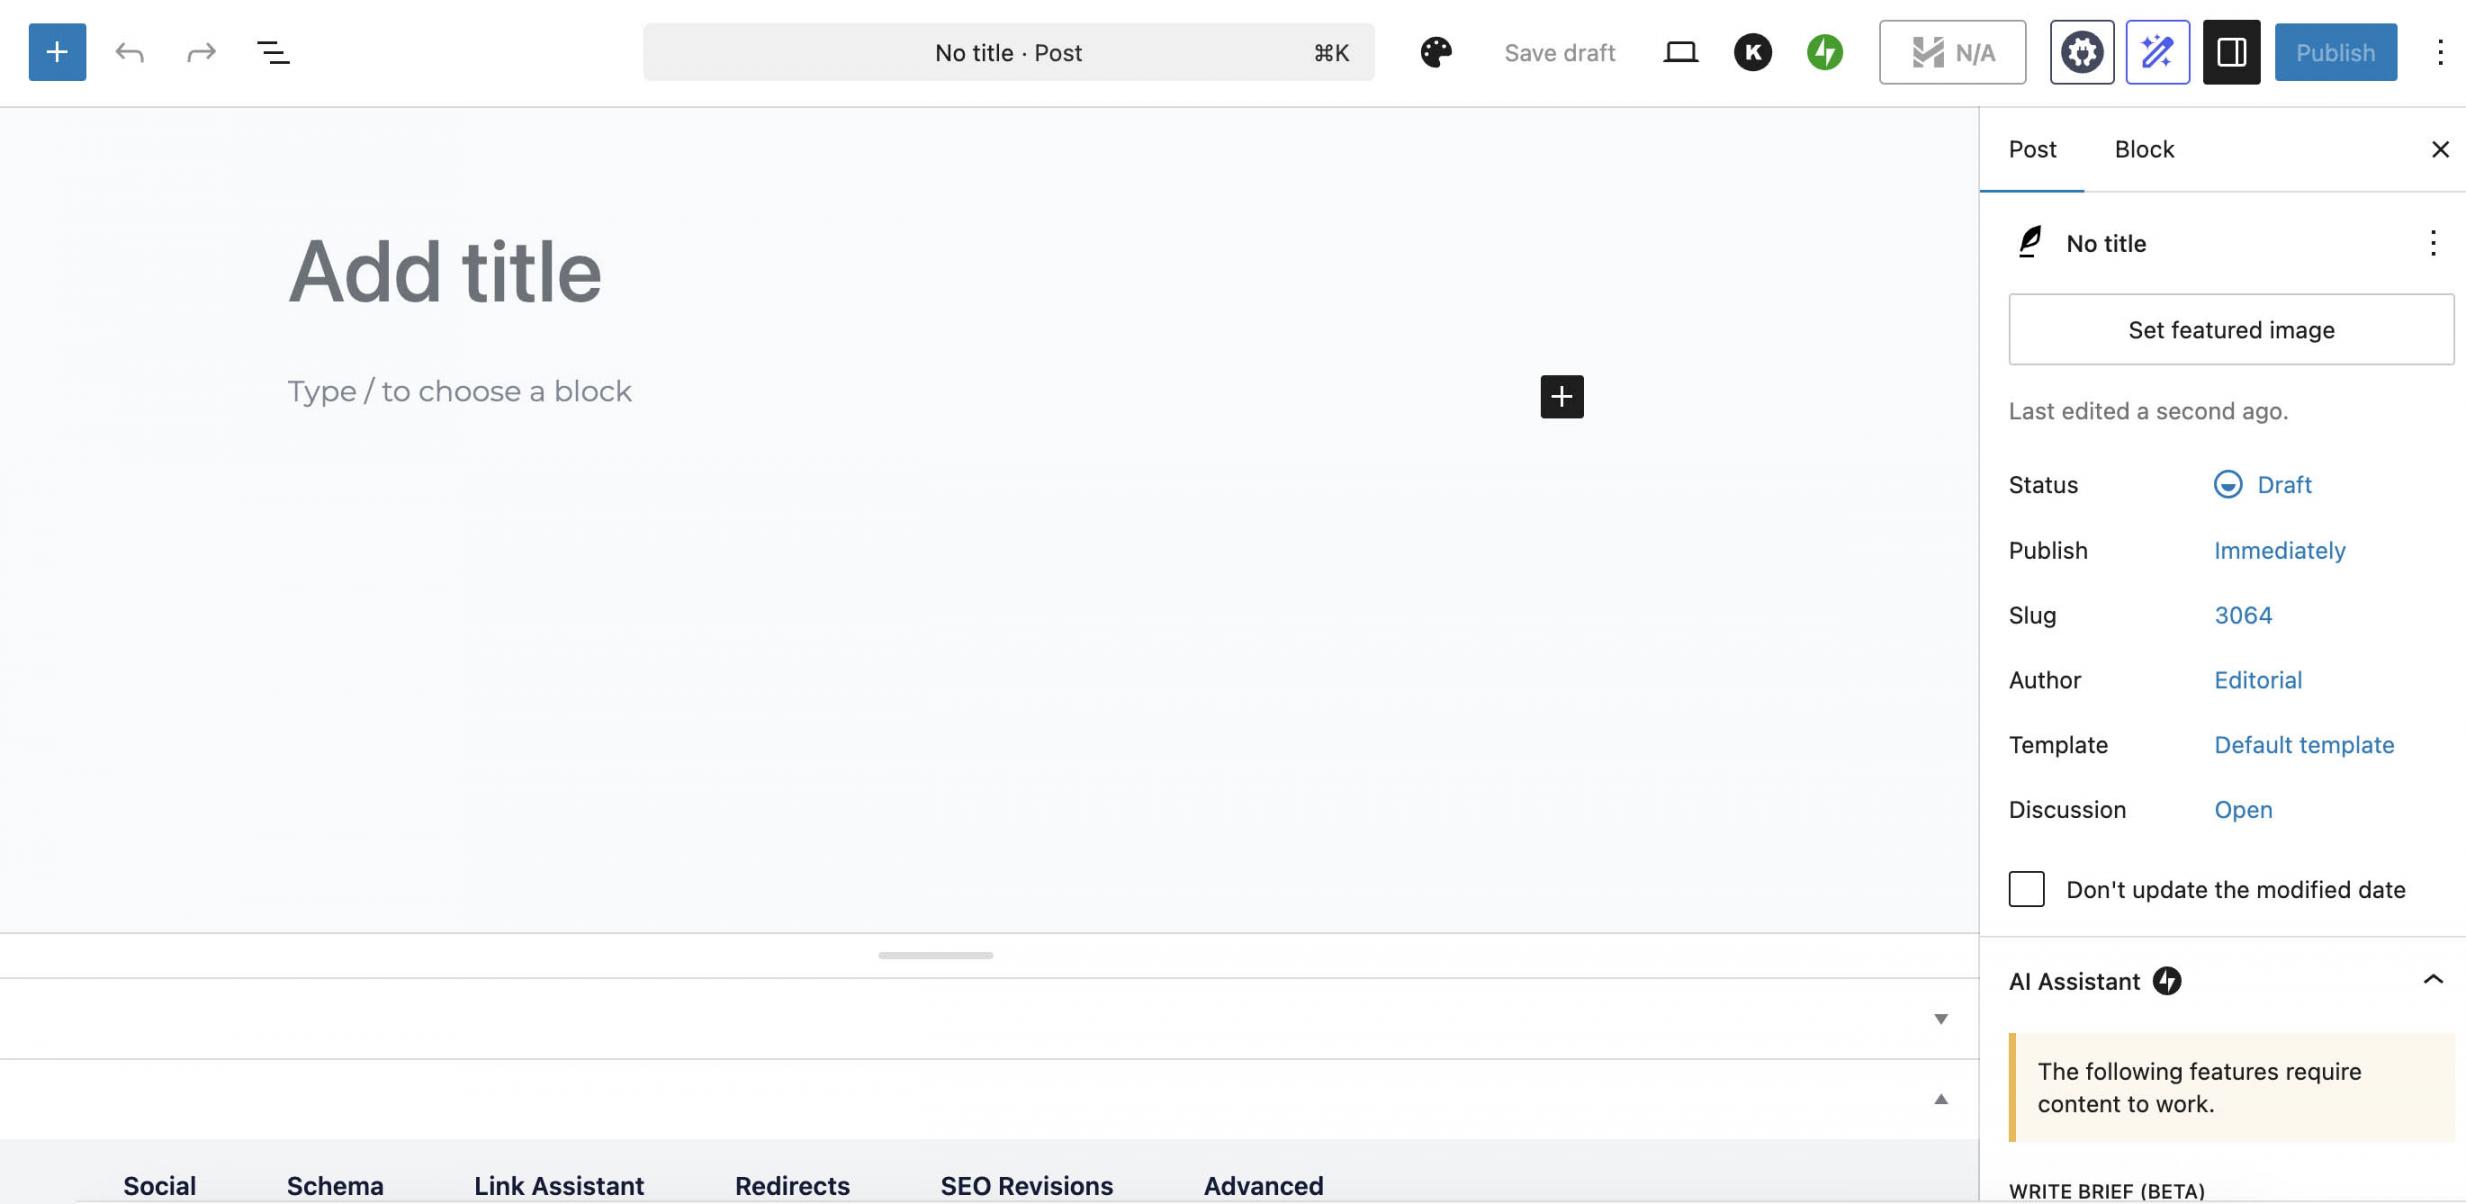
Image via WordPress
You can change the post visibility and add password protection to it (commonly used for publishing gated content).
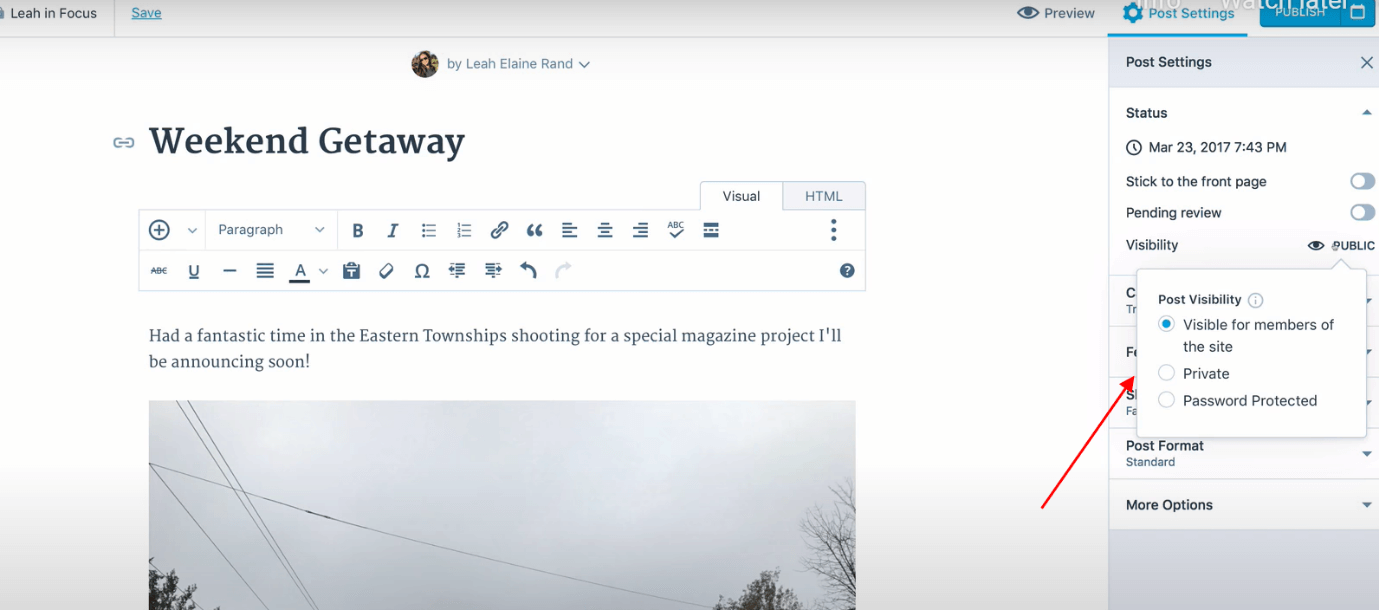
Image via WordPress
If you want to display social sharing buttons on your post, scroll down to the “Sharing” section of the Settings pane and select the desired buttons.
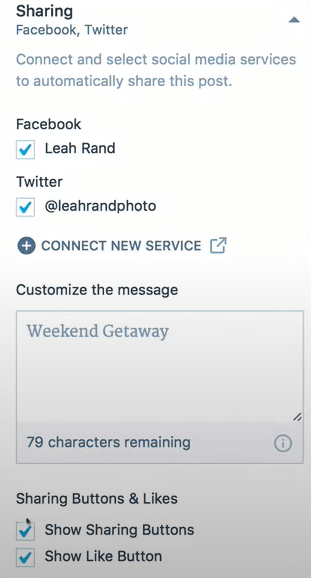
Image via WordPress
If you want to display an excerpt of the post on your social media pages or your website’s homepage, type it in the “Excerpt” field.
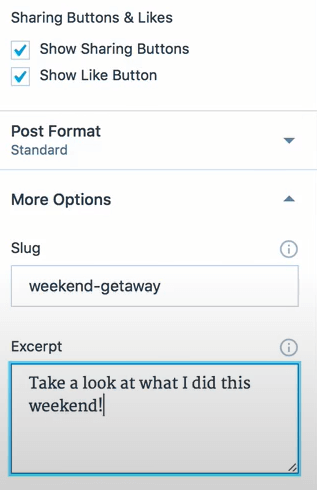
Image via WordPress
Last, you can control comments and pingbacks to your post by checking/unchecking those options.

Image via WordPress
Click on the “Preview” button when you’ve made all of the changes to your post.
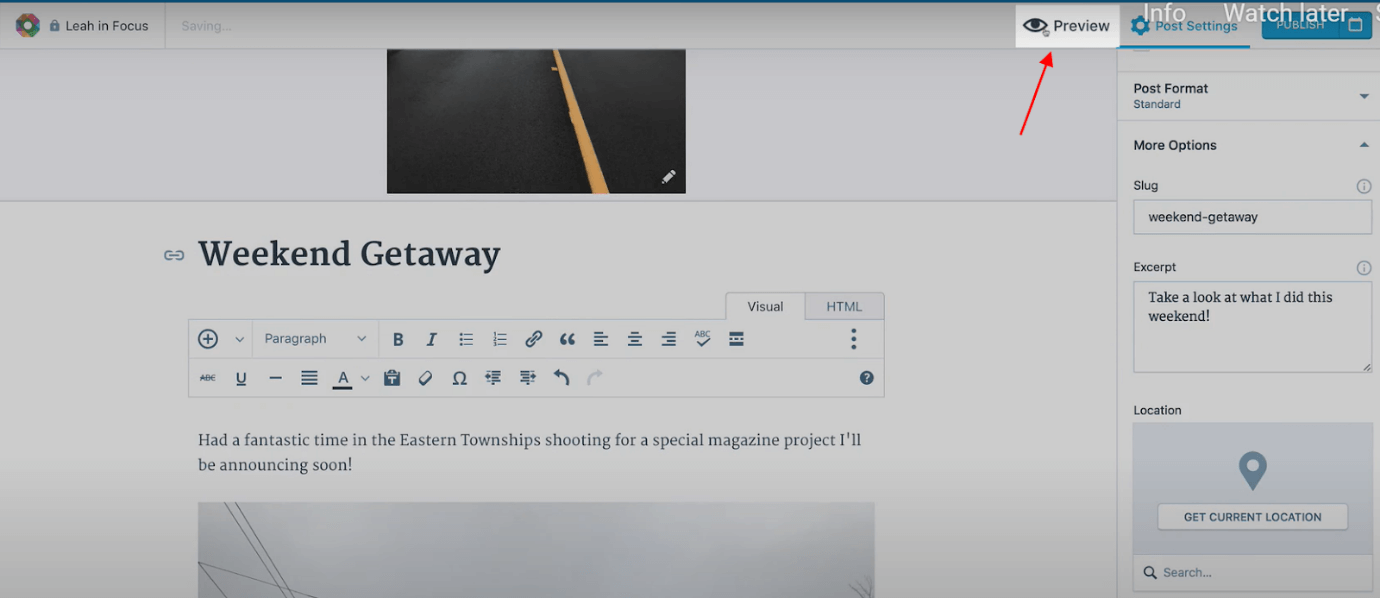
Image via WordPress
If the post is ready, click on “Publish.”
To schedule your post for publishing it later, click on the calendar icon next to the “Publish” button and select a publishing date and time.
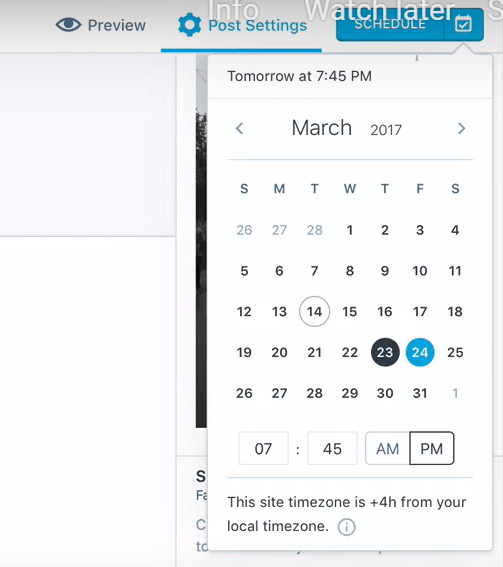
Image via WordPress
As you master how to start your own website, publishing content isn’t enough. You should run content audits from time to time to evaluate the performance of your blog posts and update underperforming content.
7. Add Social Sharing Buttons to Your Website
For omnichannel marketing, you need to drive traffic from your website to your social media pages and vice versa. Let’s learn how to add social sharing buttons to your new website.
- Go to “My Sites” on the Dashboard, and then, click on the “Sharing” menu.
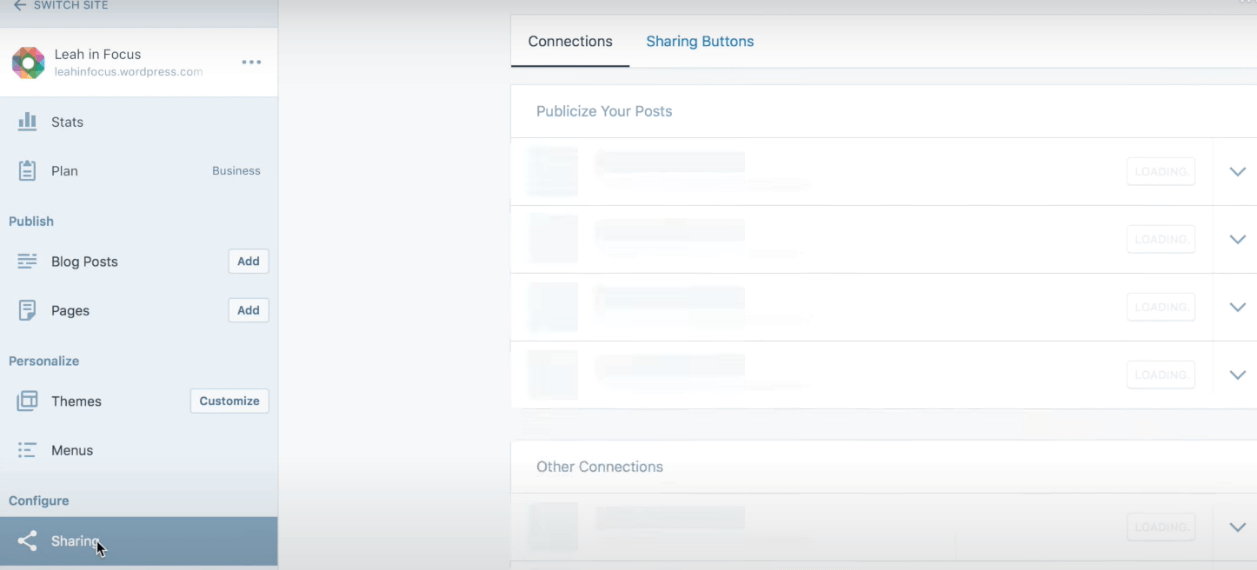

Image via WordPress
- On the right, click on the “Sharing Buttons” tab. You will see a list of social sharing buttons in the “Edit visible buttons” section below. Select the ones you want to embed on your website.
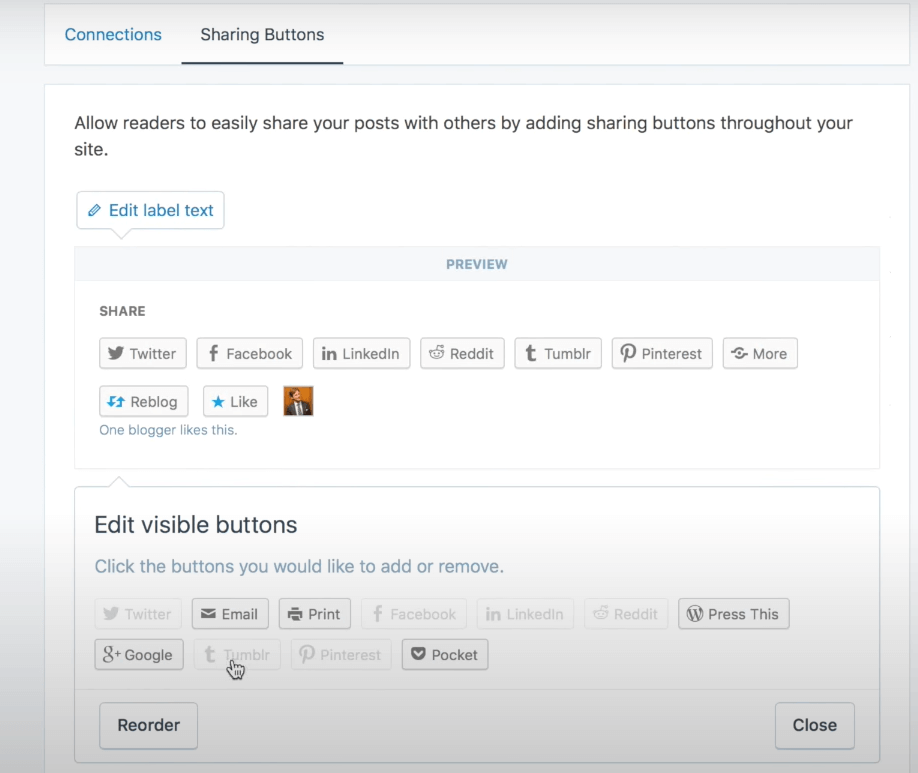

Image via WordPress
- You might not want to clutter your pages with too many sharing buttons. You can hide these buttons and make them visible only when people click the “More” button.
To do so, click on the “More” button.
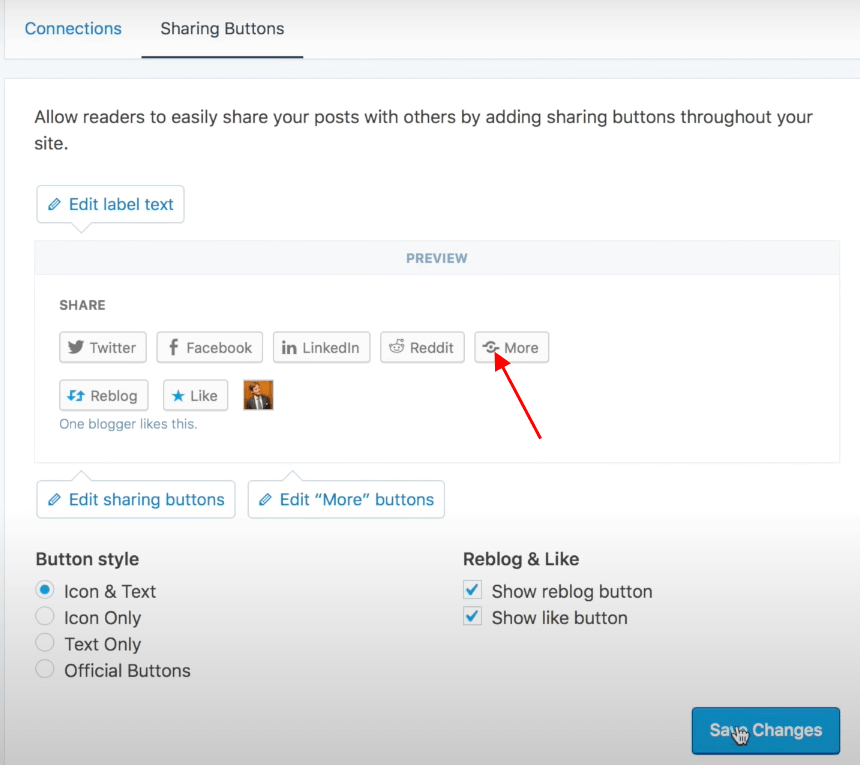
Image via WordPress
You can edit button labels and change how they appear (label only, label+icon, etc.).
Keep an eye on the “Preview” section that shows how your buttons will look in different button styles.
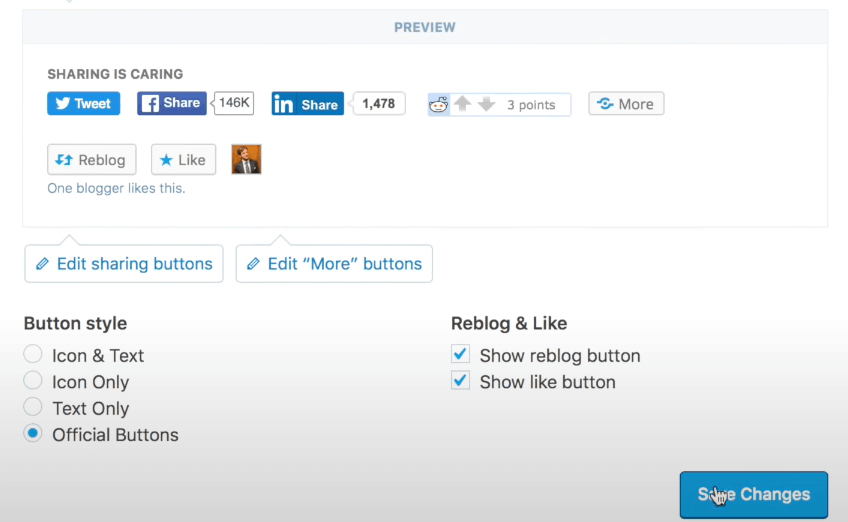
Image via WordPress
- You can also control where your social sharing buttons will appear (posts, pages, etc.) and whether or not comments/likes will be allowed. You can also specify an X handle that will be added automatically when people tweet your post content.
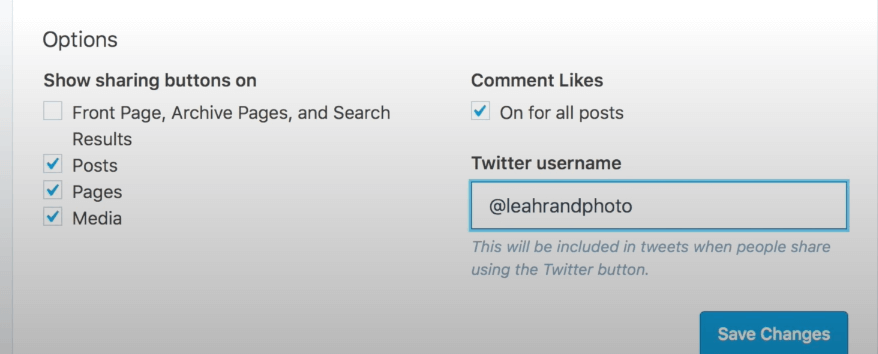
Image via WordPress
That’s how easy it is to make your website social media friendly.
As you learn how to start your own website, keep in mind that adding social sharing buttons will make it easier for visitors to share your articles within their social circles. This, in turn, will help you build brand awareness.
8. Add Forms to Your Website
Now, you’ve successfully learned how to start your own website, you need to add forms. They are a great way to collect information about your visitors and resolve their problems. Your potential clients can also use forms to connect with you and ask questions about your services and products, or request a quote.
In WordPress, adding forms is fairly straightforward.
As master how to start your own website, here are the steps you need to follow to add various types of forms:
Adding a “Contact Us” Form to Your Website
- Go to the page where you want to add the form.
- Go to the precise location where you want to embed a contact page form. Click on the “+” icon to insert a form block.
- Search for “form” by typing it in the “Search for a block” field.
- You will see a list of forms to choose from. Select “Contact Form” that contains fields like name, email address, and message.


Image via WordPress
- Insert it and edit the labels according to your requirements.
Adding a “Subscribe to My Mailing List” Form
If you want to send newsletters to your website visitors, you can add a subscription form block to your website. Visitors who fill out your subscription form will elect to receive daily/weekly newsletters from you.
Here’s how a subscription block looks like:

Image via WordPress
To add a subscription block, follow the steps below:
But before you do that, add mailing plugins like Mailchimp or MailerLite to your site. If you have WordPress Business plan or more advanced plans, you can choose from a greater number of mailing list plugins.
- Go to the page where you want to add the block and click on the “+” icon.
- Search for “subscription” in the “Search for a block” field.
- Select “Subscription Form” from the list of forms displayed there.
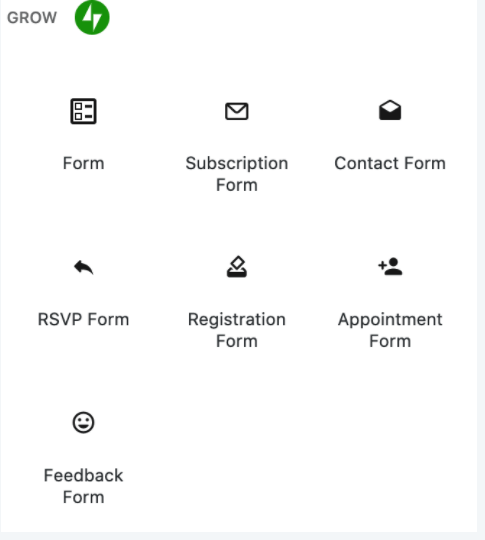
Image via WordPress
- To edit the button label, click on the button and type the new text you want to display on the button.
- You can also change the background color of the button, text color, and border color to make your button more prominent.
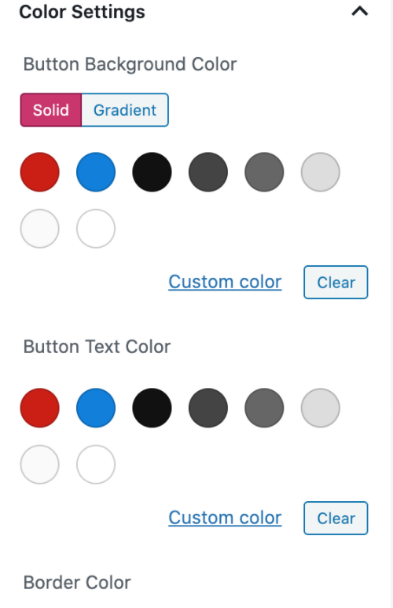

Image via WordPress
- If you want buttons with rounded edges, you can adjust the “Border Radius” under “Border Settings.”
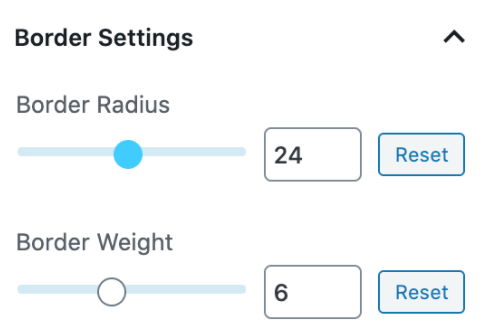

Image via WordPress
- You can increase/decrease the padding between text and border by adjusting the “Spacing Settings.”
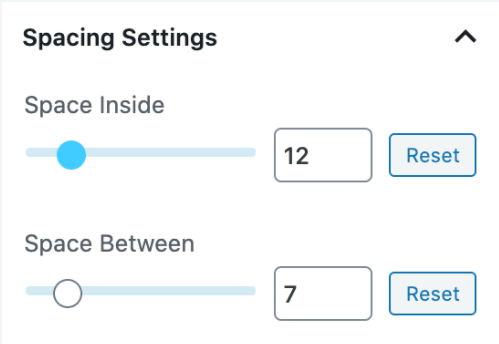

Image via WordPress
- To display the number of subscribers, toggle on “Show subscriber count.”
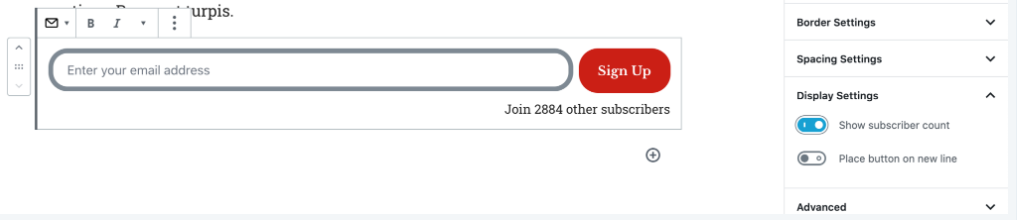

Image via WordPress
Toggle on “Place button on new line” if you want the subscriber count to show below the “Subscribe” button.
9. Add Ecommerce Functionality to Your Website (Optional)
When navigating how to start your own website that sells products/services, the first thing you need to do is to install the WooCommerce plugin on your WordPress website. The plugin will enable standard ecommerce features like cart and checkout. It comes with versatile pricing plans and robust customer support.
A wizard will walk you through the WooCommerce plugin installation. However, here are the steps you will have to follow:
- Go to your admin dashboard on WordPress and click on “Plugins” in the navigation pane.
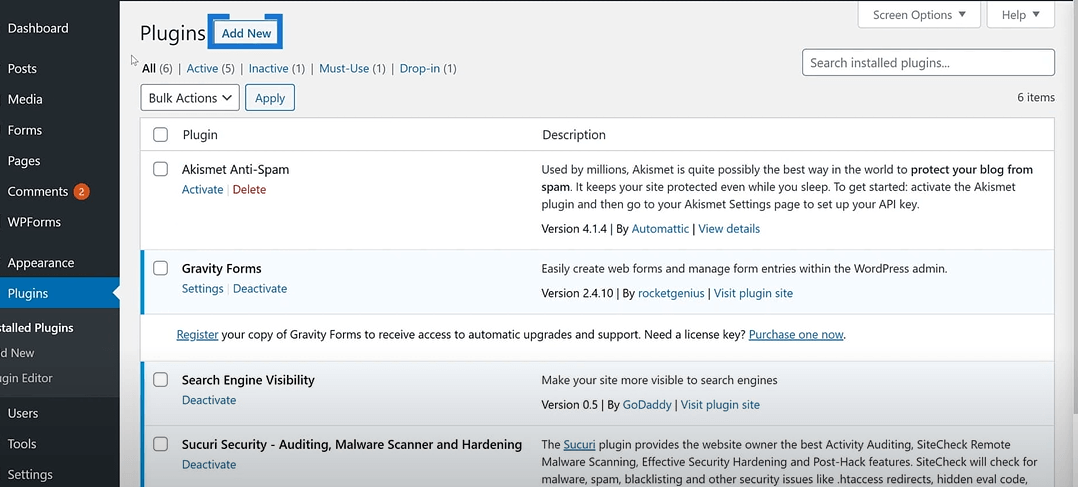

Image via WordPress
- Click on “Add New” in the right pane. You will see a list of popular plugins, which are likely to include WooCommerce. If you don’t find it in the displayed options, search for “WooCommerce” using the search field above.
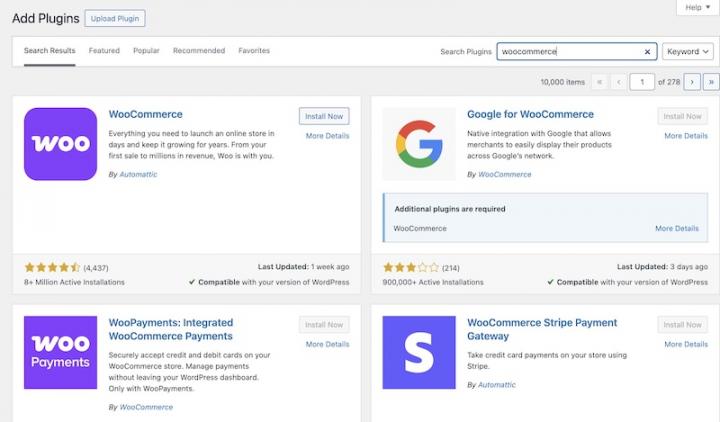

Image via WordPress
- Click the “Install Now” button near the WooCommerce plugin. Once the plugin installs, the button label will change to “Activate.” Click the button.

Image via WordPress
- Customize the settings of the WooCommerce plugin fields.
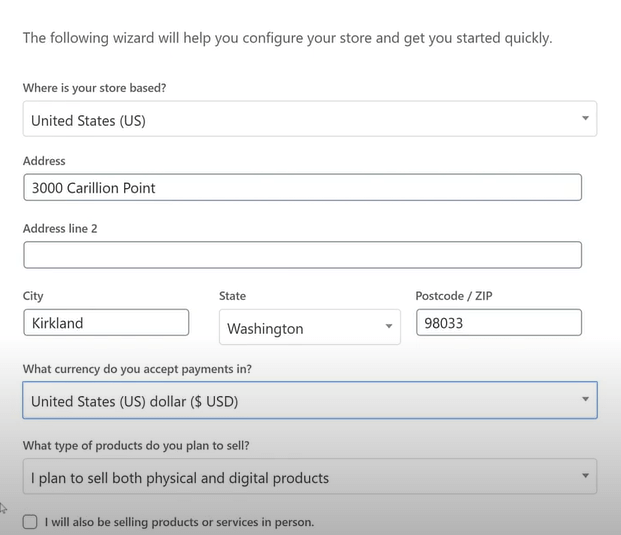

Image via WordPress
- Click the checkbox that displays next and then click on “Continue.”
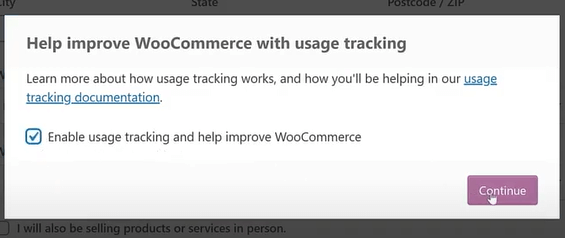

Image via WordPress
- Select the payment options you want to allow users in your store to choose. You can add more payment methods later. If you don’t have PayPal and/or Stripe accounts, type the email address with which you want to register on these platforms.
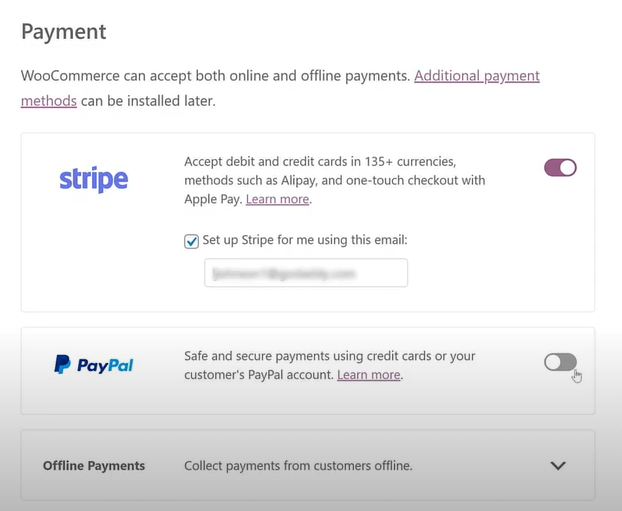

Image via WordPress
If you plan to accept offline payments as well, click on the “Offline Payments” checkbox at the bottom. Then, click on the “Continue” button.
- Next, you need to specify shipping options. You can choose “Free Shipping” or “Flat Rate Shipping” for customers in the United States. If you don’t want to ship to customers outside the U.S., toggle off “Locations not covered by your other zones.”
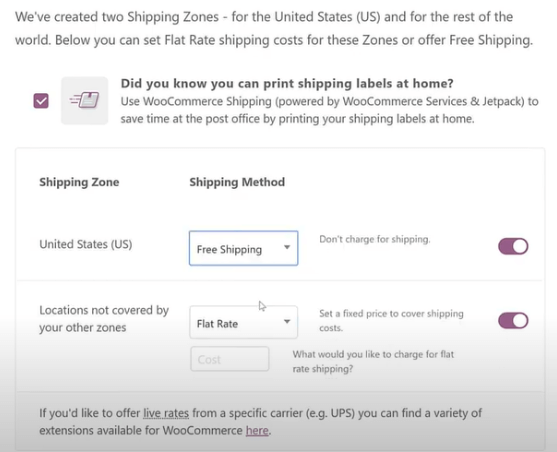

Image via WordPress
- Enable all of the features in the “Recommended for All WooCommerce Stores” page that will appear next.
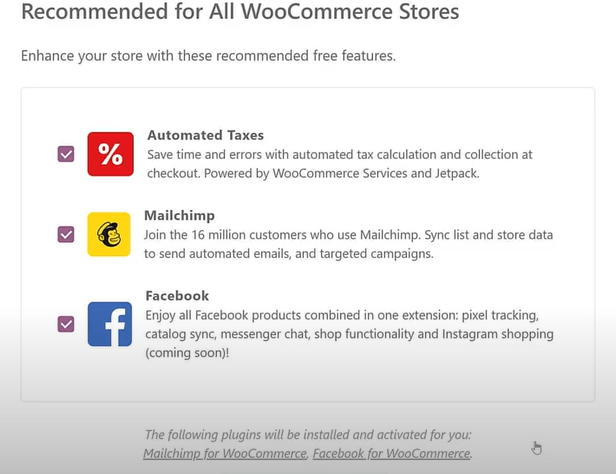

Image via WordPress
That’s it! You’ve successfully learned how to start your own website. Now, you can import products through your admin dashboard.
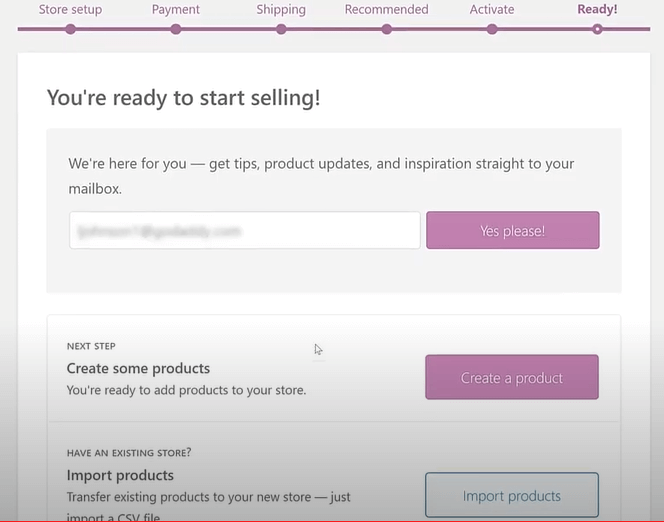
Image via WordPress
To review and update your store information, head over to the Settings tab.
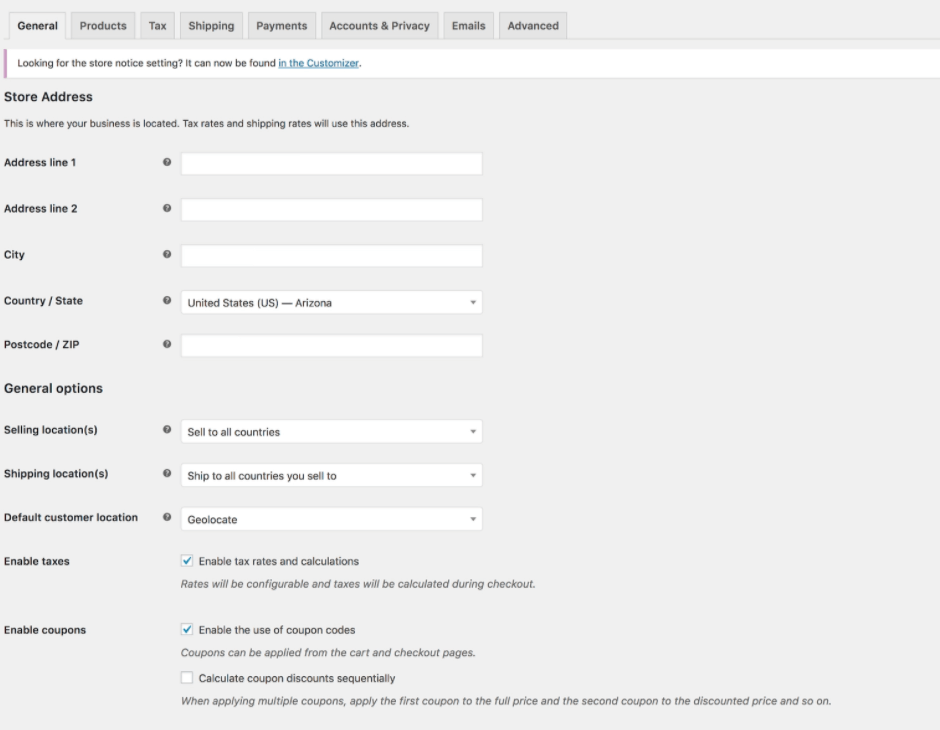
Image via WordPress
Ensure that you create an SKU (stock-keeping unit) or barcode for each of your products. This is essential for inventory management.
How to Start Your Own Website Using Wix (Website Building Tool)
Along with WordPress, there are many website builders that you can use to start your own website for business.
If ease of use and affordability are your prime concerns while working with tools, Wix might be a great choice for you. The intuitive website-building tool lets you build unlimited free sites using their powerful website editor.
You don’t need to provide payment details when signing up. All you need when figuring out how to start your own website using Wix is a valid email address and a password. Simply enter those details, and you'll be on your way to building a stunning website within minutes.
Wix also has an AI-powered designer, Wix ADI, which automatically puts together your website after asking you a couple of questions about your niche and web design preferences. You can get your site running in a few minutes by adding your custom content and media as you navigate how to start your own website.
Sounds good, right?
Exactly.
But that’s not all. Wix has something for everyone. From online stores to creative agencies, Wix has abundant templates and features for all sorts of clients.
They have professional-looking website templates built by qualified designers that you can easily use when navigating how to start your own website without external help.
On top of that, you can buy 250+ business solutions from the Wix App Market to add more customizations and functionalities to your website.
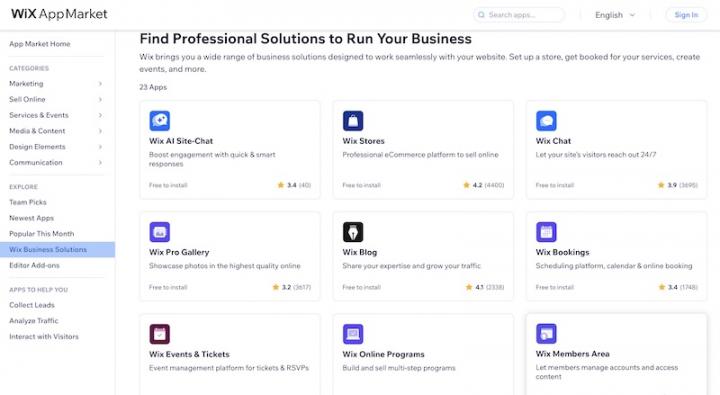
Image via Wix
These are just some of the reasons why we decided to add a section on how to start your own website using Wix in this post.
Most website builders work in more or less the same fashion.
So, let’s dive right into how to start your own website using Wix. There are two main methods for building a website with Wix:
1. Using the Wix Editor
The drag-and-drop Wix Editor allows you to start your own website from scratch using templates, blank canvas, and Velo (a coding platform to add customizations).
Build Your Website Using Templates
Best for: People with limited design experience
The website buiding process starts with deciding the blog type you want to make. When figuring out how to start your own website, you have to choose if you want an ecommerce website, a blog, an entertainment site, among others.
As you navigate how to start your own website using Wix, you also have to decide on a website name.
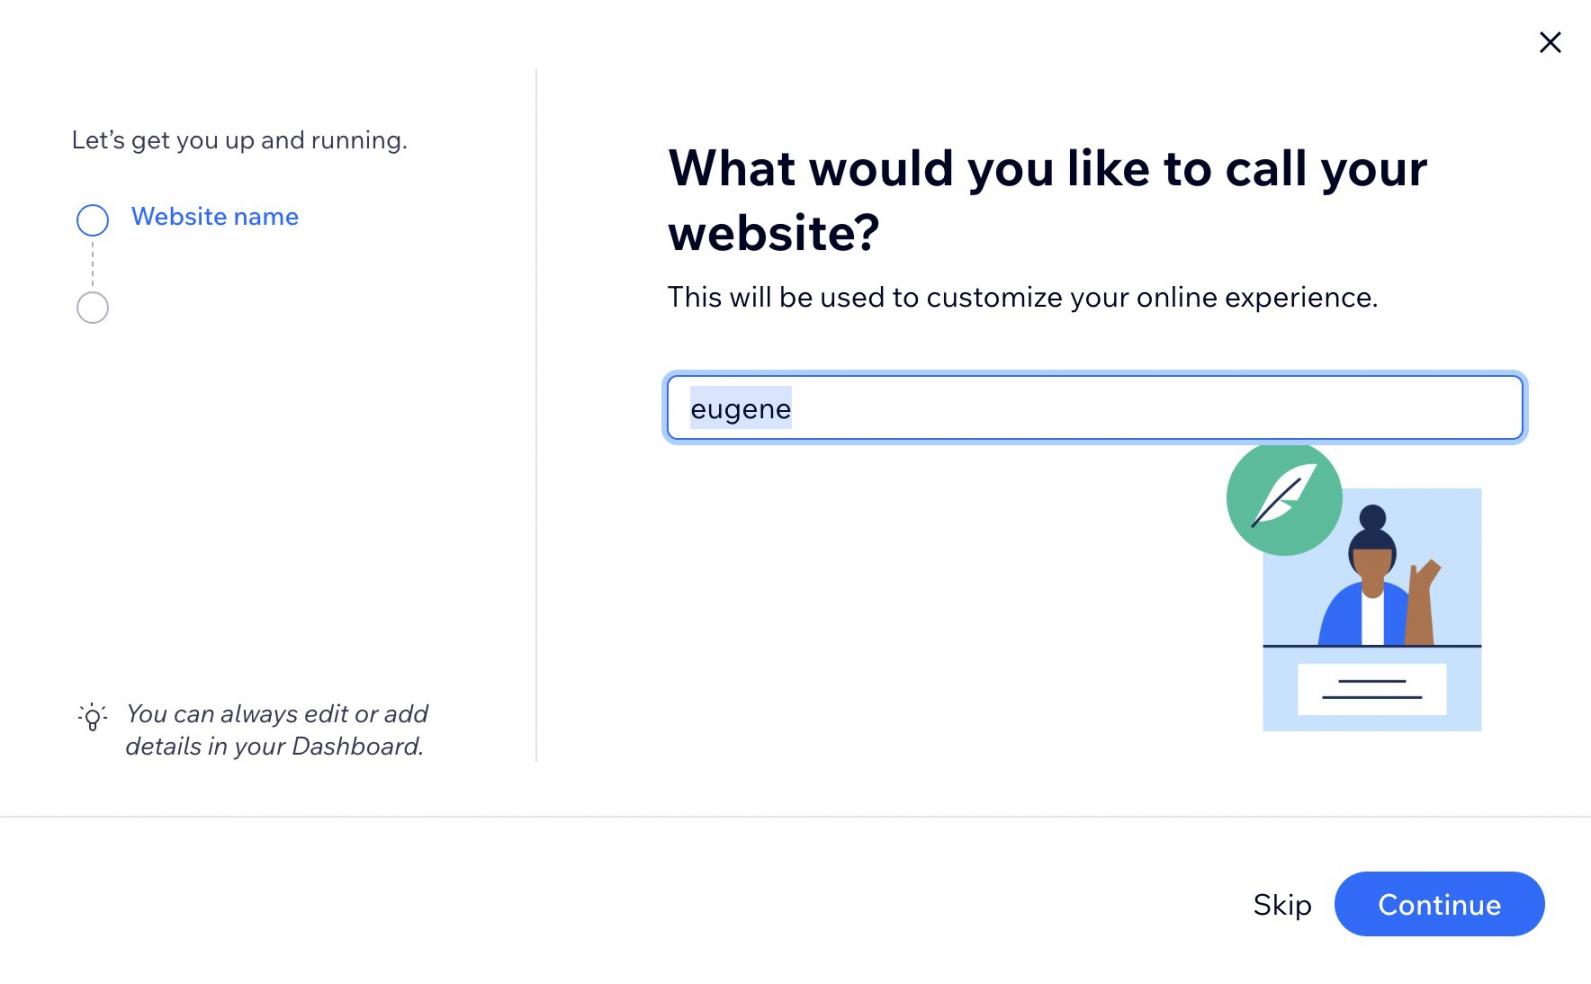
Image via Wix
Another crucial step when learning to start a website using Wix is incorporating the platform's apps, like Instagram Feed. You also need to come up with a domain name. However, Wix does the job of checking online to see if your chosen domain name is available.
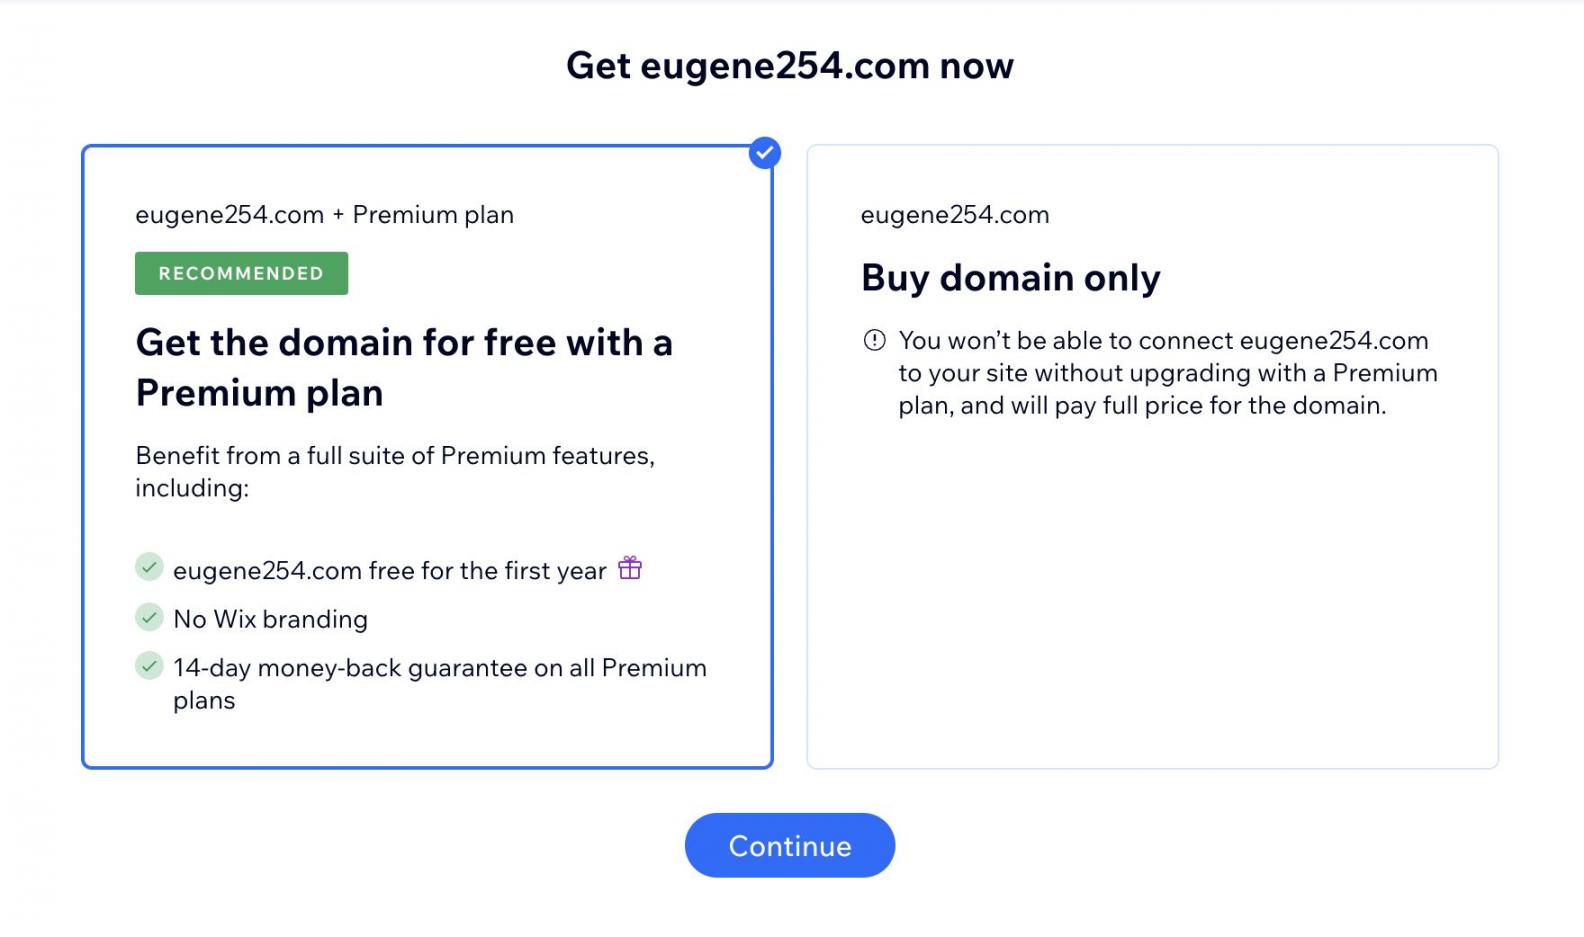
Image via Wix
Designing Your Wix Website
After you’ve sorted out your domain name, the next thing you need to do is design your website. The Wix Editor provides you with two options. You can either pick a template, customize it, or use AI.
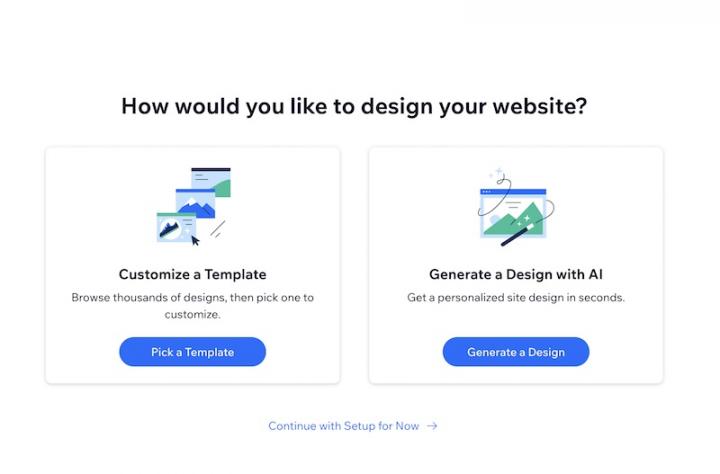
Image via Wix
Wix offers a plethora of templates (900, to be precise) you can use to start your own website on a tight budget. The best part is that most of these design templates are included in your free Wix subscription.
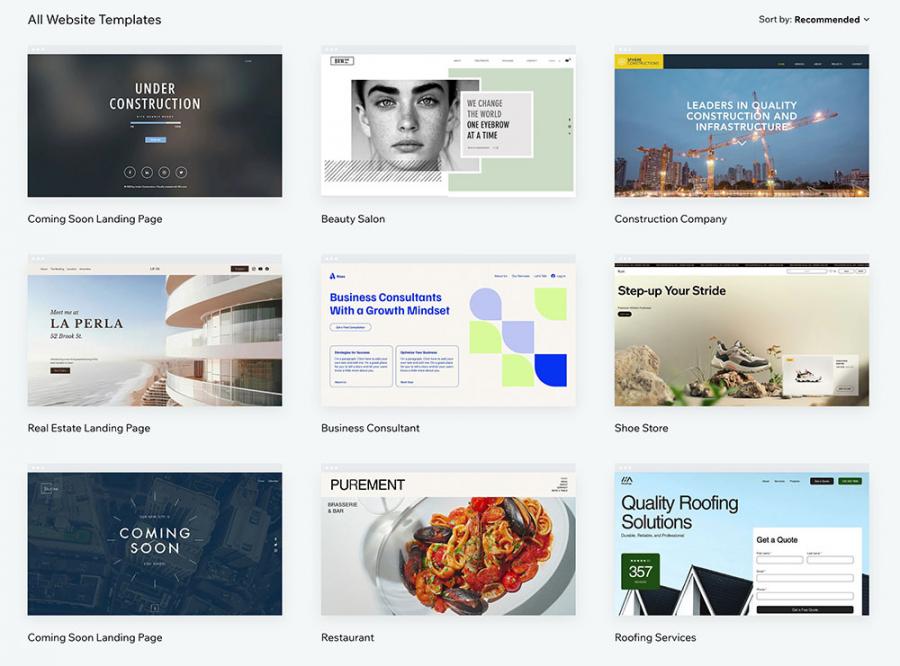
Image via Wix
We recommend that you explore the different template options Wix offers for your niche. As you navigate how to start your own website using Wix, go through Wix’s design portfolio to see templates in action.
Wix templates are mobile-friendly, so your site looks good on phones and tablets. That’s important if you want more people to visit your site.
The platform also has built-in tools to help with search engine optimization (SEO) so you can rank better on search engines. If you're figuring out how to start your own website, this makes it easier to get noticed.
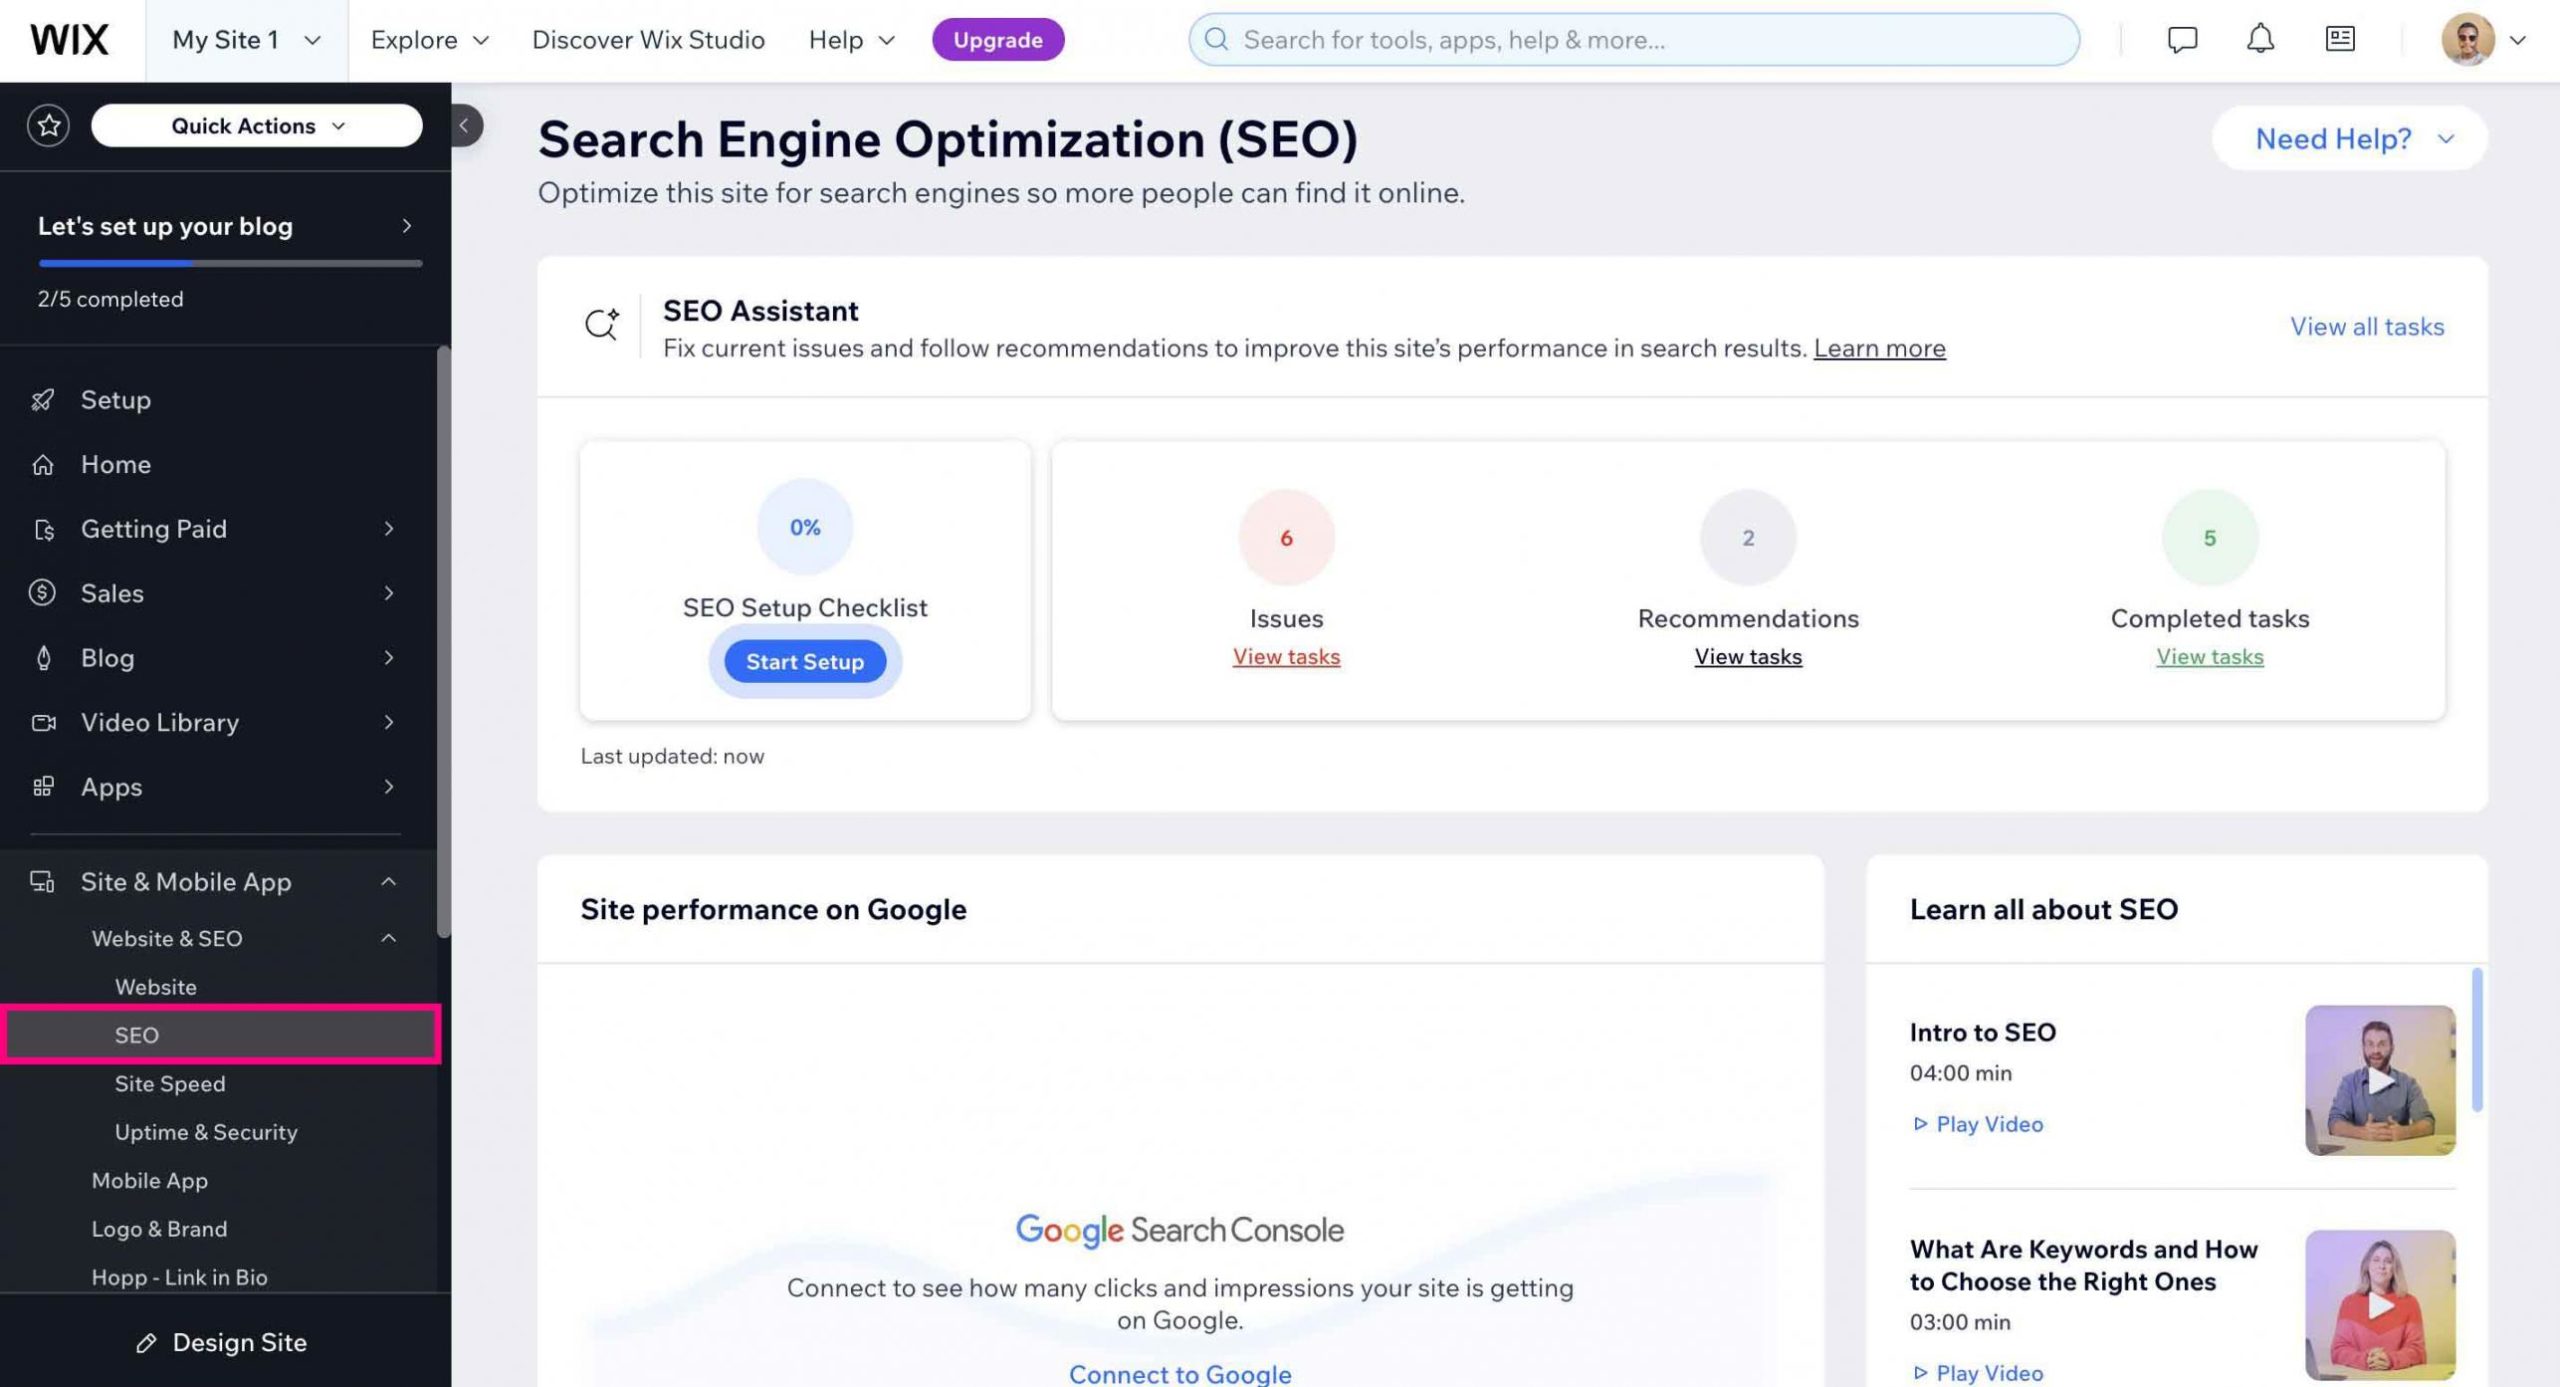
Image via Wix
When you find a template that you like, you can preview it by hovering over it and clicking on the “View” button. If you don’t like what you see, close the template and keep reviewing other templates.
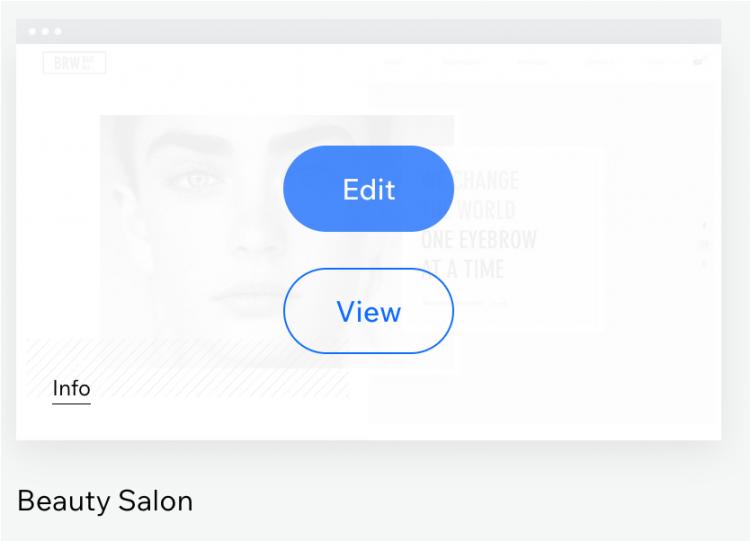
Image via Wix
Customization is also simple with Wix templates. Simply drag and drop different elements, pick new fonts, and change colors to match your style. If you ever want to switch things up, Wix lets you edit anytime.
As you figure out how to start your own webiter with Wix, it’s important to know that you’re not stuck with the first design you pick.
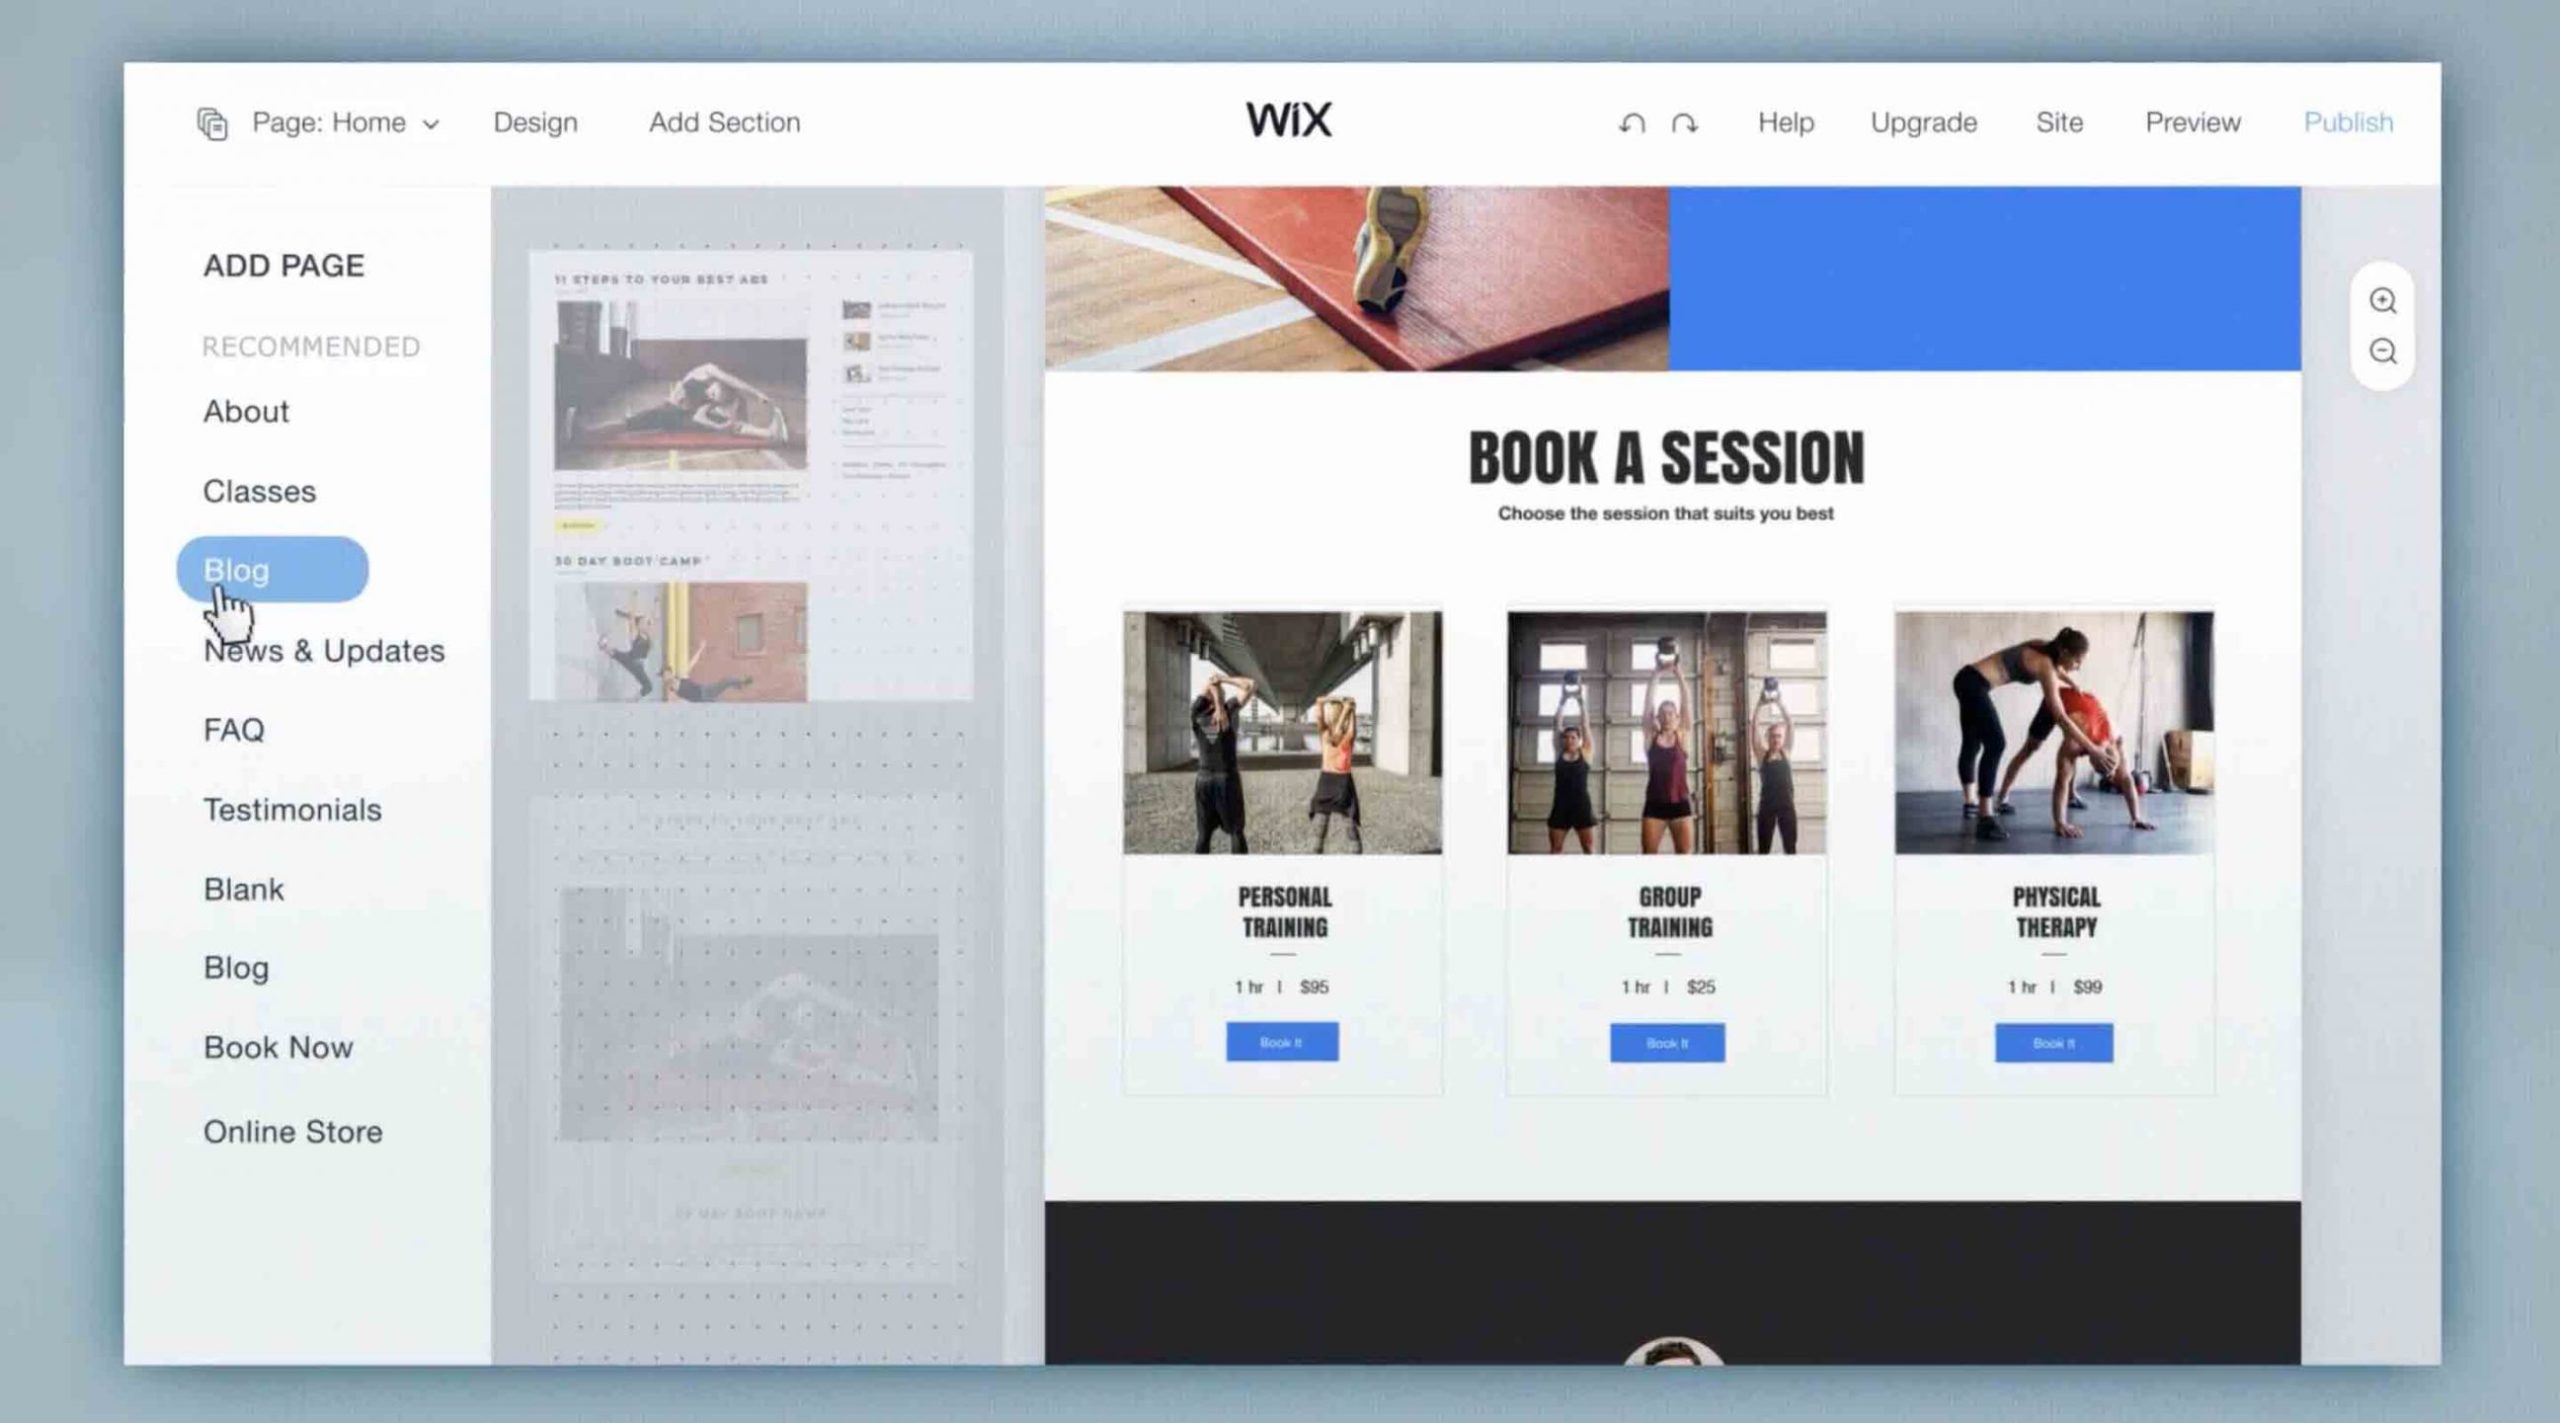
This is what the Wix template editor looks like. Once everything is ready, simply publish your site.
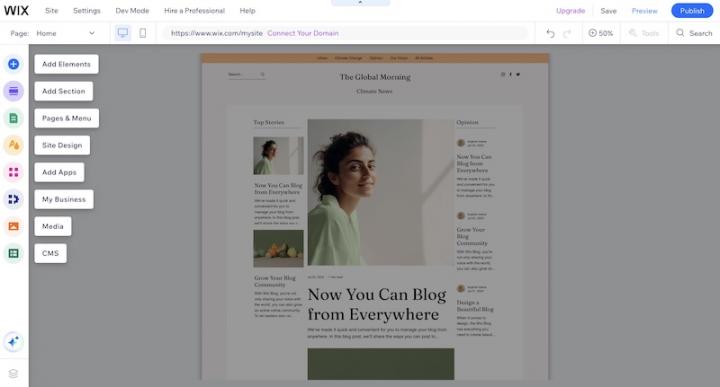
Image via Wix
If you're selling something, Wix already has ecommerce templates with payment options. You just add your products and set prices, and your store is ready. Learning how to start your own website for online sales has never been easier.
Wix also offers extra features like booking systems, contact forms, and social media integrations. Whether you're a small business owner or just starting a blog, these tools help make your site more functional.
In short, Wix provides you with fully loaded templates you can use to start your own website quickly.
Build Your Website From Scratch
Best for: People with designing skills
If you don’t fear blank canvases, you can start your own website from scratch using a blank or any minimalistic template. You can create a unique personality for your business website and make it stand out from that of your competitors.
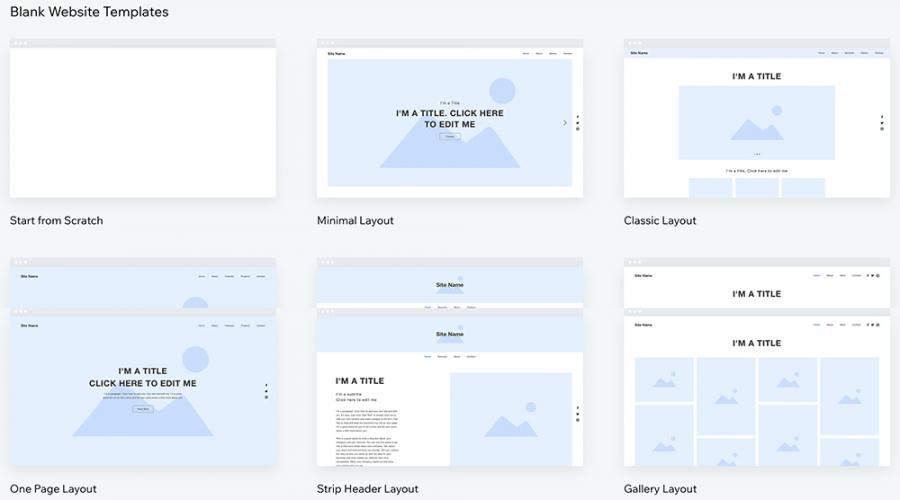
Image via Wix
You will get complete freedom to design your website the way you visualize it.
Once you select a template, you will be redirected to the Wix Editor where you can drag and drop buttons, grids, blocks, etc. and can play around with layouts and colors to get the desired look and feel.
Build Your Website with Velo by Wix
Best for: People who desire advanced customizations and possess coding skills
Velo by Wix is a powerful tool that helps you build custom websites with advanced features. If you’ve been looking for ways to learn how to start your own website, this platform gives you more control over design and functionality.
It’s perfect for anyone who wants to go beyond basic templates and create something unique.
What else?
Velo also lets you set up databases to store and manage content. Instead of adding each item manually, you can connect pages to a database and pull in dynamic content.
This is useful when learning how to start your own website,blog, product catalog, or any site with a lot of information.
You can also create web applications that complement your website. Using Velo APIs, you can design your app’s structure and features. In Velo, if you turn on the “Dev” mode, you can get inside your app’s code and modify it as you want.
Another great feature you can use when navigating how to start your own website is backend coding. With Velo, you can create custom functions that run behind the scenes. This is useful for things like automated emails, payment processing, and advanced user interactions.
To summarize, Wix makes website design simple, but Velo takes it up a notch. If you’ve been searching for how to start your own website with more control, this is a great option. Read this breakdown of the top Wix alternatives you can use.
2. Using the Wix ADI
Best for: Beginners
For people not very conversant with building websites, Wix offers a disruptive new technology, the Wix ADI (Artificial Design Intelligence). It creates a site based on your needs. You don’t have to mess with layouts, colors, or fonts. Just answer a few questions, and your site will be ready in minutes.
The AI-backed engine asks users a few questions about what they expect from their website. After analyzing their answers, the Wix ADI puts together a website that is tailored to meet your specific needs.
You can easily start your own website – connected domain, web hosting, social media integration, and ecommerce functionality.
Not convinced?
Then, watch the Wix ADI in action in this demo video:
Video via YouTube
That’s cutting-edge technology!
And, that’s not even the best part about using Wix to start your own website.
What’s the best part then?
It’s their pocket-friendly pricing plan. Wix allows you to start your own website for free. You can get access to their slick templates, point-and-click editor, and SSL certificates without spending a penny.
However, if you need a connected domain, online payment integration, and ad-free websites, it’s best to opt for Wix’s paid plans. With prices as low as $17 per month, you can build secure websites and take advantage of their 24×7 customer support services and visitor analytics.
FAQ
Q1. How can I start a website for free?
A. You can start your own website for free using website builders like Wix and WordPress that allow you to create your own website for free. Wix offers 500+ customizable templates, robust web hosting services, SEO tools, and proactive customer support.
Though Wix lets you build websites for free, such websites have a downside, which you may discover too late. Free websites will show ads that you had never signed up for and they won’t allow you to accept online payments. This can turn off your visitors.
If you want to build an ad-free website, you will have to sign up for one of Wix’ paid plans that start from $15 per month.
Q2. How much does it cost to start a website?
A. You can learn how to start your own website for free using website builders like Wix and WordPress. They don’t charge you for storage space or free templates and plugins. However, there will be limitations on bandwidth, functionalities, and support in their free plans.
Q3. Is it free to start a website?
A. There are tools like Wix that allow you to start your own website for free. WordPress also lets you build a free website on their platform. However, you’ll have to pay to purchase a domain name.
Wix offers a few domain names for free for a year. It also offers free web hosting, templates, and 24×7 customer support but with access to limited features only.
Q4. What is the cheapest way to start your own website?
A. The most cost-effective way on how to start your own website is to use website builders like Wix and WordPress. They offer easy-to-use website editors, professional-looking templates, useful learning resources, and great customer service to help beginners.
While Wix offers free a domain name for a year, plus web hosting and templates, WordPress charges you for registering a domain name.
Q5. Is Wix really free?
A. Yes, Wix lets you build basic websites for free. But these websites run ads and have limited bandwidth and storage options.
If you want more storage and bandwidth, you can opt for their paid plans. Their lowest-priced plan (Combo) is worth $15 per month. At this price, you can get a free custom domain for one year, free SSL certificate, 3GB storage, and 30 minutes of video hours.
Q6. Do you get paid for having a website?
A. No, you don’t get paid for having a website, but you can monetize your website in many ways, including:
- Leveraging affiliate marketing
- Running ads
- Selling products and services
- Creating paid membership plans
- Publishing sponsored posts
- Gating premium content
- Accepting donations
Q7. Which type of website is best for earning money?
A. Various types of websites have a great monetization potential, including:
- Ecommerce websites
- Job boards
- Portfolio websites
- Niche affiliate websites
- Podcasting websites
- Online learning courses sites
Q8. How much does Wix charge to create a website?
A. Wix lets you build basic websites for free. But these websites run ads and offer limited bandwidth and storage space.
To get access to advanced features, you can opt for their paid plans, which start from $17 per month.
Ready to Start Your Own Business Website?
Starting a WordPress website is not that difficult. If ever you get stuck at any point, head over to the WordPress Support Center which offers insightful articles, video tutorials, and an active user community.
In this post, we’ve covered all of the information on how to start your own website. If you need to set up a special type of website, like an online course site or a live-streaming platform, you can use website builders meant for that purpose.
Want to build a high-converting website or optimize your landing pages for better performance? Leverage Attrock’s expert services to turn your vision into a results-driven digital experience.
Disclaimer: This content contains some affiliate links for which we will earn a commission (at no additional cost to you). This is to ensure that we can keep creating free content for you.